Windows has different ways to turn off the system that save us time and facilitate our user experience. We have already seen some of them , such as creating a button to disconnect the PC or do it from the CMD . The truth is that there are many different ways to achieve it, however there are situations in which we spend some time in front of the PC without doing anything. Those are the times when automatically shutting down Windows 11 if not in use would help a lot. And that is precisely what today’s tutorial is about, would you like to know how it is done? Well, I advise you to continue reading.
Is It Possible To Automatically Shut Down My Windows 11 PC If It Is Idle?
Yes, we will only have to create a new task that is in charge of this, so we will only have to follow the steps that we indicate below.
How to Shut Down Windows 11 Automatically If I Don’t Use It Step by Step 2022
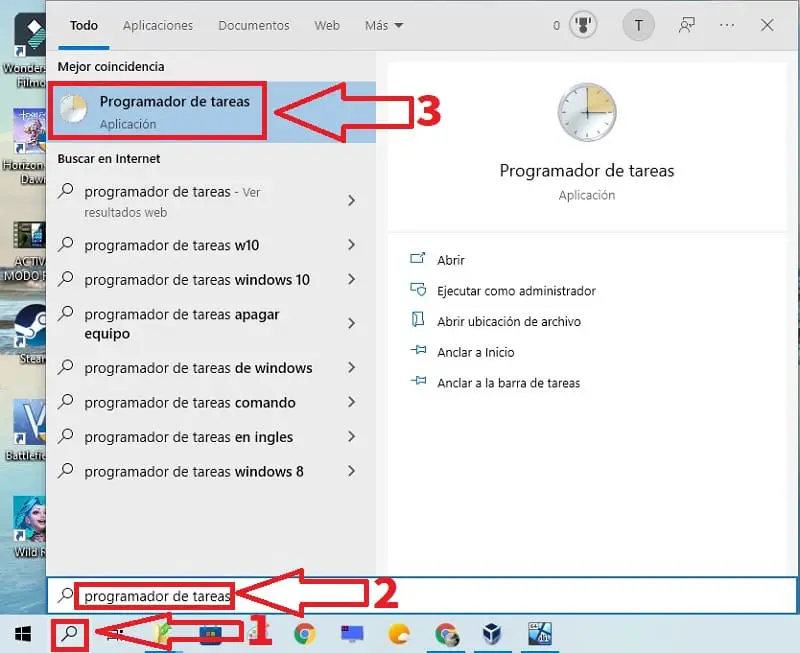
The first step will be to open the task scheduler so we will only have to do the following:
- We click on the search icon on the taskbar.
- We type «Task Scheduler» .
- We entered the best match.
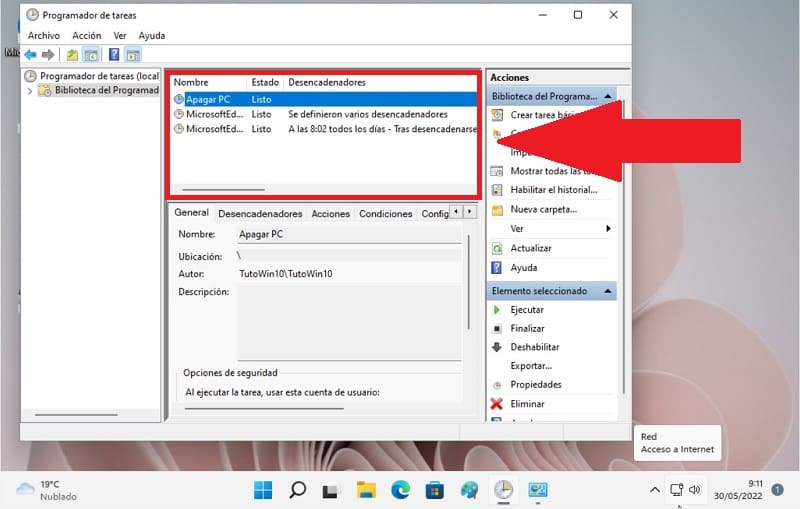
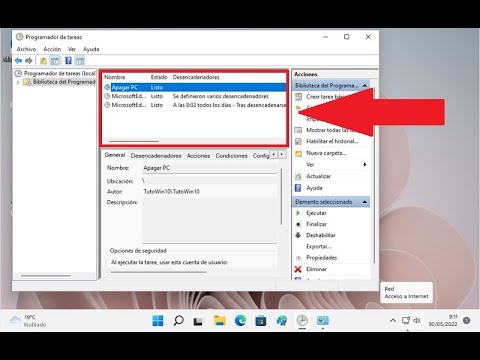
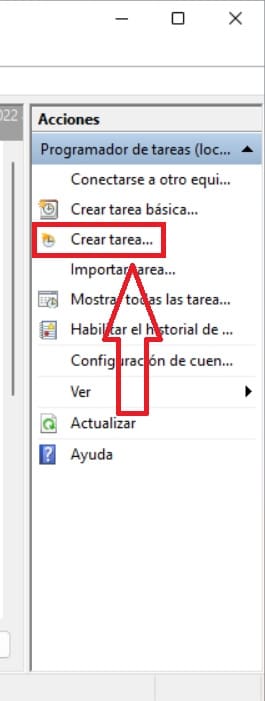
Once inside we must look at the section on the right and we will have to create a new task , as indicated in the image below.
Shutdown Windows 11 Without Programs 2022
It is here where we will have to create a new task that is in charge of programming an automatic shutdown in Windows and for this we will have to fill in the following parameters.
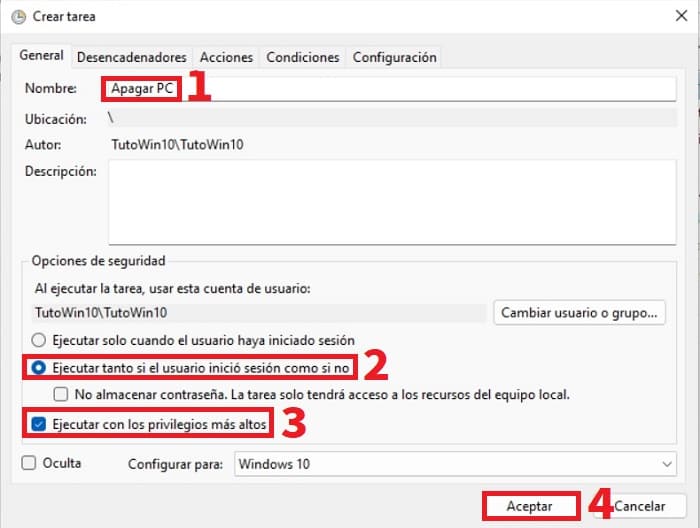
- We write the name of the task, for example: «Shutdown PC» .
- Then we select “Run Whether User Is Logged In or Not” .
- Select “Run with Highest Privileges” (Optional).
- Before clicking on “Accept” we will have to configure the parameters that I indicate below.
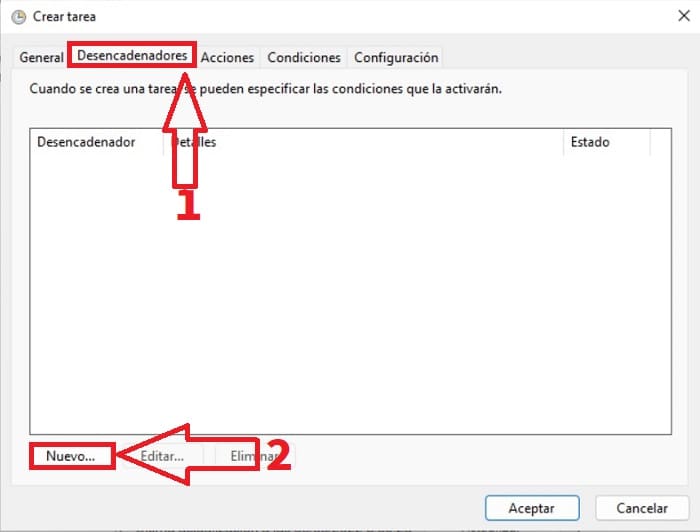
Let’s go to the next step:
- We enter the “Triggers” tab .
- We give «New» .
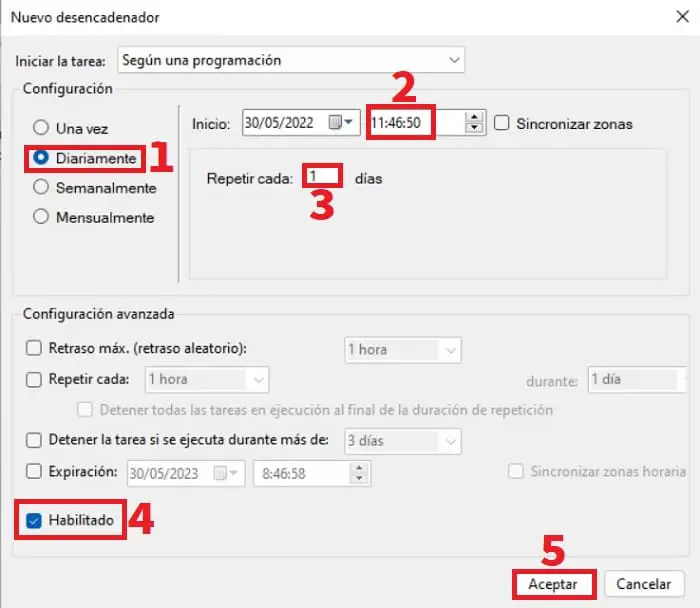
In “New Trigger” we will have to select the following:
- We select “Daily” .
- We set a start time .
- Let it be repeated every day.
- We activate the “Enabled” box .
- Remember that we still cannot click “Accept” because we have to configure more parameters.
Let’s go to the next step:
- We enter the “Actions” tab .
- We give «New» .
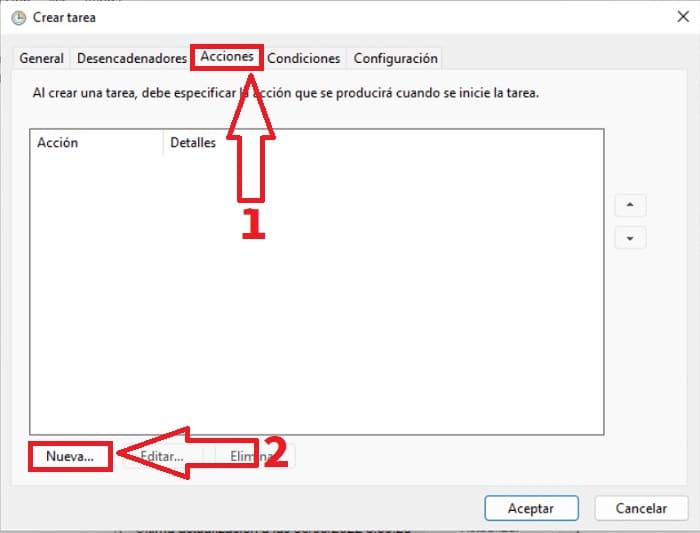
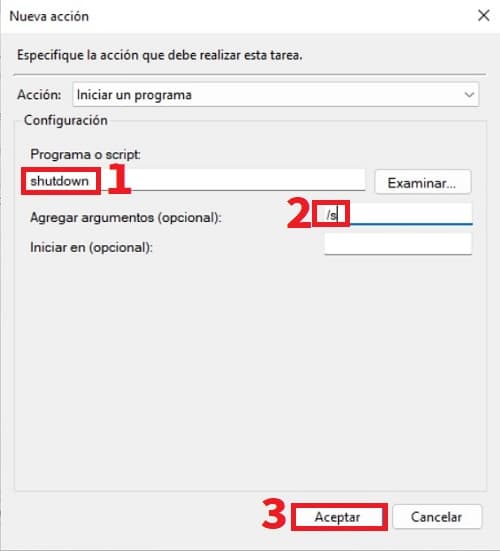
- In “Program” we will have to write “Shutdown” (without quotes) which is the script that is responsible for turning off the PC.
- In “Add Arguments” we will have to add “/S” (without quotes).
- Remember that we still cannot click “Accept” because we have to configure more parameters.
Let’s go to the next step:
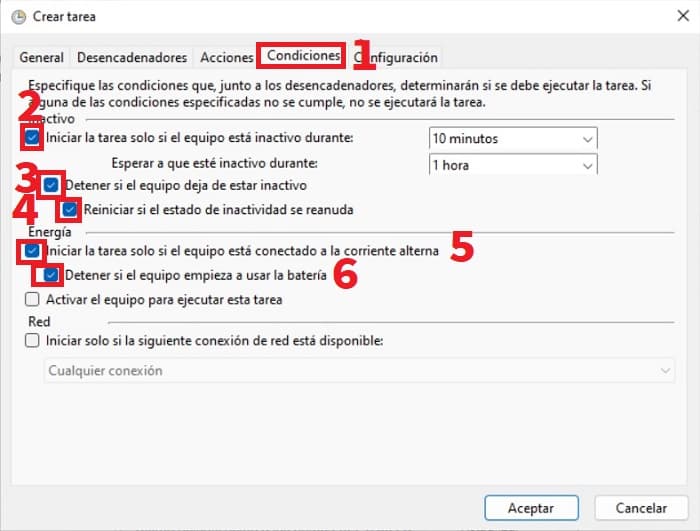
- We enter the “Conditions” tab .
- “Start Task Only if Computer is Idle for 10 Minutes” Enabled.
- “Stop if Computer Stops Idle” Enabled.
- “Reboot if Idle State Resumes” Enabled
- «Start the Task Only If the Equipment is Connected to the Alternating Current» Activated.
- “Stop If Computer Starts Using Battery” Enabled.
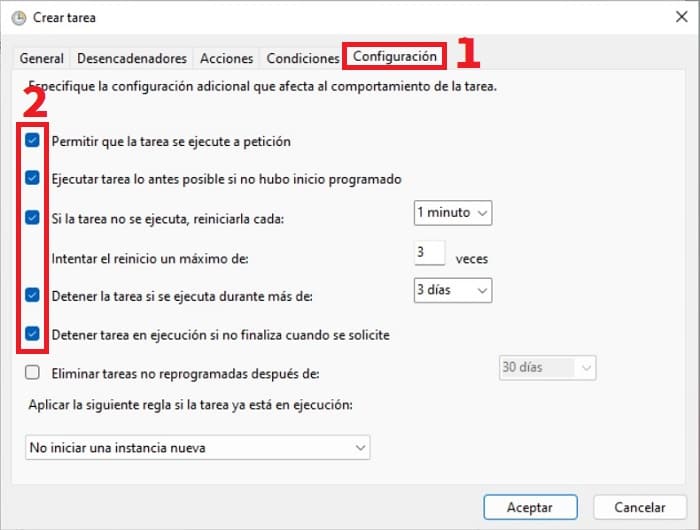
- In the next step we enter the “Settings” tab .
- We activate the following boxes: Allow the task to run on demand, run the task as soon as possible if there was no scheduled start, if the task does not run restart it every 1 minute, stop the task if it runs for more than 3 days and stop task running if it does not finish when requested.
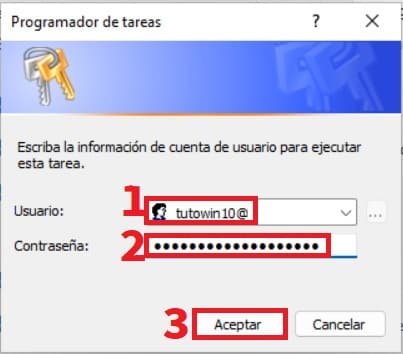
- Finally we introduce our user.
- Our password .
- We give «Accept» .
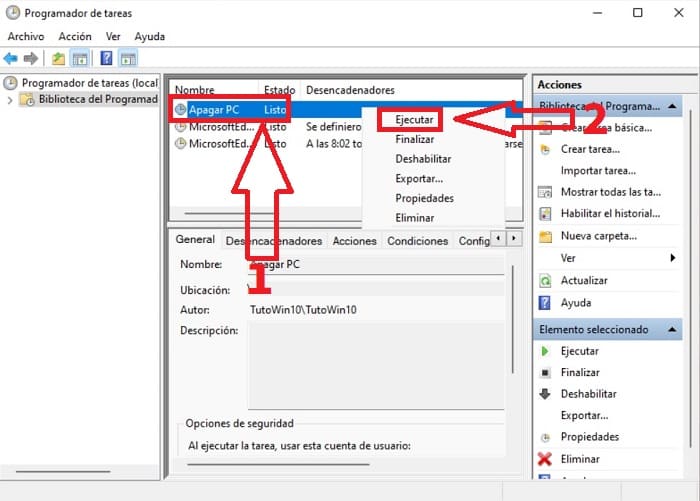
Finally we will have to start the task , so we will have to do the following:
- We right click on the new task that we have just created.
- A context menu will appear in which we must click on “Run” .
In this way, if the computer is idle for 10 minutes, Windows 11 will automatically shut down .
If you have any questions, you can always leave me a comment and remember that you help me a lot every time you share one of my tutorials with your social networks. Thank you very much for all your time!