
Windows 11 crashes, won’t start, slow or just won’t boot? Did you know that there is a way to fix this problem automatically ? Well, welcome to Howpchub in this simple video you will learn how to activate automatic repair in Windows 11 in this way you will be able to solve all your problems when turning on your PC without having to restore to a previous point or format the computer.
What is Windows 11 Automatic Repair and what is it for?
It is a tool incorporated in the latest Microsoft operating systems that allows you to identify certain startup incidents that prevent the computer from starting normally.
What Is The BCDEdit Command And What Is It For?
To use this tool we must apply the BCDedit.EXE command which allows the management of each BCD store (which are part of the boot configuration) from the Windows terminal.
This command allows us to manage the startup of our computer to make the modifications that are necessary to solve the possible incidents that may arise when the operating system starts.
How to know if Automatic Repair is disabled in Windows 11

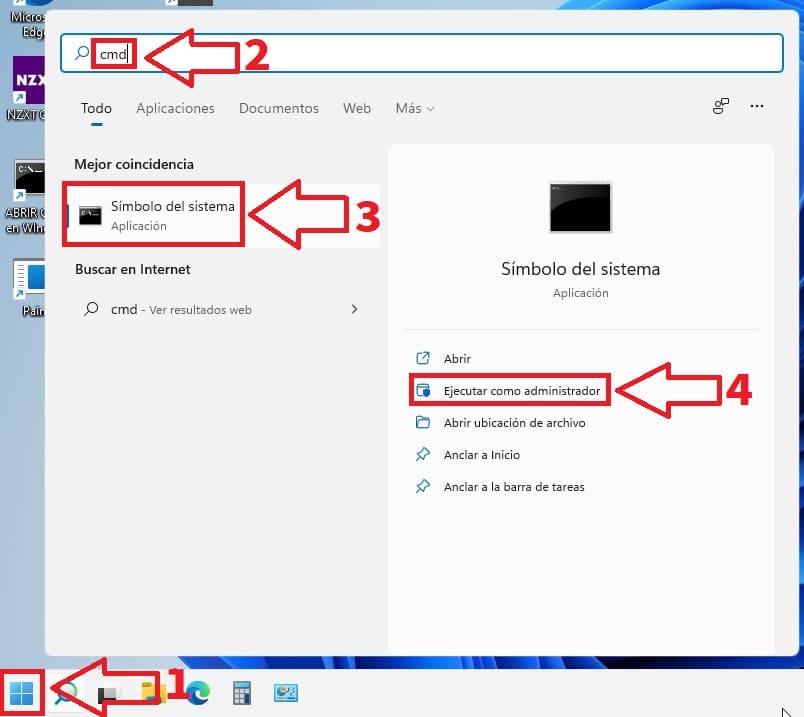
The first step will be to find out if we have automatic repair activated by default. To know if it is enabled we will have to open CMD in administrator mode, so we will have to follow these instructions:
- We go to the magnifying glass on the taskbar .
- We write “CMD” (without quotes).
- We notice that the best match says “Command Prompt” .
- On the right, select the option that says run as administrator .
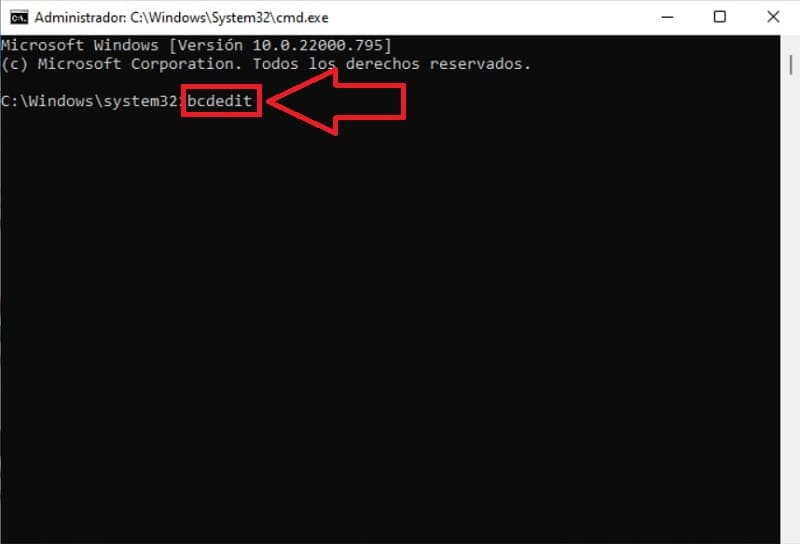
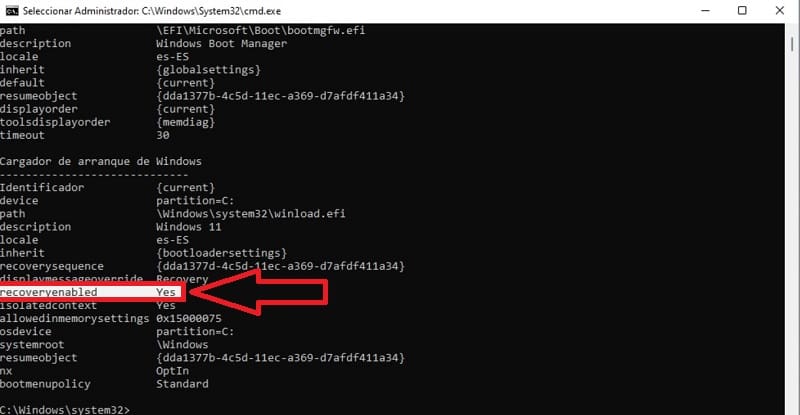
Once in CMD we write the command “bcdedit” (without quotes) and press the Enter key (Also known as Enter ).
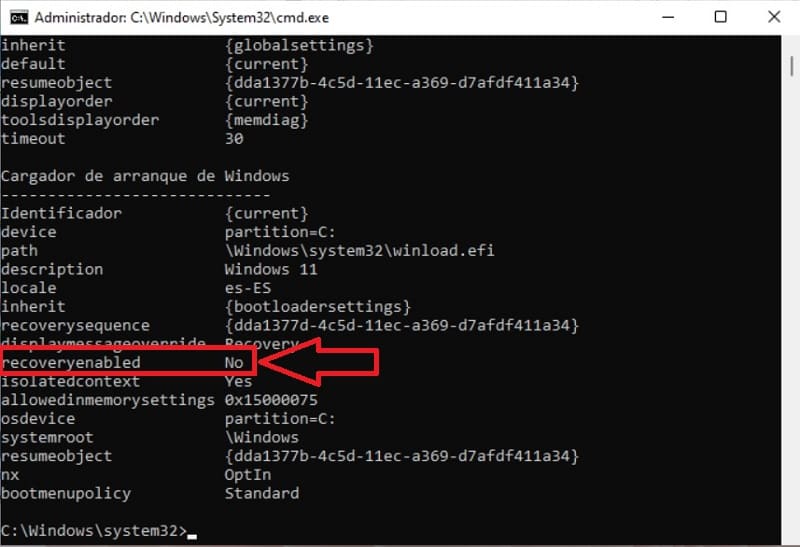
If automatic repair is disabled in the “recoveryenabled” section it will say “NO” .
How to Activate the Automatic Repair of Windows 11 Easy and Fast 2022
To enable the automatic repair of Windows 11 we will have to access the Command Prompt in Administrator mode and write the following command:
bcdedit /set {current} recoveryenabled yes
Then press the «Enter» key (Enter key depending on your country).
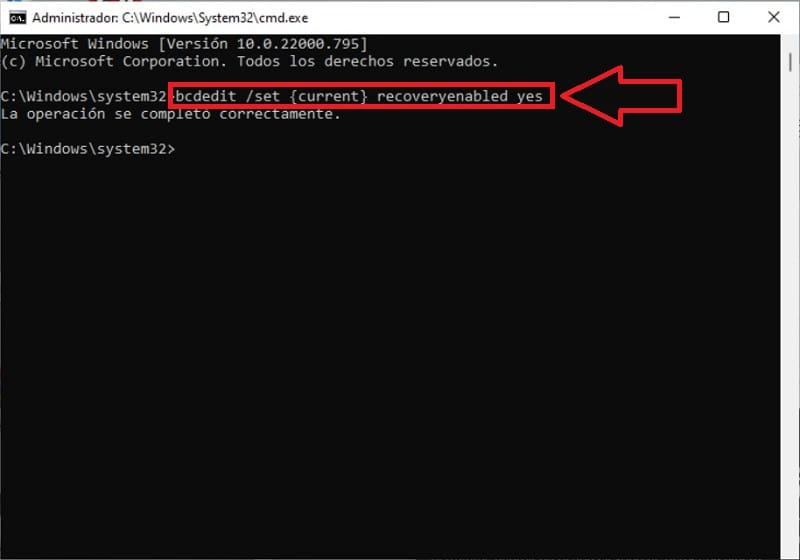
To see if it is now activated, we will use the “bcdedit” command again and now it should appear in “recoveryenabled” as “Yes” .
How to Remove Automatic Repair from Windows 11 Step by Step 2022
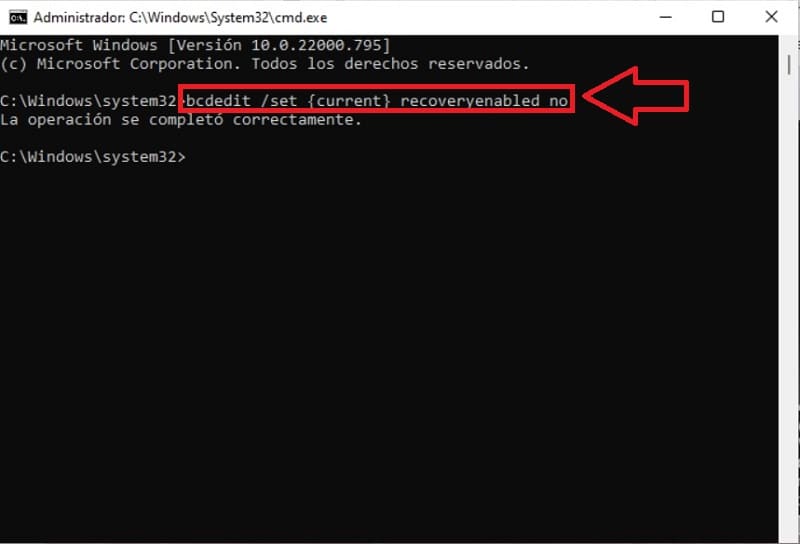
To deactivate the automatic repair of Windows 11 we will have to write the following command at the command prompt:
bcdedit /set {current} recoveryenabled no
Then we will press the «Enter» key (Enter key depending on our country).
How to know if Automatic Repair is disabled in Windows 11
We can check if we have deactivated it correctly with the “bcdedit” command and press the Enter key .
If the “recoveryenabled” option appears indicated as “No” it means that it is correctly deactivated.
If you have any questions with this tutorial you can always leave me a comment and we will see it together. Remember that you have all the social network buttons at your disposal to share this content with your colleagues. Thank you for your support and your time!