
Did you know that Windows 10 can repair itself automatically ? This way you could fix your PC problems without having to format it or restore it to a previous point . The problem is that the tool used to solve these problems can make your computer very slow, especially at startup . For this reason, you may be interested in knowing how to disable automatic repair in Windows 10 in order to enable it when it is really necessary. And today we will show you the steps you must follow to carry it out.
What is Windows 10 Automatic Repair and what is it for?
It is a tool that allows you to recover Windows in order to solve certain problems that prevent the system from starting normally.
What Is The BCDEdit Command And What Is It For?
This command will run in the Windows terminal and manage the BCD stores . These stores are provided by the various files that are part of the setup that starts the operating system.
BCDedit allows us to manage the startup of the PC , making the modifications if necessary to solve the problems that prevent the computer from starting correctly.
How to know if Automatic Repair is activated in Windows 10
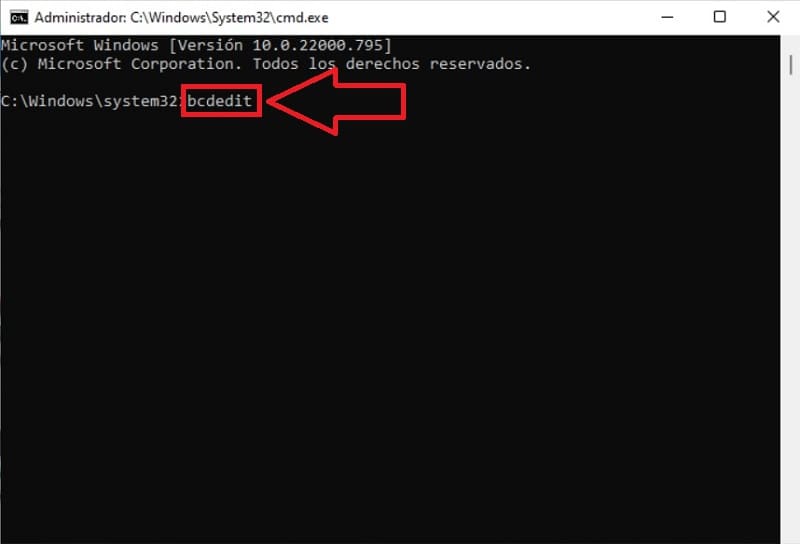
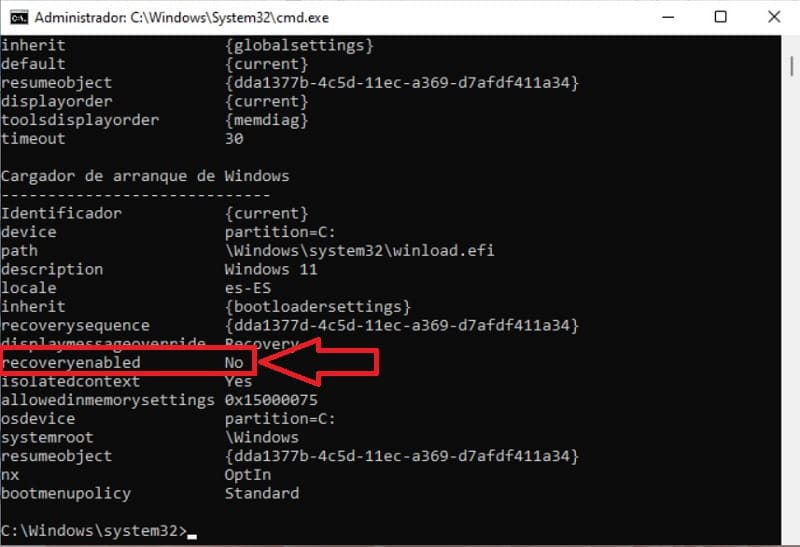
To find out if we have this option activated, the first thing to do is enter the Command Prompt in administrator mode. Once inside CMD we will have to write the command «bcdedit» (without quotes) and press the «Enter» key (Enter depending on our country).
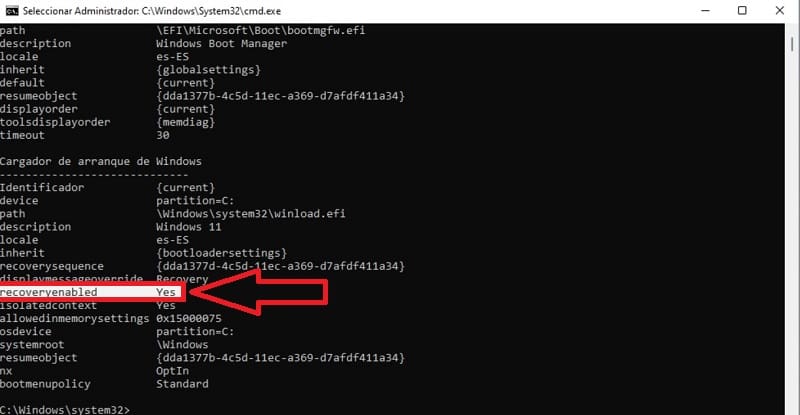
In the case of having this option active, we will have the “recoveryenabled” section marked with “YES” .
How to Remove Automatic Repair from Windows 10 Step by Step 2022
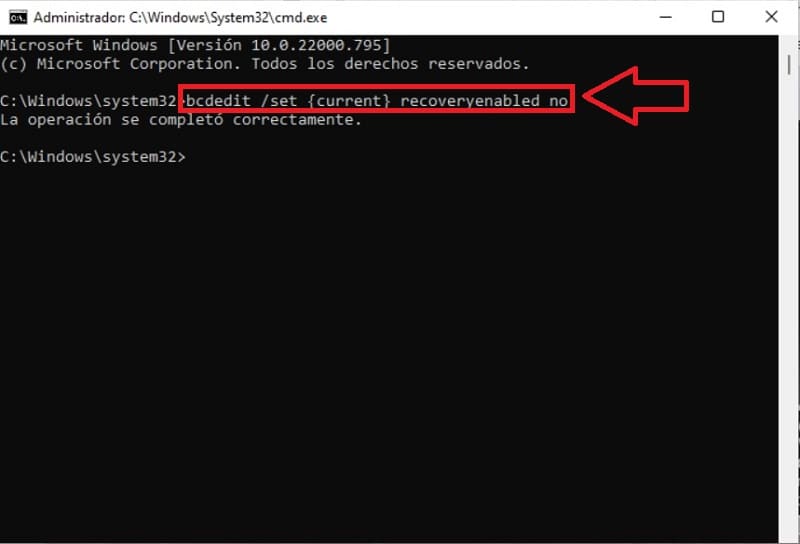
To remove the automatic repair of Win 10 you have to type the following command in Command Prompt:
bcdedit /set {current} recoveryenabled no
Then we will press the «Enter» key (Enter key depending on our country).
To verify that it is really deactivated we will have to write the «bcdedit» command again and press the Enter key .
If the “recoveryenabled” section shows as “No” it means that the automatic repair is inactive.
How to know if Automatic Repair is disabled in Windows 10
In the same way, if you want to know if the automatic repair of Windows 10 is disabled, we will have to retype the “bcdedit” command in the CMD and then press the Enter key .
If the “recoveryenabled” section appears with a “NO” in the Windows bootloader, it means that automatic repair is disabled .
How to Activate Automatic Repair of Windows 10 Easy and Fast 2022
To reactivate it, we will only have to access CMD again in Admin mode and write the command that I leave below:
bcdedit /set {current} recoveryenabled yes
Then press the “Enter” key (Enter depending on your country).

In this way the “recoveryenabled” section will appear with a “Yes” which means that we have activated this tool again.
If at this point you still have any questions, you can always leave me a comment and I will try to answer as soon as possible. Remember that you can support this content by sharing it with your friends and family through your social networks. Thank you very much for everything!