OBS Studio is, along with VLC , one of the most popular screen recording programs among the Linux community. This is because the program in question is open source and can be downloaded completely free of charge on any operating system, be it Windows, Linux and even Mac. As if this were not enough, OBS has functions that today we can only find it in paid programs, such as live video streaming or 60 FPS screen recording . A few weeks ago we showed you five free alternatives to Camtasia for Windows 10 . Today we will show you how to record your computer screen with OBS on Windows, Mac and Linux .
How to use OBS Studio and configure the program
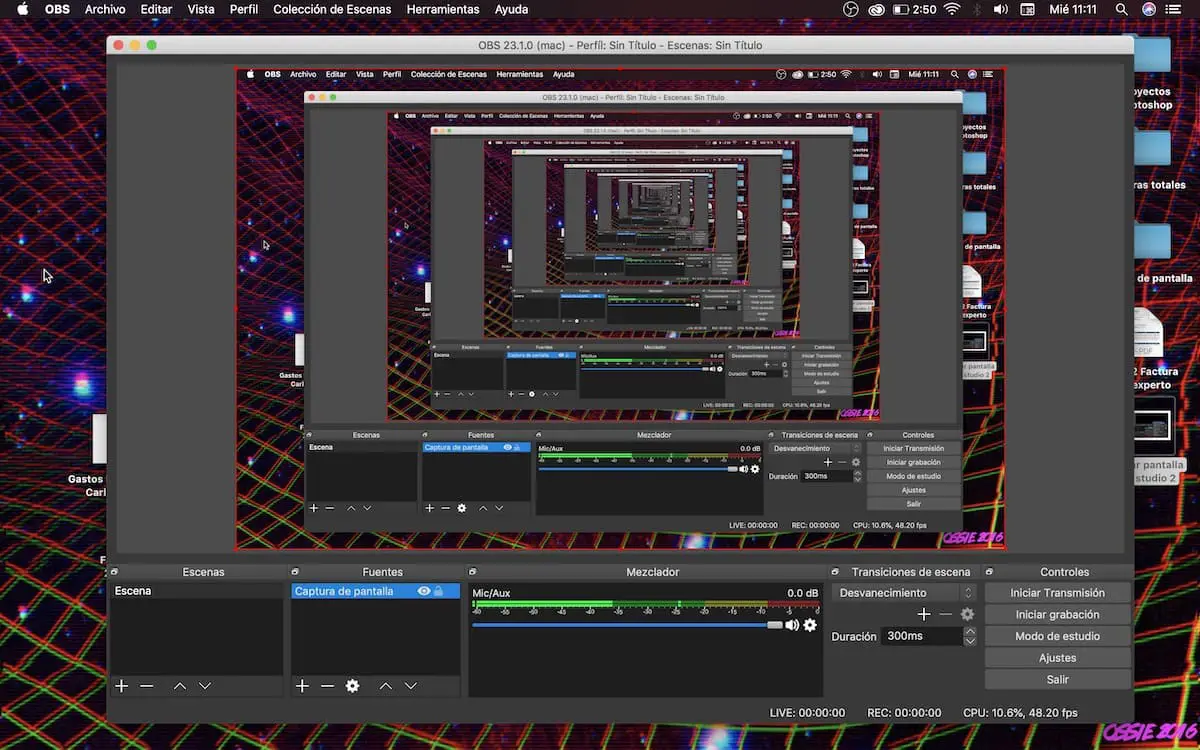
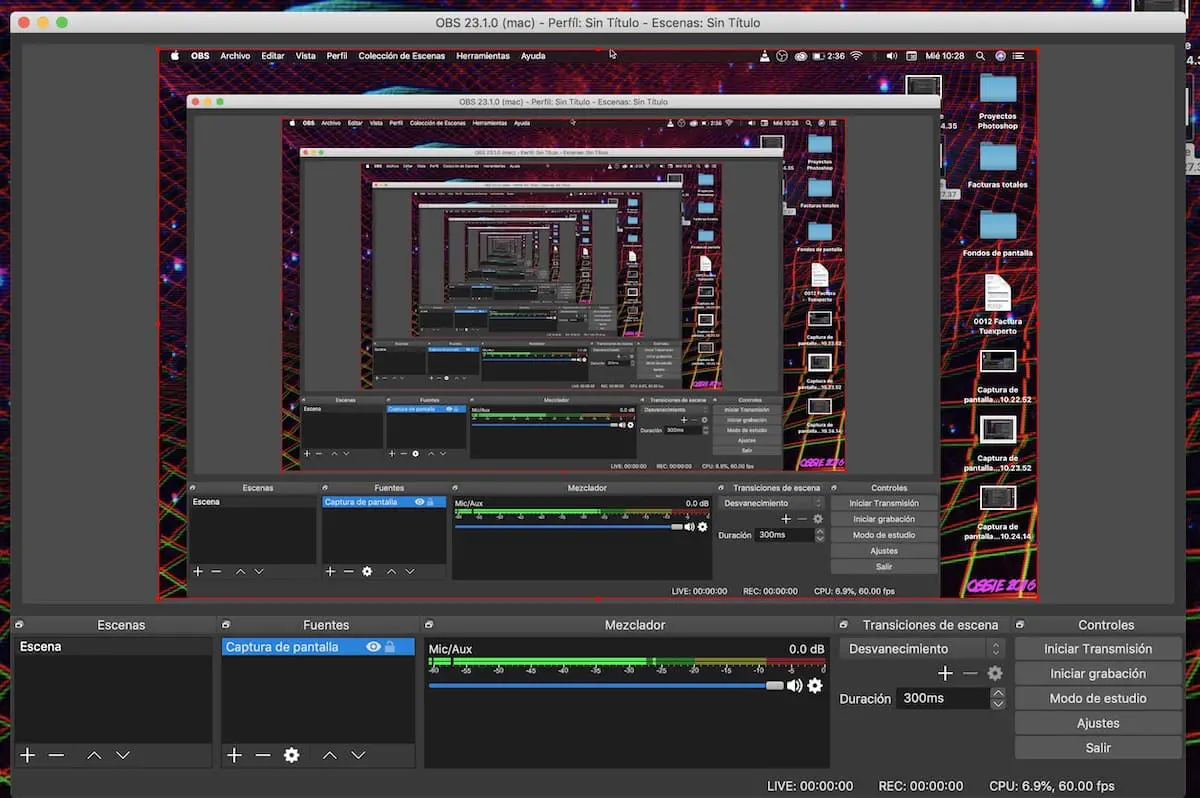
Unlike other programs to record the Desktop of our computer, OBS Studio has a somewhat rough interface for all those inexperienced users.
Before proceeding to record the screen with OBS, the first thing we will have to do is define the recording resolution and the FPS rate. To do this, we will click on Settings in the menu on the right and we will go to the Video section .
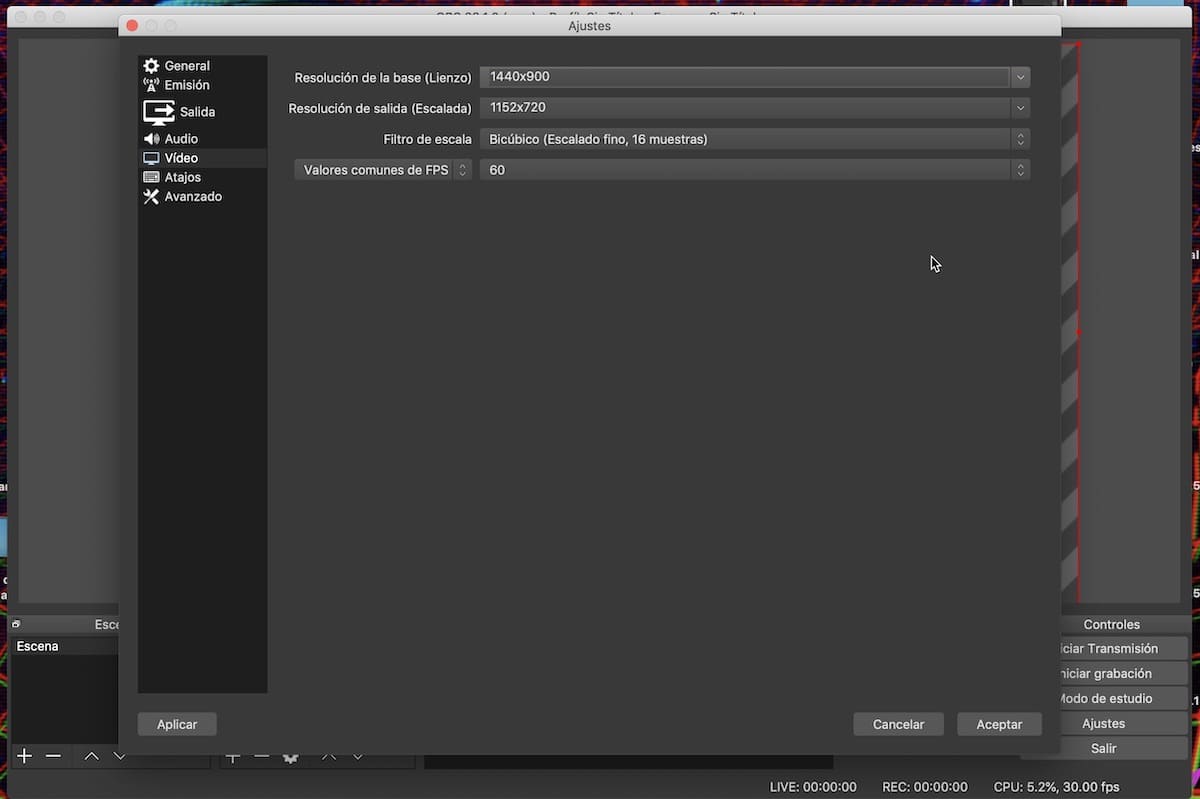
Next, we will indicate the native resolution of our screen (1,920 x 1,080, 1,366 x 768 and so on) in Base resolution (Canvas) and Output resolution (Scaled) . We can indicate a lower resolution in Output resolution in case our computer does not support such large resolutions if our goal is to edit the capture later. Otherwise, we will have to indicate the same resolution in both fields (1,920 x 1,080 and 1,920 x 1,080, 2,880 x 1,800 and 2,880 x 1,800…).
Once we have indicated the resolution, the next step will be to configure the FPS, which will be indicated in the Common FPS values field . Again, if our computer does not support high-quality video editing, it is recommended to opt for 30 FPS instead of 60.
Finally we will go to Recording path in the Output section to indicate the path where we want the videos to be exported .
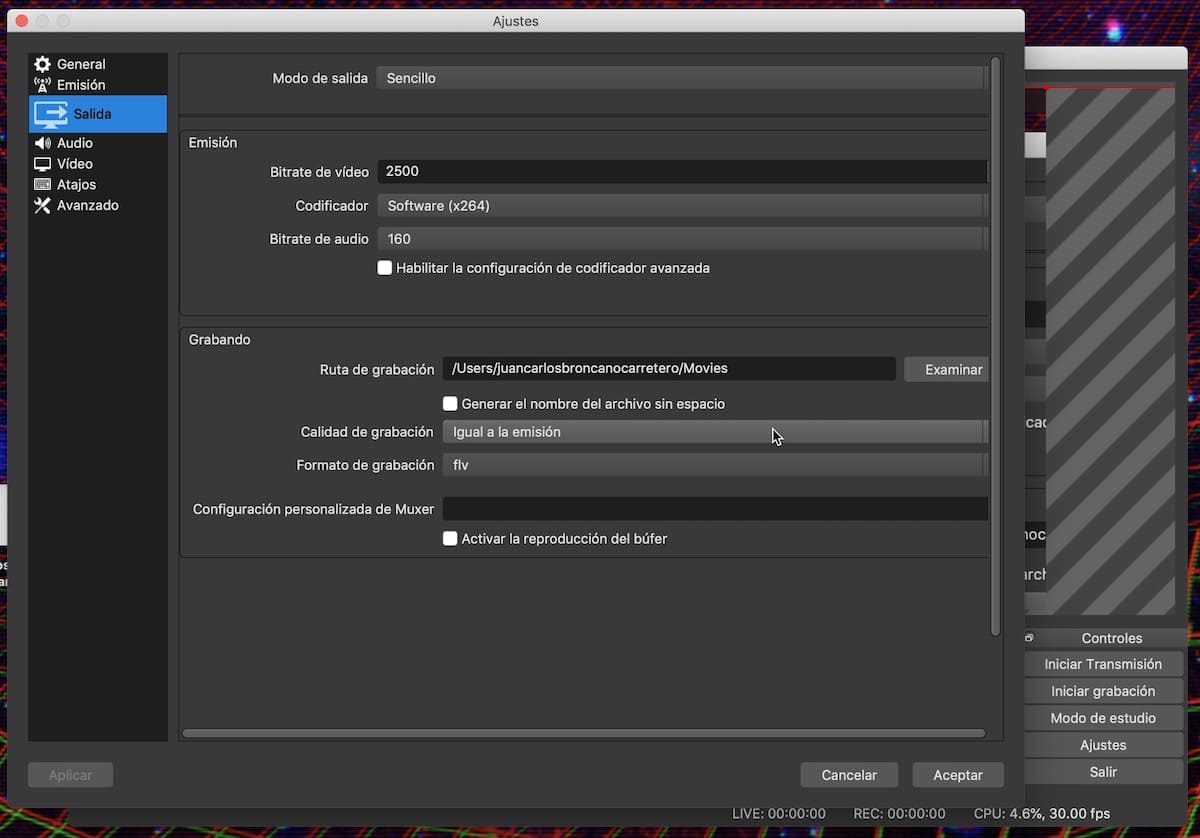
As an additional option, we can configure the final quality of the recording and the final format of the video in the Recording Quality and Recording Format sections. When we have finished configuring all the settings of the recorder, we can start recording with OBS.
How to capture the screen on OSB
We have already finished the pre-configuration of OSB to record the screen. At this point, the program will most likely continue to show us a black screen or a black screen with no image at all .
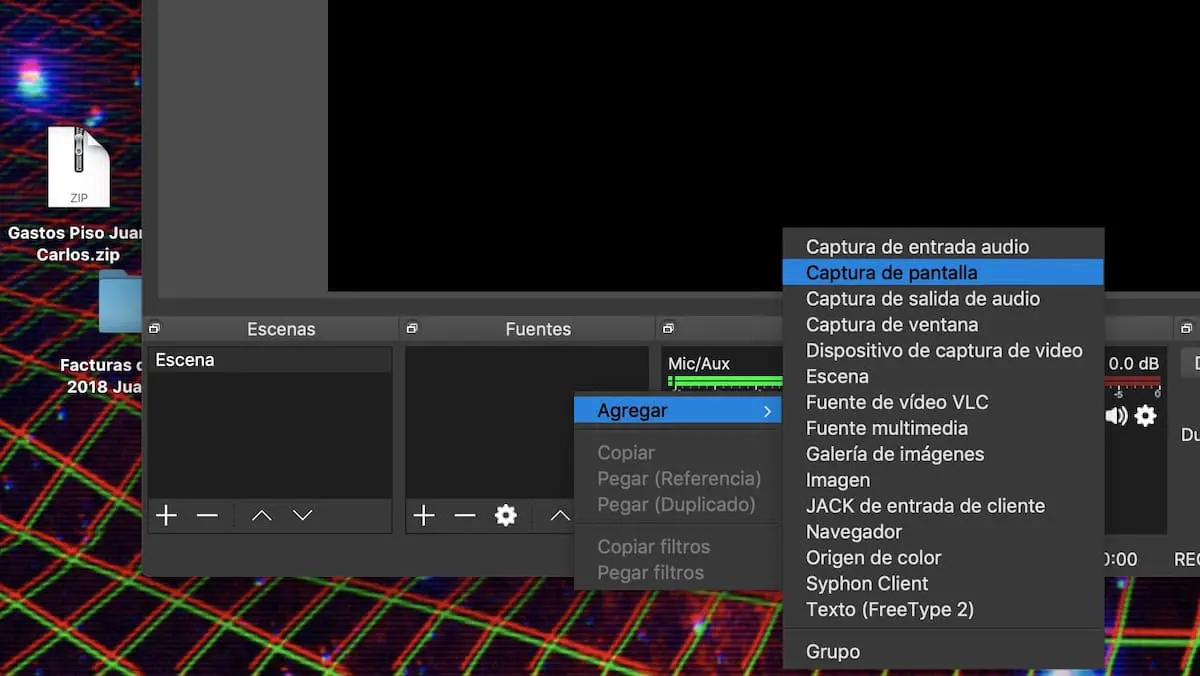
To start the screen recording, as simple as right-clicking on the Sources section, clicking on Add and selecting Screenshot . If we prefer to record the window of a certain program, we can select Window Capture.
In any case, we will have to adjust the size of the recording in the relevant window through the red box that will appear in the OBS screen recorder . Our recommendation is to take these same frames to the extreme so that the final recording appears without gaps in black.
When we have finished adjusting the size, we can start the recording in the button with the same name in the right side menu . To finish it, we will have to click on Stop recording. The resulting video will be in the path indicated above without any type of watermark or black bands.