The marking of texts is quite simply deleted in Windows or in the application programs. Simply use the mouse to hold down the left mouse button and mark the area you want and release the mouse button at the end of the selection. This is generally known to all users.
However, this usually only works horizontally. Horizontal marking is certainly the standard function, but sometimes it can also be very desirable to mark a certain section of text vertically . Most users are certainly not aware that text can also be marked vertically.
Vertical marking in Word
And exactly this vertical marking also works easily in Microsoft Word. No matter whether it is Word 2007, 2010, 2013, 2016 or Office 365, the vertical marking process works for all Word versions. Below we have shown you how it can look with Office 365.
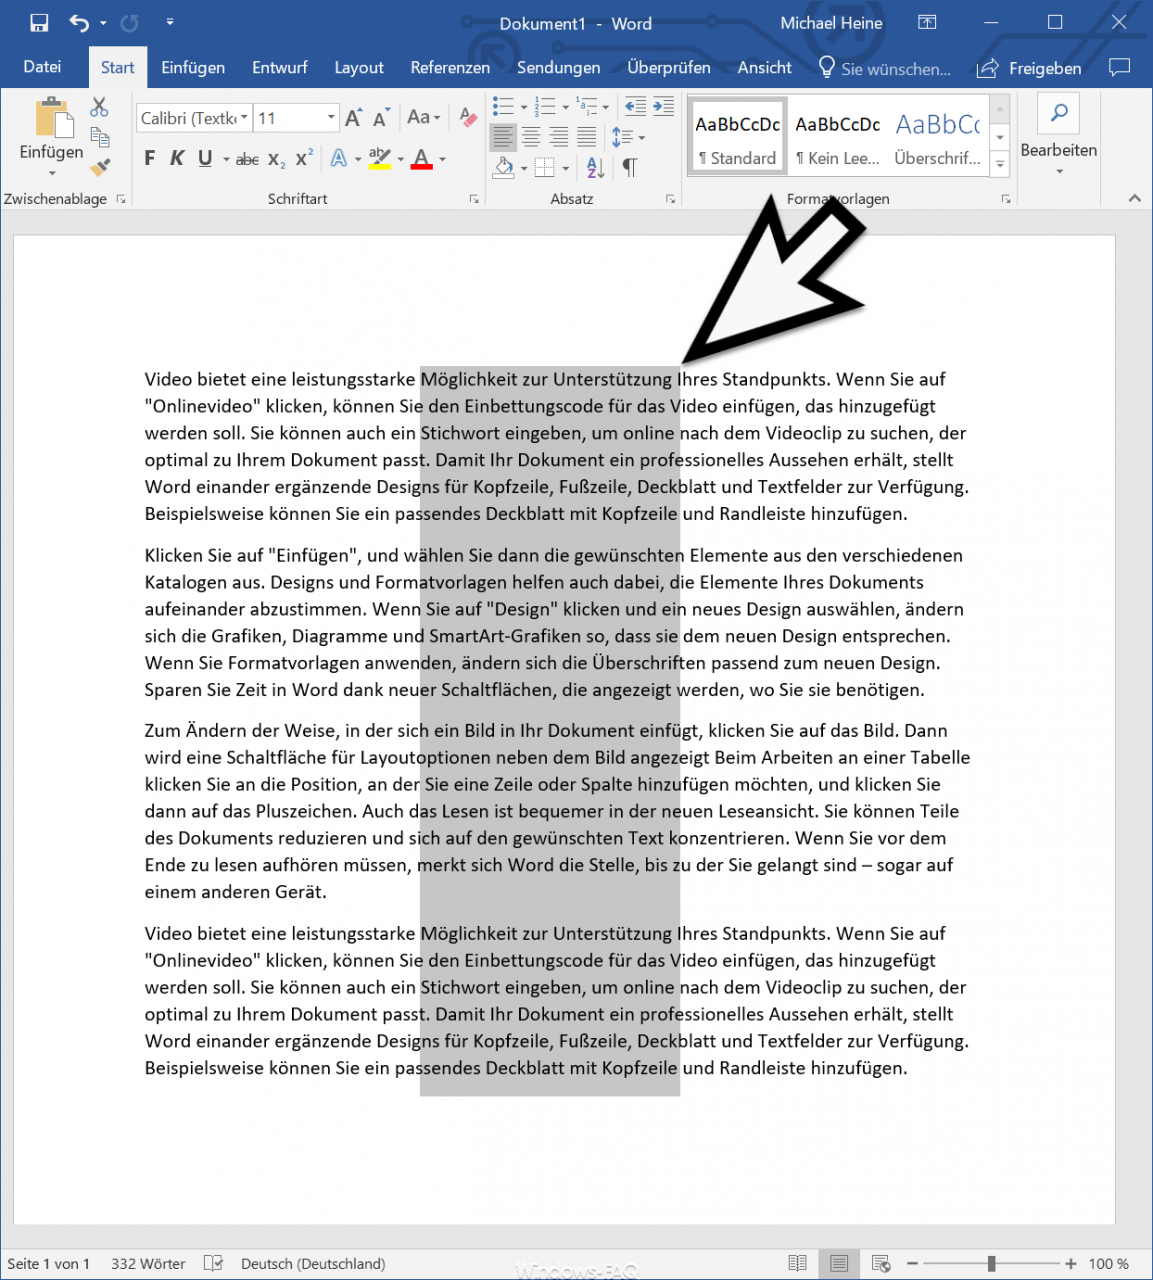
As you can see, a certain area is ” vertically marked ” within the text . This works relatively easily by pressing the button while highlighting
![]()
Hold down “ALT” and at the same time pull the mouse down! The text is then marked vertically and you can, for example, put it on the clipboard or simply process it further or format it differently. There are various possible uses for this vertical marking and it definitely makes work easier for some activities.
Unfortunately, this vertical marking process only works in Microsoft Word, not in the various web browsers or other application programs. If you know other programs in which it is possible to mark a text in this way, we would be happy to receive a corresponding comment .
Here is some more information below.
– Open PDF file in Word or convert it to a Word file
– Change the speed of the mouse pointer under Windows 10
– Scroll inactive windows when pointing – Windows 10 mouse setting
– Change the size of the mouse pointer