When you need to demonstrate how things happen (or have happened) between two points in time, a timeline is your best bet. There are several different methods of inserting a PowerPoint timeline into your presentation so you can show others this progress.
Note : The instructions in this document apply to PowerPoint 2016, 2013, Powerpoint for Mac, and PowerPoint Online.
How to paste a timeline from another program into PowerPoint
A direct way to get a timeline in your PPT file is to create it in another program, then copy and paste it into PowerPoint. Simply export the timeline from a program such as MS Project or Excel to a graphic format such as JPG, GIF, or PNG, and then insert the timeline graphic into PowerPoint as if you were inserting images or clipart. It is also possible to link the timeline in a similar way by adding data from Excel to Word, which will update automatically when you make changes.
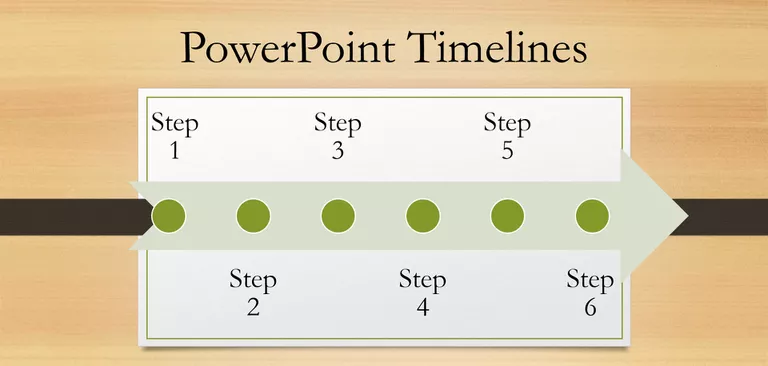
How to Make a Timeline in PowerPoint with Built-in Features
PowerPoint also offers a built-in feature that makes adding timelines a breeze. Called SmartArt , these are configurable graphics that can be configured in a very simple way.
To use one of these for a timeline:
- Select the Insert tab on the large ribbon toolbar.
- Select SmartArt .
- In the dialog box that appears, find the chart that best suits your needs.
Tip : Items in the Process category are good choices, like Basic Timeline or Vertical Chevron List .
- Select OK to insert the SmartArt into your presentation.
- The element will appear in an editable window. For example, you can add chevrons to the Vertical Chevrons List by editing the bullets on the left. It works like a normal list, and you can press Tab and Shift+Tab to indent and out.
- Alternatively, you can continue to decorate your SmartArt after you’ve added it, for example with callouts.
The SmartArt feature is less robust in PowerPoint Online, but the most relevant types of graphics (for example, those mentioned above) are present and usable.
How to Create a Timeline in PowerPoint Using a Template
Alternatively, there are pre-built PowerPoint templates that allow you to quickly put together a timeline.
In the PPTX file shown above, available from the Microsoft Office Template Gallery, you can move and copy existing objects to create new timeline phases or new milestones and annotations. This method is a bit more practical, but it will allow you to get the exact results you want.
Note : Templates can be used in all versions of PowerPoint as long as they are in standard PPTX format.
How to Create a Timeline in PowerPoint With a Plugin
Another approach is to use a PowerPoint plugin specifically designed to create timelines. Office Timeline is a great option if you want to add project deadlines (such as Gantt charts), and it’s available in a free version.
You will need a few minutes to perform the following steps:
- Download the free edition of the app from the Office Timeline website.
- Double-click the .EXE file to start the installation.
- Once complete, PowerPoint should launch automatically. It will also display a quick introduction wizard as well as a sample file.
Once installed, a new Office Timeline Free toolbar will be available . It contains tools for creating new timelines, selecting the style of timelines to insert, and entering/importing the data the timeline is based on.
Note : The Office Timeline add-in is only available for Windows versions of PowerPoint. However, there is also Brushlo, a web-based tool that produces timelines in PowerPoint format.
Armed with the above options, you should be ready to create any kind of timeline you need in PowerPoint.