DLNA is a really nice thing. With a DLNA server, you can transfer your PC content wirelessly (WLAN) or wired (LAN) to other devices such as televisions, smartphones, tablets or other devices, without these devices having to have a direct connection to the source. These media servers are becoming increasingly popular and we would like to show you today how you can turn your Windows 10 PC into a DLNA server .
DLNA is called ” Digital Living Network Alliance ” and is a technical standard that various device manufacturers from the fields of computers, smartphones and consumer electronics have launched. So that the media player (DMP) can connect to the media server, you have to do the following:
Install DLNA Server
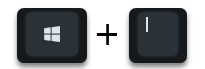
It is easiest if you first open the Windows Settings app using the keyboard shortcut
calls up and enters the following as a search term:
Advanced sharing settings
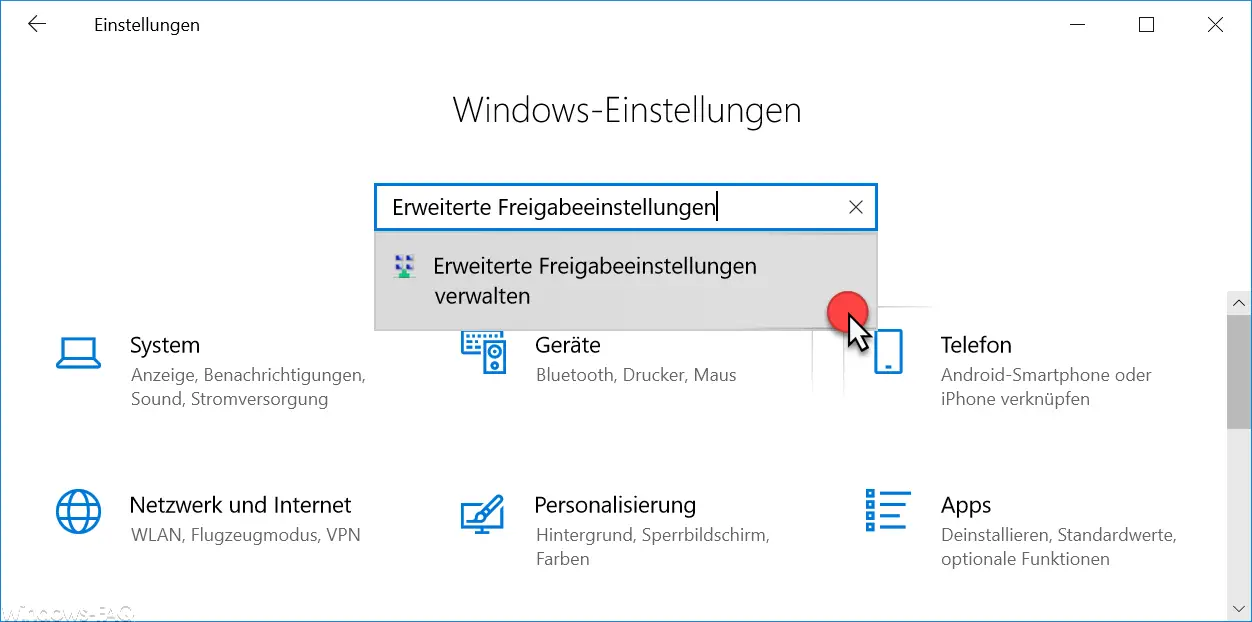
After calling ” Manage advanced sharing settings “, the classic control panel appears, in which you can change numerous sharing options for the different network profiles. The decisive part can be found in the middle area, which is called as follows.
Media streaming
We have also shown this to you below.
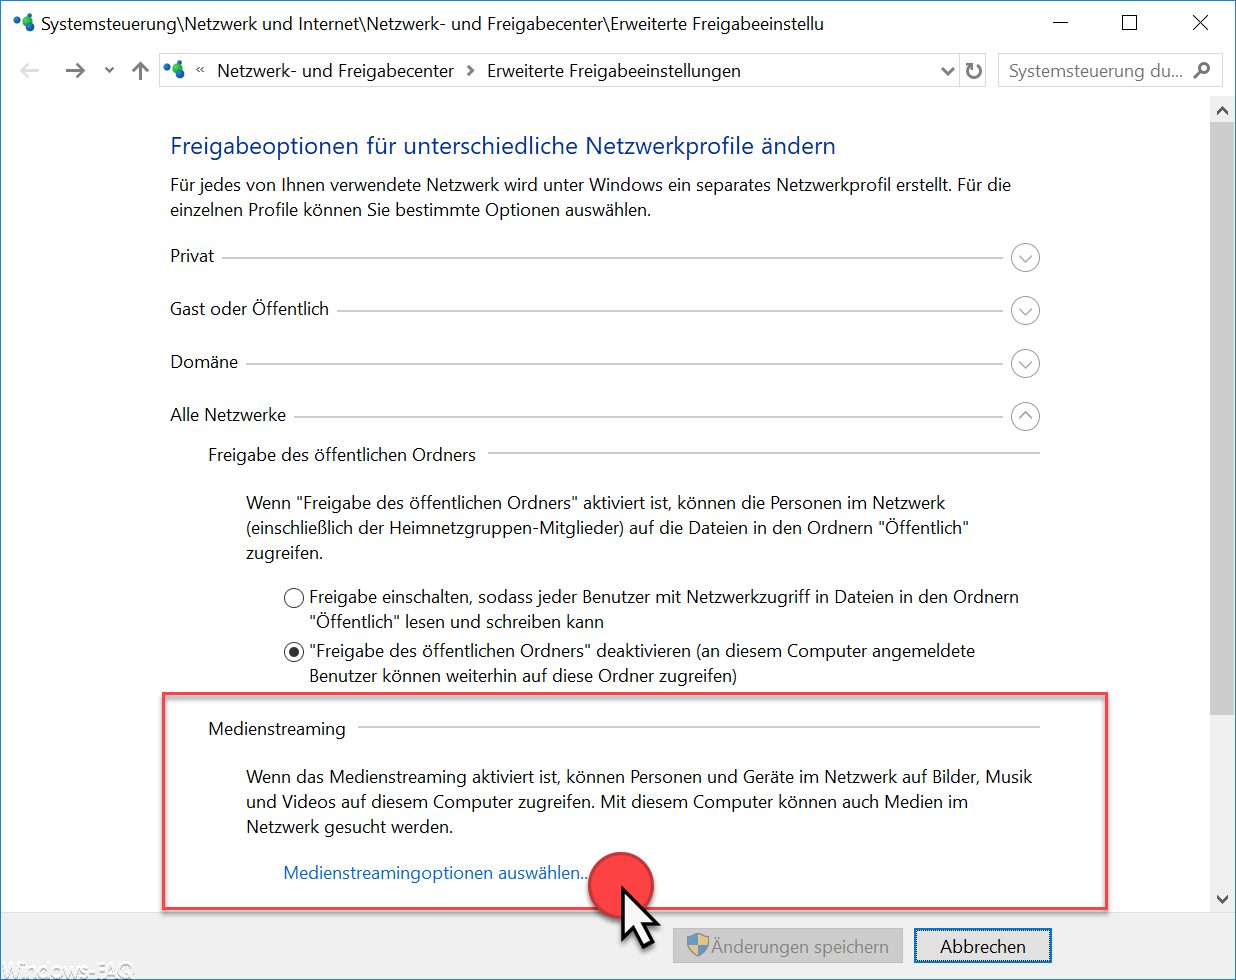
Here you have the point
Select media streaming options …
choose. The following window then appears with the option to activate media streaming .
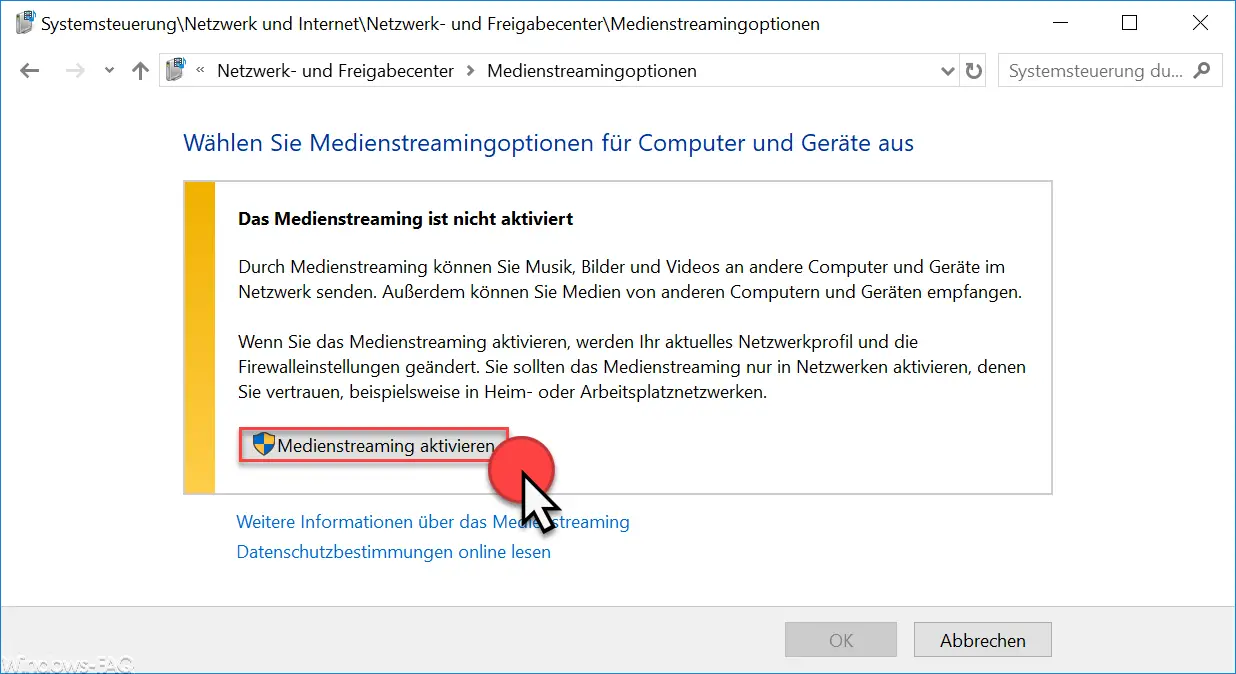
Here, Microsoft points out again that media streaming is not activated . The following information is also visible.
Through media streaming , you can send music, photos and videos to other computers and devices on the network. You can also receive media from other computers and devices. If you activate media streaming , your current network profile and firewall settings will be changed. You should only enable media streaming in networks that you trust, for example in home or work networks.
Then the following, final DLNA configuration window appears.
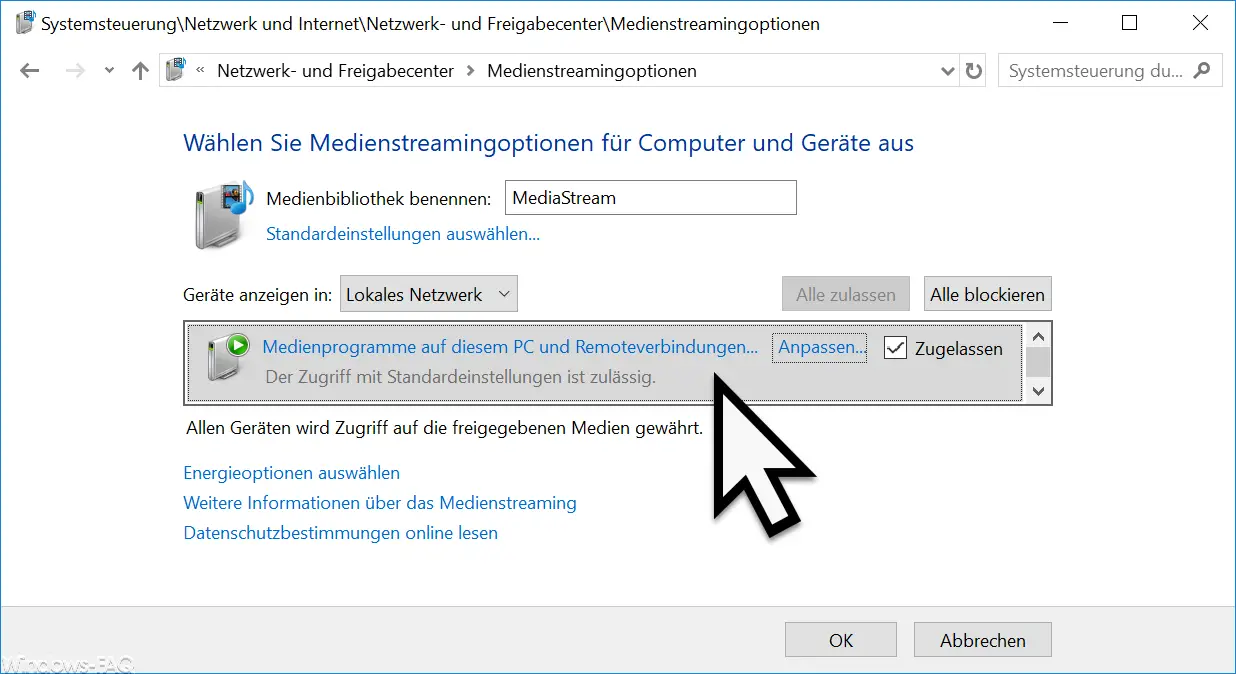
Here you can now define and define all the necessary media streaming options for computers and devices to be used. You can allow individual devices, block them or only allow certain streaming media such as music, pictures, TV and video via ” Customize ” . With the final click on ” OK ” the DLNA server is configured and ready for use.
If you remove the checkmark at ” Allow “, the DLNA server or media streaming is deactivated again .
You can find more tips and tricks around Windows in these articles:
– Deactivate Windows 10 timeline (Timeline)
– Activate Windows core isolation or memory integrity – Convert
FAT32 data carrier to NTFS format without data loss
– ISOBURN – Windows ISO burning program as command line command
– Generate large dummy files quickly and manually using a command with FSUTIL
– Call system administration tools in Windows 10
– Show or delete available WLAN connections by command
– Control shortcuts for important Windows setting options
– PowerShell command to deactivate the firewall
– Shut down Windows and restart with PowerShell commands