Sometimes it makes sense to rename printers . This is of course possible via the Windows GUI (Graphics User Interface), but it is quite cumbersome. As is renaming printers via PowerShell much easier now, and we want to show you below how your the renaming printer name can very quickly and simply.
To do this, first open a PowerShell console with administrative rights. How you can do this the quickest and easiest, we have explained in our entry ” Call Command Prompt (CMD) and PowerShell quickly with a key combination as administrator “.
After calling the PowerShell console, you can use the following command to get an overview of all available printers.
Get-Printer | Format-Table Name, ShareName, Shared
We have shown you the entire process below.
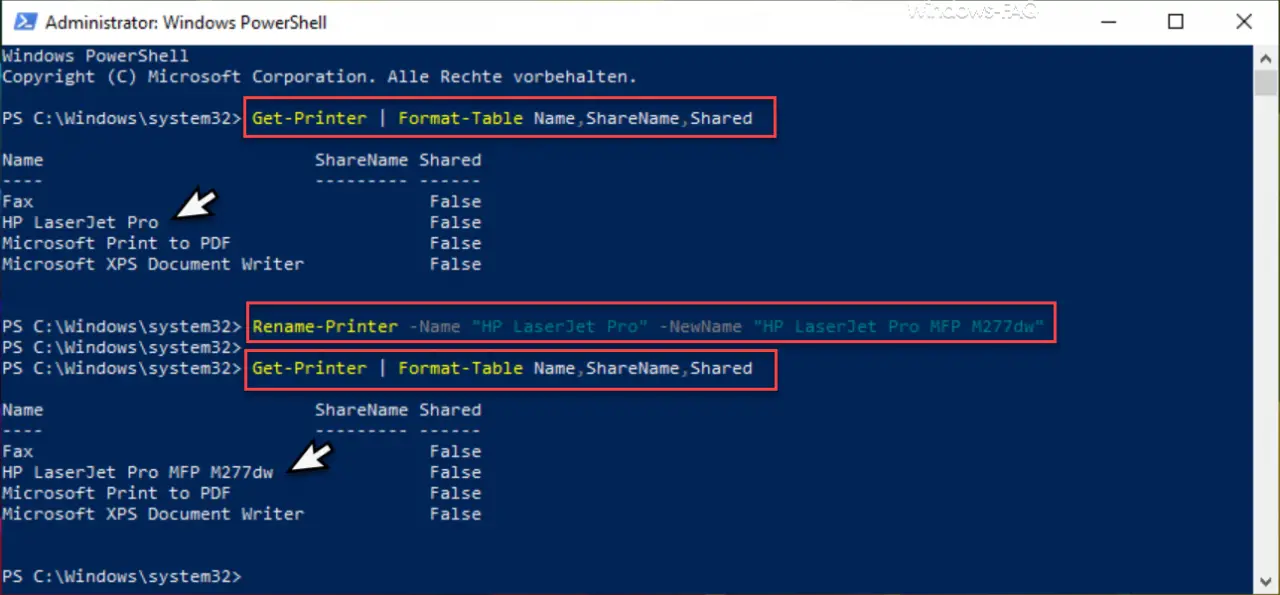
By issuing the command you get a tabular overview of all installed printers. In our case also the ” HP LaserJet Pro “, whose printer name we want to change now. Only the value ” Name ” is important, the printer information or parameters ” ShareName ” and ” Shared ” could also be omitted.
The printer renaming then works with the following command.
Rename-Printer -Name “CURRENT PRINTER NAME” -NewName “NEW PRINTER NAME”
The printer is renamed without any acknowledgment. However, if you specify a printer name that does not exist, the corresponding PowerShell error message ” The specified server does not exist or the server or printer name is invalid ” is output.
You can then use the first command to display the list of installed printers again and the new printer name is then immediately visible.
Further tips and tricks for PowerShell and useful PowerShell commands can also be found in these articles:
– The fastest ways to start the PowerShell console
– Show file rights with PowerShell – Query
free and used hard disk space locally or remotely using PowerShell
– Read WindowsUpdate.log on Windows 10 or reformat using PowerShell
– Windows roles and features with PowerShell install
– read out computer system information with PowerShell
– query Exchange quotas (Quota) settings with PowerShell
– prepare the Windows client for remote PowerShell commands with WINRM
– edit local users and groups with
PowerShell
– determine Windows system runtime with PowerShell – Windows 10 system restore point create
with PowerShell
– shutdown and restart Windows with PowerShell commands – repair Windows component store with DISM and PowerShell commands
– switch off UAC (user account control ) via PowerShell or registry with Windows 10
– PowerShell command to deactivate four of the firewall