Under certain circumstances it may be necessary that certain devices in the network are not automatically assigned an IP address by the DHCP server . This may be necessary if certain devices are not to use the WLAN, for example, and are not to unnecessarily occupy an IP address from the DHCP range .
Basically, the Windows Server already provides all the necessary functions for blocking MAC addresses . However, there are a few things to consider when setting up the MAC blockade , which we want to go into here.
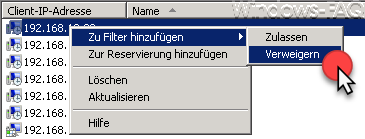
In the DHCP Manager, your device leases all MAC and MAC addresses that have successfully been assigned an IP address by the DHCP server. If undesired devices are included in this list, you can use the function via the context menu
Add to filter
and
Deny
activate, as you can see here in the figure below.
Then the list of ” denied ” devices fills up , which you can see in the ” Filter ” area in the DHCP manager. However, this is not enough, because the denied devices continue to obtain an IP address and appear in the address lease list as ” Denied “. So the inclusion in the ” Denied filter ” brings nothing, you still have to activate the filter.
This works as follows.
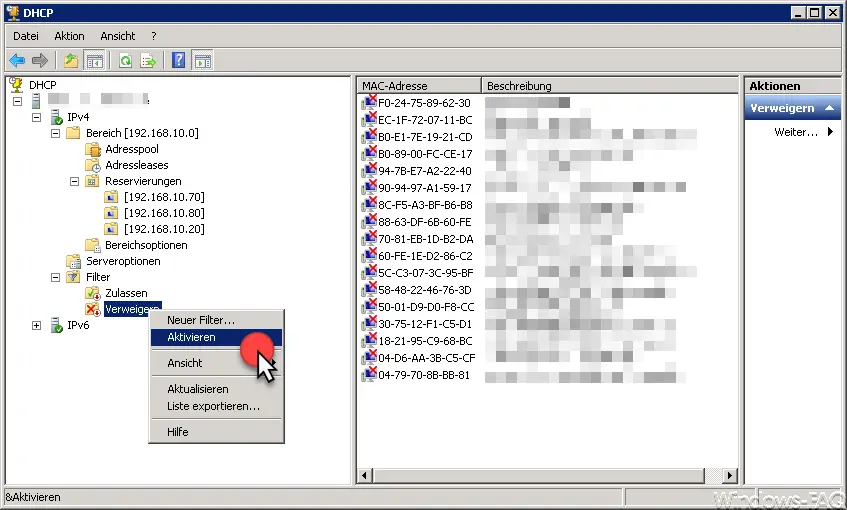
Activate DHCP filter
In the ” Filters ” and ” Deny ” area, you still have to confirm the ” Activate ” function via the context menu . Only then is the MAC address negative filter activated and the devices in the denied list no longer receive IP addresses from the DHCP server. With ” Deactivate ” you can of course release the denied devices again. so that the IP allocation is active again.
You can find more information about DHCP in these articles:
– List DHCP reservations conveniently and clearly, including a note
– DHCP server service can no longer be started
– Set up a static IP address in Windows 10