A really very useful function in Windows 10 is the transfer of the monitor image to the TV . The so-called ” Miracast ” makes it possible for the Windows 10 PC to communicate with the newer TVs without additional software tools or TV hardware.
In this short Miracast tutorial we would like to show you how quickly and easily you can transfer the monitor image of your notebook or tablet to a TV . To do this, you first call the Windows settings using the key combination
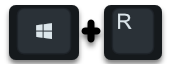
Windows key + “R” on. Then you have to go to the area
System (display, sound, notifications, power supply, …)
and then into the sub-area
display
You will then find the selection point in the “Multiple screens” area
Connect to wireless display
We have shown you this as an example below.
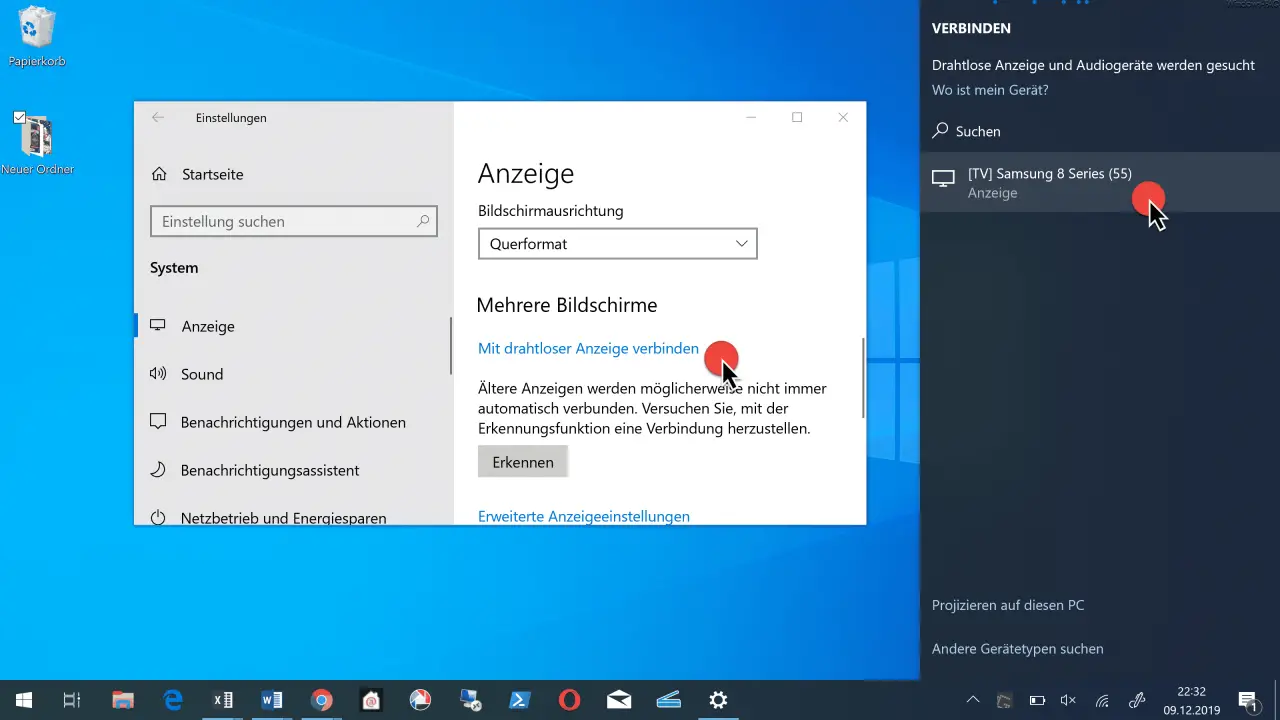
After you have activated ” Connect to wireless display ” , Windows 10 searches for possible Miracast devices and then displays them in the right column (Windows 10 Info Center). In our case, our Surface 6 Pro found a Samsung TV 8 Series .
As soon as you click on the TV set , Windows 10 starts mirroring the monitor on the TV set .
On the top screen you will see a black frame that shows the connection to the TV. Here you can also disconnect the TV connection and make further settings for the Windows 10 TV connection.
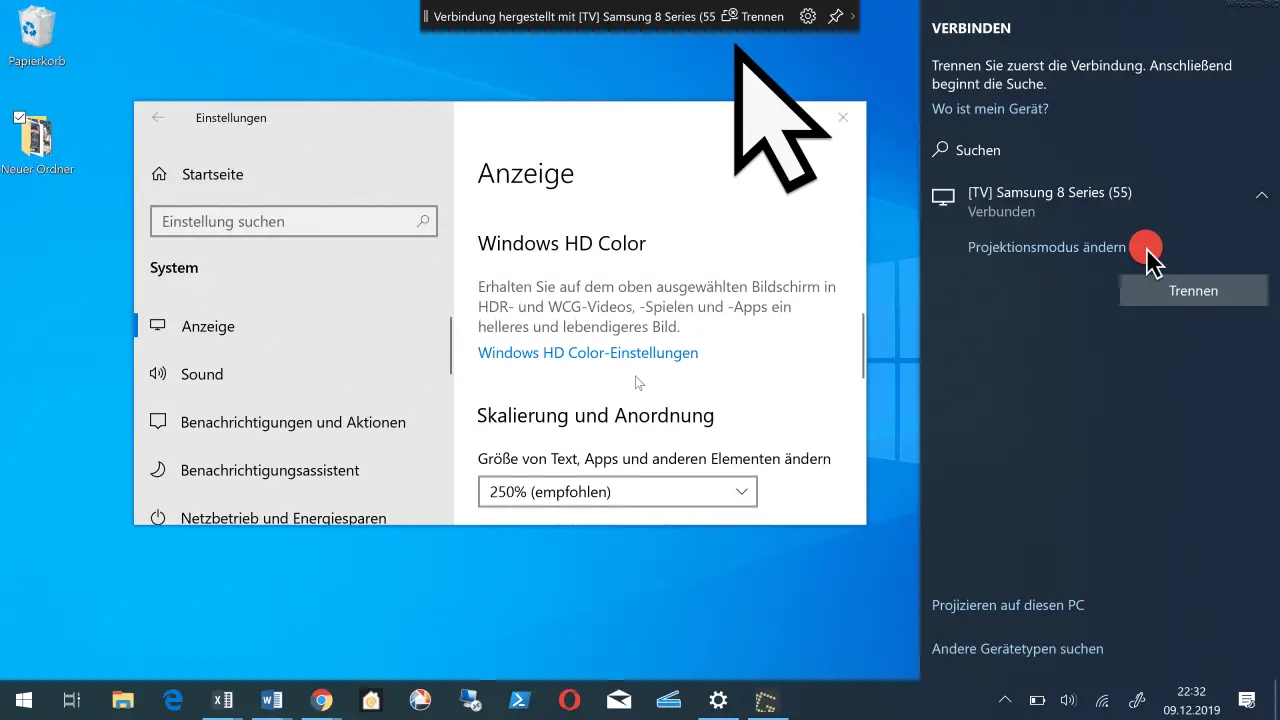
About the point
Change projection mode
then you have further setting options, how or which picture you want to transfer to the TV. The following projection options are available to you .
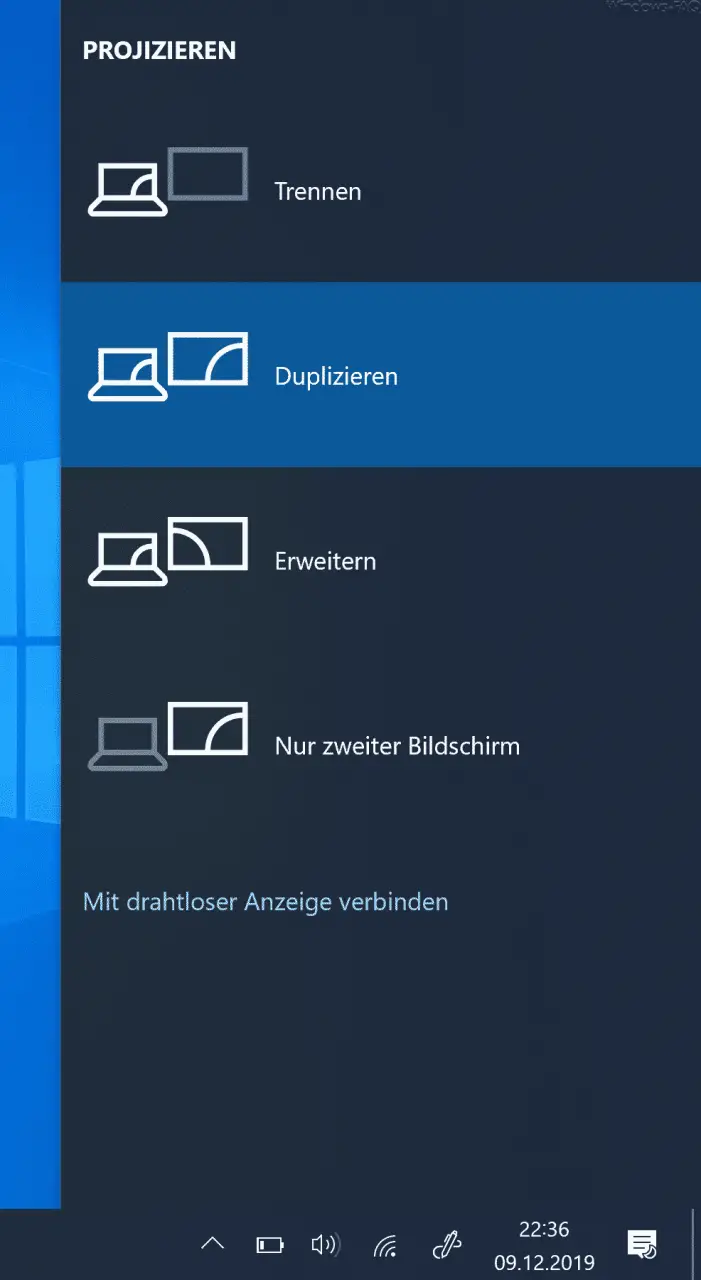
As you can see, you can now set the following.
- Disconnect Miracast connection between Windows 10 PC and TV
- Duplicate monitor display on TV
- Extend tablet or notebook monitor with TV screen
- Only display the picture on the TV
So it is really very easy to establish a connection between a Windows 10 PC and a TV and to transmit the monitor image wirelessly to the TV .