Many Windows users have faced the problem that the Windows hard drive (HDD or SSD) will simply become too small over time and you would prefer to replace it with a larger hard drive .
This exchange or cloning of hard drives under Windows is not as difficult as many imagine. As a rule, Windows hard disks only have to be cloned if they contain the Windows start partition or boot partition, because this cannot be copied so easily.
In the meantime, there are also HDD USB docking stations with 2 slots from various manufacturers that have an integrated clone function . This sometimes works quite well, especially if the source HDD is the same size as the target HDD. In our case, cloning doesn’t work because we want to replace a 120 GB SSD with a 250 GB SSD and thus clone the smaller SSD to the larger HDD .
The cloning of Windows hard drive works very quickly and easily with the free tool
Macrium Refect 7 Free
which you can download and install. With this freeware, which is free for personal use, you can clone hard drives without any problems. We explain how this works in this short clone tutorial .
Before you start cloning the hard drive , you should make sure that the target hard drive is completely empty and formatted.
After you have installed the tool, the start mask of the cloning tool shows you the built-in hard drives, as you can see in the figure below.
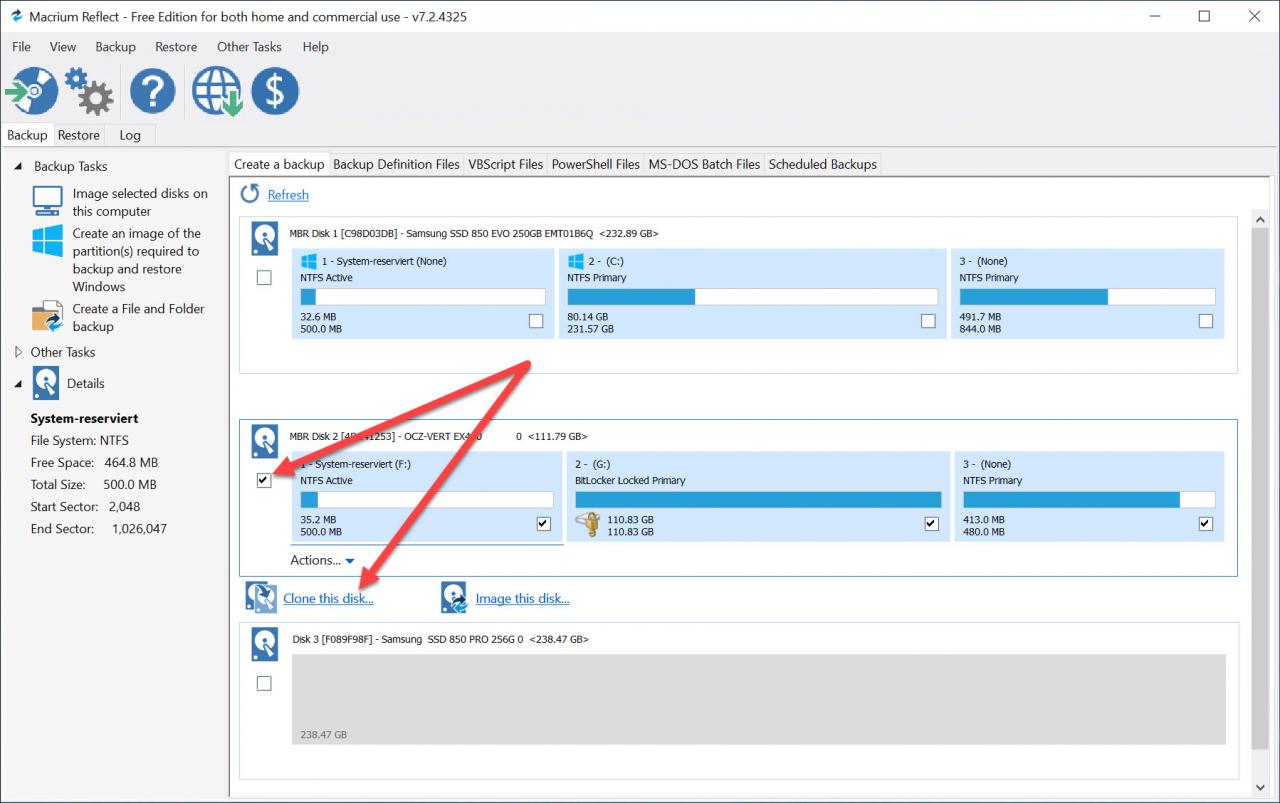
Now select the source HDD, we have marked this with the arrow. Then you have the function
Clone this disk…
call. The following window then appears.
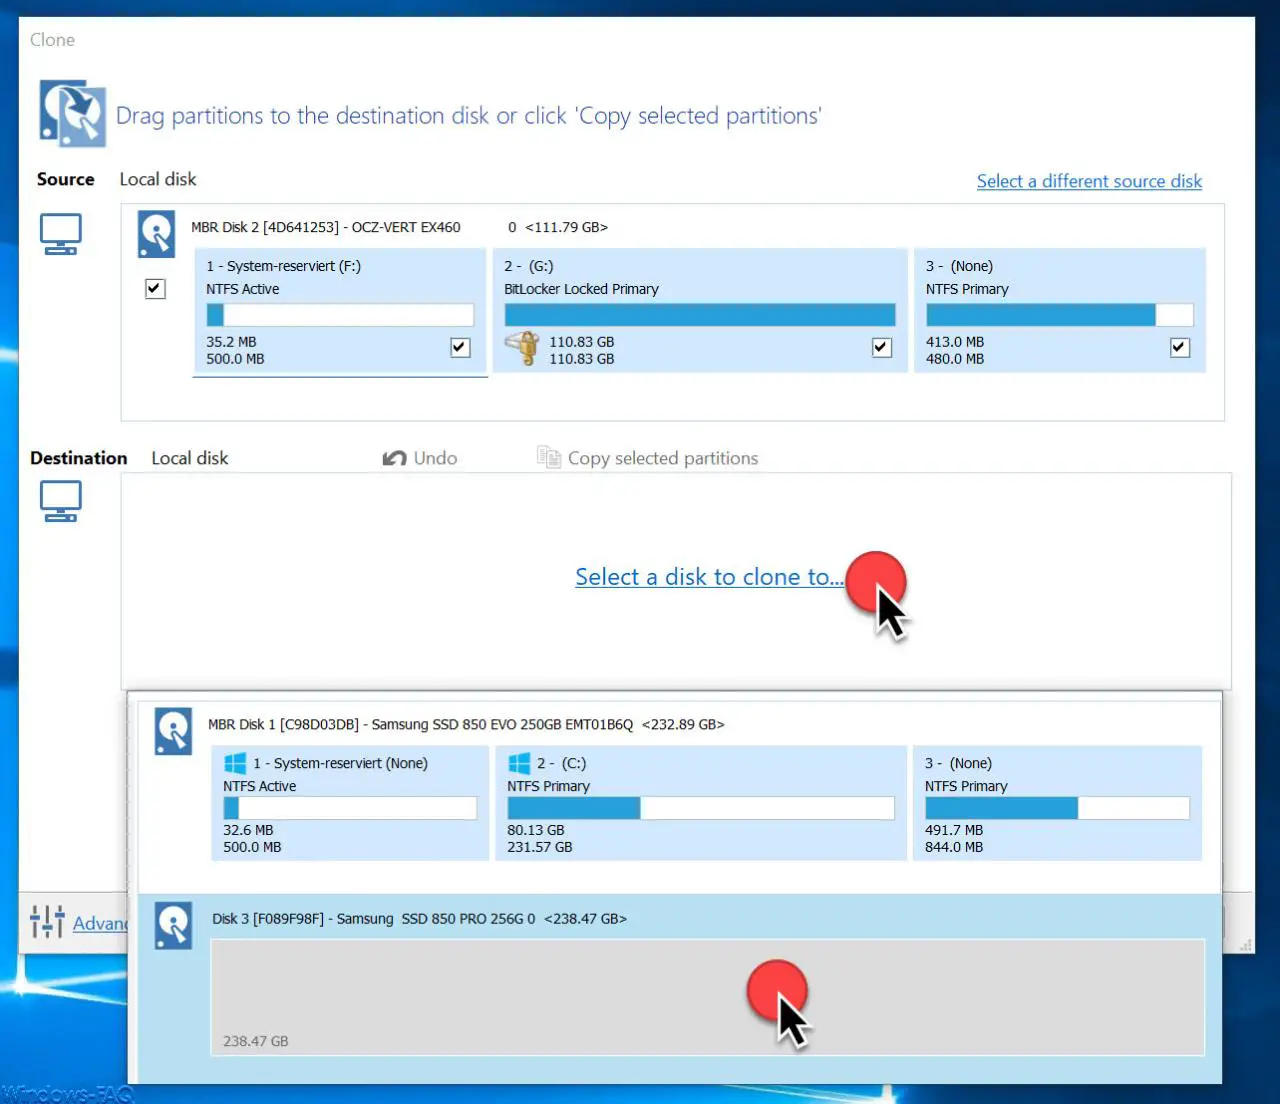
Here you can see that the source hard disk is already shown as ” Source “. Via the button
Select a disk to clone to …
then you have to select the target hard disk, on which the data will be cloned. In our case it is a Samsung SSD 850 Pro with 256 GB.
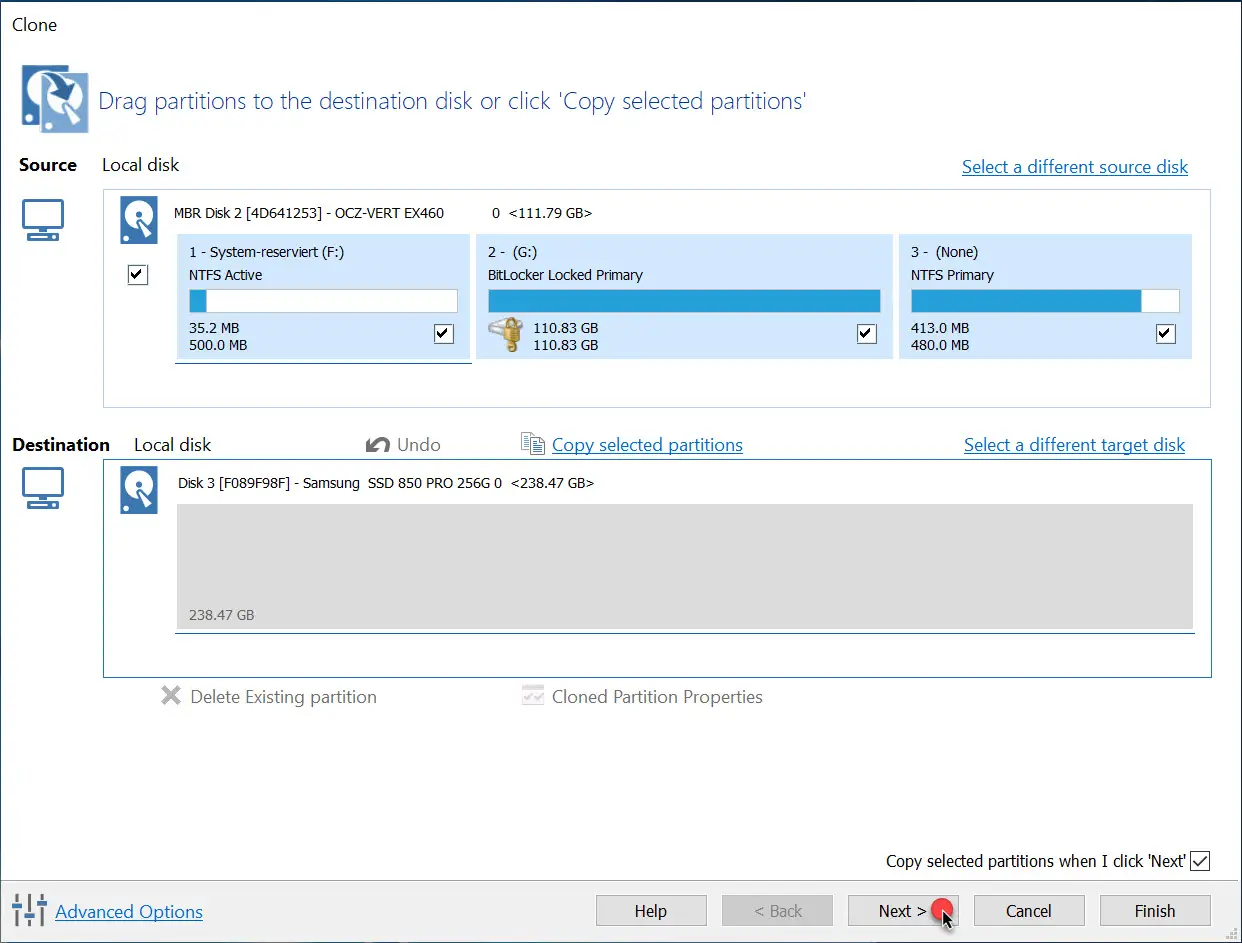
Now the source and destination are selected for the clone process and you can click on ” Next “.
Then you have the option to schedule the clone process and set other options, which are usually not necessary. For this reason, we will not go into these optional clone options .
After confirming “ Finish â€, the actual cloning process starts and the tool begins to clone the data from the source hard disk to the target hard disk.
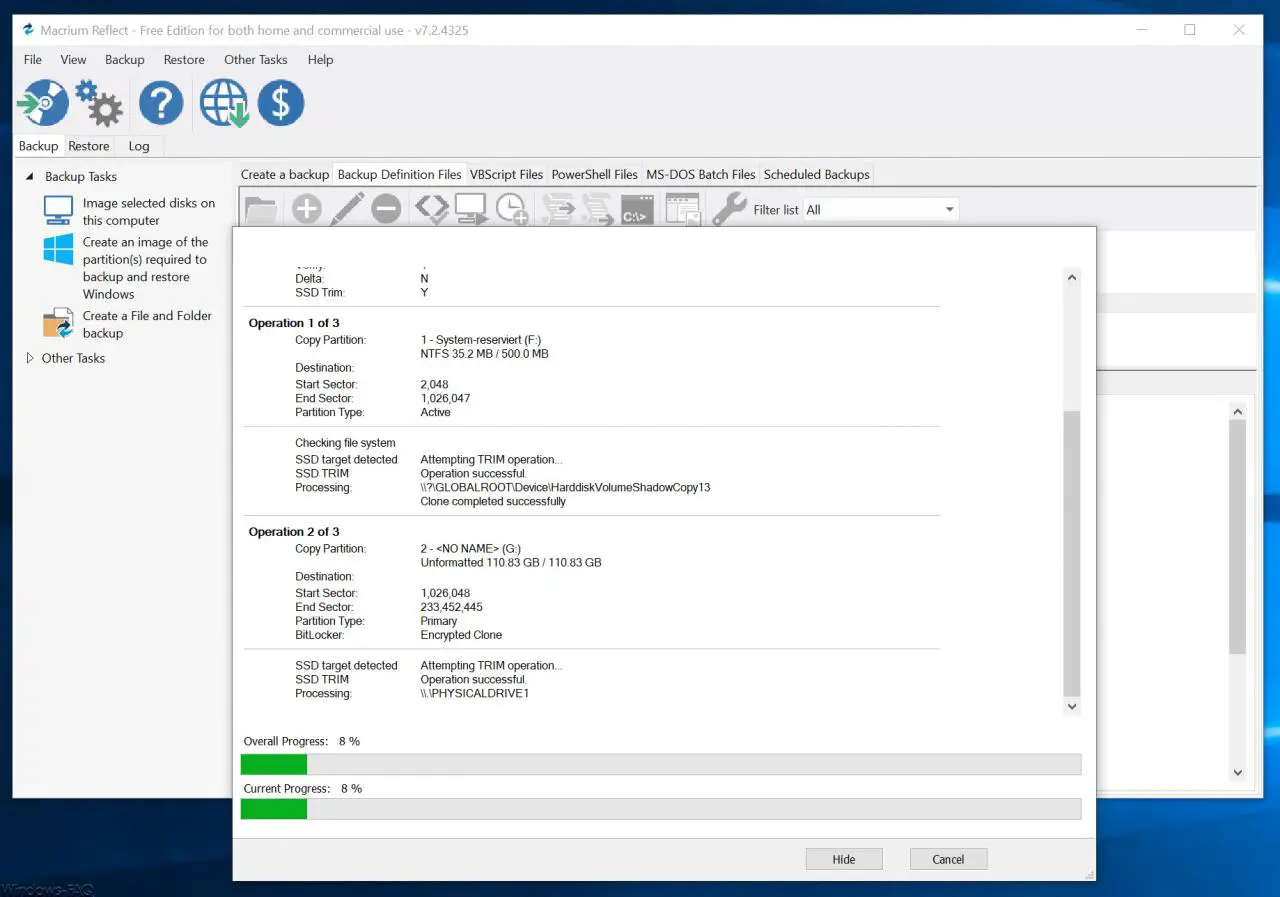
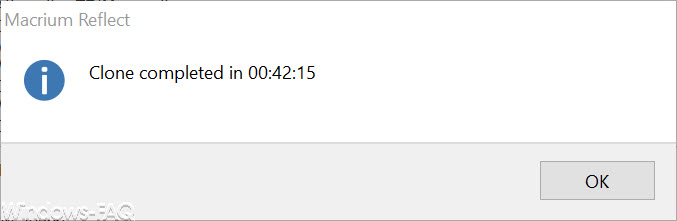
How long it takes to clone the hard drive depends somewhat on the performance of the hard drives used. For us, the process took almost 42 minutes to clone the hard drives successfully.
Then we installed the cloned SSD in our PC and booted Windows perfectly. So with this tool it was a breeze to clone Windows boot partitions .
We also did this with an SSD with Bitlocker , which also worked just as quickly and flawlessly. Only the Bitlocker recovery key had to be entered again during the first boot process, since the hardware had changed.
Further information on the topic of Windows partitions, data carriers and hard drives can also be found in these articles.
– Delete Windows recovery partition in order to enlarge partition
– Set up storage spaces and storage pool under Windows 10
– Set up software Raid 1 (mirroring) under Windows 10
– Change Windows Explorer hard disk icon
– Set Hyper-V default folder for virtual computers and hard disks
– Boot from external hard disk or make it bootable
– Define the time period for switching off the hard disk under Windows 10 (energy options)
– Convert hard disks from MBR to GPT in Windows 10 with MBR2GPT
– Convert FAT32 data carrier to NTFS format without data loss
– Hard disk or USB stick securely with DISKPART delete
– restore formatted hard disks with Wondershare Recoverit Pro
– query free and used hard disk space locally or remotely via PowerShell
– convert GPT hard disk to MBR