By default, Windows 10 is set so that Windows 10 gets the current system time from the specified Internet time servers . This usually works very well and usually nothing needs to be changed. If so, you can do this in the Date & Time app .
Simply press the key combination “Windows key + R”, as shown here.

Then you have to enter the following command.
timedate.cpl
After pressing the “OK” button, the program for editing the Windows system time , i.e. date & time, is called up. Then you have to go to the tab
Internet time
switch. Here you can see which time server Windows 10 is synchronizing with. In the following case, it is as follows.
The computer is set up so that it is automatically synchronized with ” time.nist.gov “.
Next synchronization: Date by time
The time was successfully synchronized with time.windows.com on 07/25/2017 at 12:48.
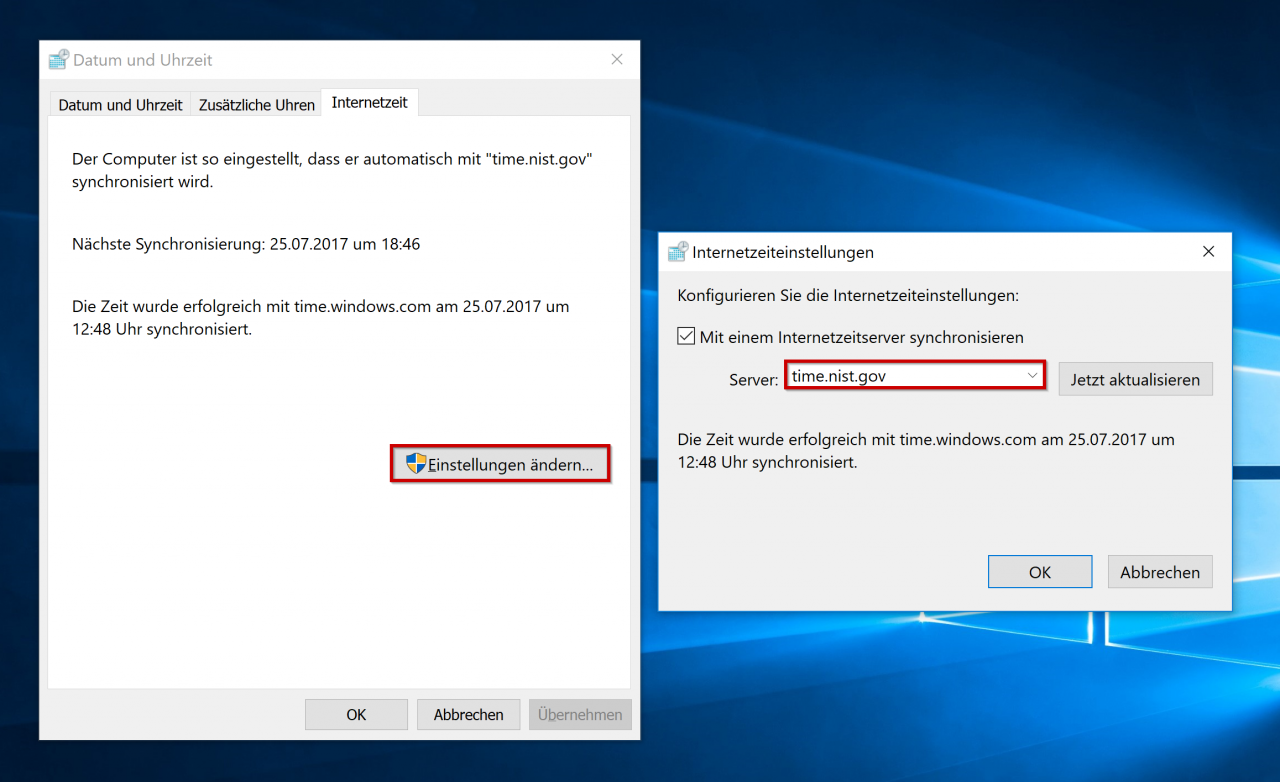
Via ” Change settings … ” you can then access the settings for the Internet time settings . There you can enter any external or internal time server . With ” Update now ” you can then test whether the date & time synchronization works perfectly.
The only problem here is that you can now specify a single time server to be used for time and data synchronization . If you want to specify multiple time servers , all you have to do is use the Windows registry. We will show you exactly how this works in one of our following articles.
If you are interested in other interesting Windows 10 settings , we recommend the following posts here in our Windows FAQ blog.
– Remove the “Uninstall” function from the Windows 10 start menu
– Shut down Windows 10 faster – Registry change
– Switch off UAC (user account control) via PowerShell or registry on Windows 10
– Switch off Cortana using the registry entry
– Registry value for hidden files in Windows Explorer
– standard printer change via registry
– change registry access to prevent control panel access
– Windows 10 – “Let Windows automatically manage standard printer” deactivate
– load distribution on 2 network cards via registry change