
In today’s article, let’s learn how to fix the wireless adapter error in the system. The error has two variations.
Windows is still setting up the class configuration for this device [Code 56]Copy
or
Wireless adapter windows is still setting up the class configuration for this device (code 56)Copy
This error appears when the system’s network adapter conflicts with the VPN installed on the system. This bug is popular on Checkpoint VPN. Some users have noticed that problem when updating the system to Windows 10 version 1709.
Here are some fixes to help you overcome the wireless adapter error.
Solution 1: reset your network adapter
1. Open the Run Dialog using the Win + R keys .
Follow the below steps in Windows 10:
2. Type the command ms-settings: network-status and press Enter .
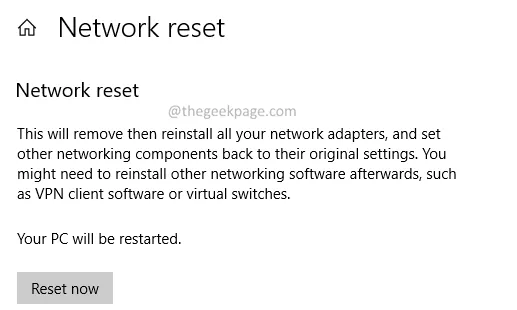
3. In the window that appears, click Network Reset.
4. In the Reset network window that opens, click Reset now .
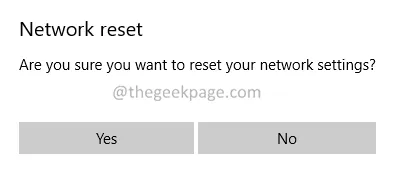
5. In the pop-up window that appears, click Yes . Go to step 6.
Follow the below steps in Windows 11:
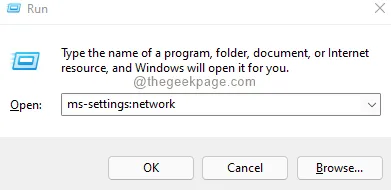
2. Type ms-settings: network and press OK .
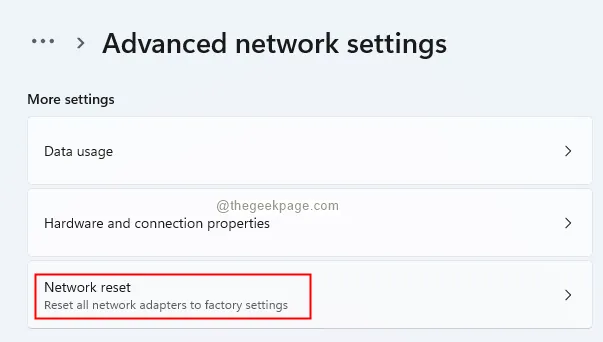
3.In the window that appears, scroll down. Select Advanced network settings.

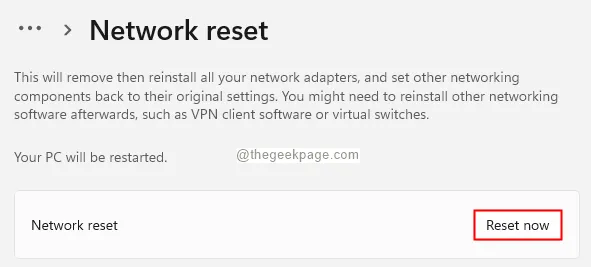
4. The Advanced Network Settings window opens. Scroll down and look for the Network Reset option under More settings.
5. In the Network Reset window, click Reset now. If you see a pop-up window, click Yes .
6. You will now see a pop-up window You are about to sign off . Click OK .
7. Restart your system.
8. On the login screen, you will see a pop-up window on the right side with the message “Do you want to allow your PC to be discoverable by other PCs and devices on this network? «
9. Click Yes .
Solution 2: uninstall and reinstall your network adapter
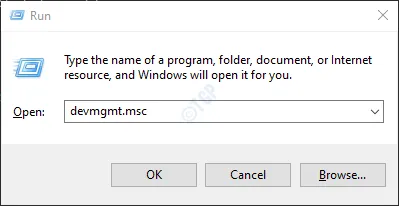
1. Open the Run dialog box.
2. Type devmgmt.msc and hit Enter.
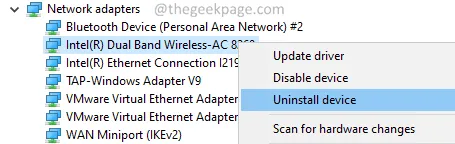
3. In the Device Manager window that opens, scroll down and double-click on Network adapters.
4. Right-click on your Wireless Adapter and select Uninstall Device .
5. In the Uninstall Device window, click the Uninstall button.
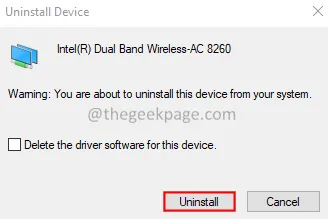
6. Restart the system.
Check if this helps.
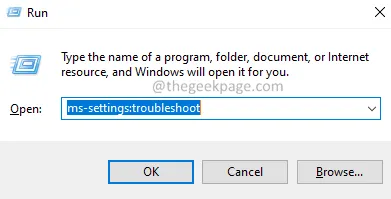
Solution 3: run the troubleshooter for internet connection
1. Open the Run dialog box.
2. Type the command ms-settings: troubleshoot, and press Enter .
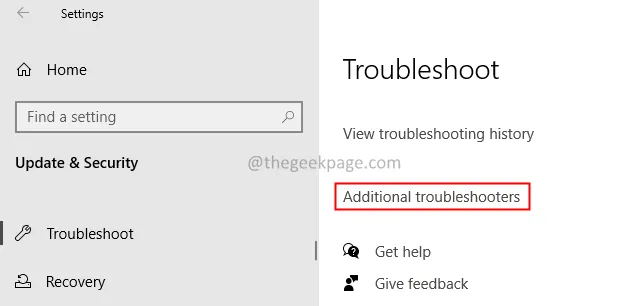
Follow the below steps in Windows 10:
3. In the opening window, click Additional troubleshooters.
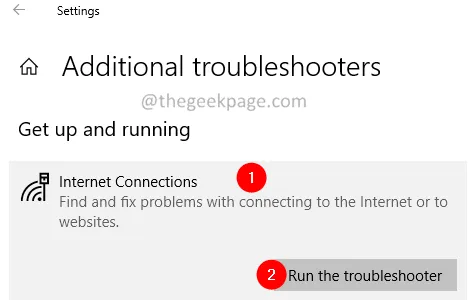
4. Click Internet Connections.
5. Press on the Run the troubleshooter . Go to step 6.
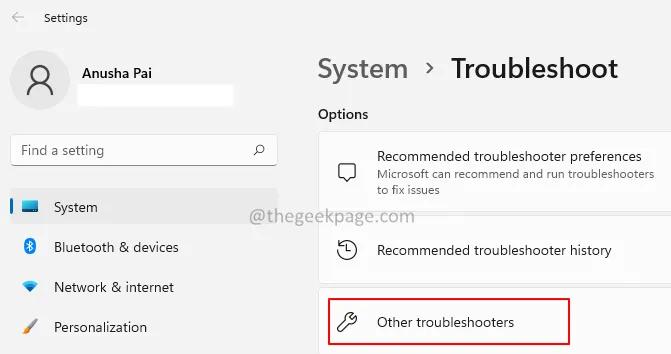
Follow the below steps in Windows 11:
3. In the window that appears, click Other troubleshooters .
4. In the initial window, locate the Internet Connections option.
5. Click on the Run next to Internet Connections.

6. In the troubleshooter window, select Troubleshoot my connection to the internet .
7. Choose the Try these repairs as Administrator option .
8. Wait until your connection is repaired.
Solution 4: uninstall the update
If you notice the problem after the system update, please identify the recent updates and then uninstall that system update.
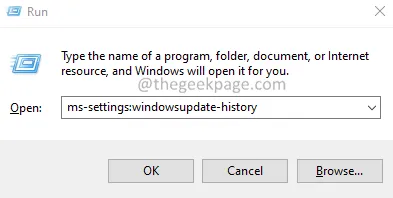
1. Open the Run dialog box.
2. Enter ms-settings: windowsupdate-history , press Enter.
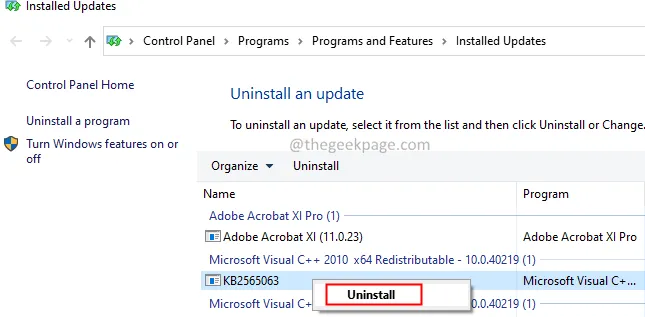
3. Click Uninstall updates .

4. Look for the update and right click on it.
5. Select Uninstall .
Follow the instructions on the screen and complete the uninstall process.
That’s All Guys.
We hope this article has been informative. Thank you for reading.