Windows 10 installations are usually carried out as a standard installation with a hard disk or SSD. Systems that should be designed as raid systems due to their importance can use the software raid function of Windows 10 .
2 hard drives are combined in a RAID 1 network (mirroring) . This means that all changes that are made on the active hard disk are also automatically written on the second hard disk. Thus, both HDDs or SSDs are always on the same database and in the event of a defect, the error-free hard disk can then be used to boot. This brings more security for the Windows 10 client used.
Microsoft also delivers this software raid solution with Windows 10 . To configure a Windows 10 client as Raid 1 , it is sufficient to install a PC, notebook or virtual PC with a hard drive. After the installation, you simply add an empty 2nd hard disk so that it is visible in the hard disk manager or in disk management (diskmgmt.msc).
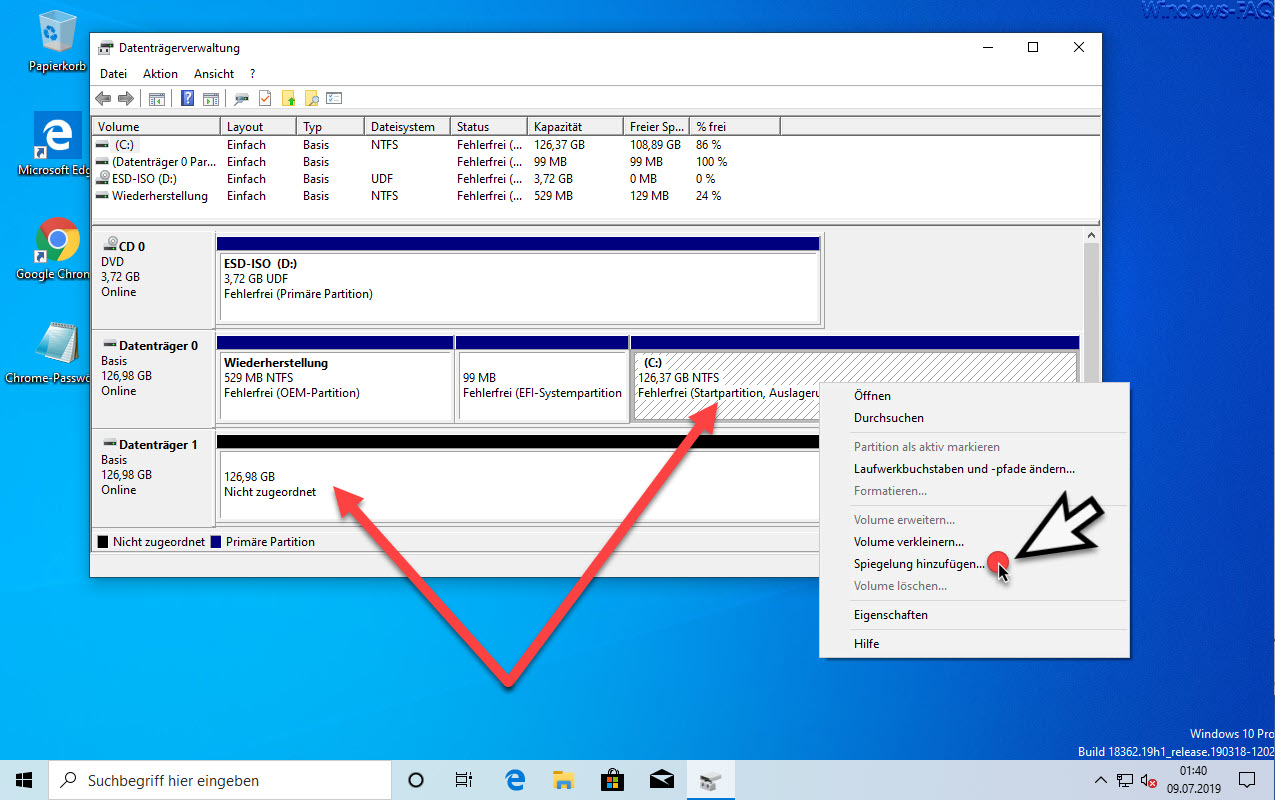
As you can see here on the picture, the PC has 2 data carriers. Both are 128GB in size, whereby the second hard drive is still completely empty and unformatted .
Now you can call the context menu with the right mouse button and the point
Add reflection …
choose. Then this display appears.
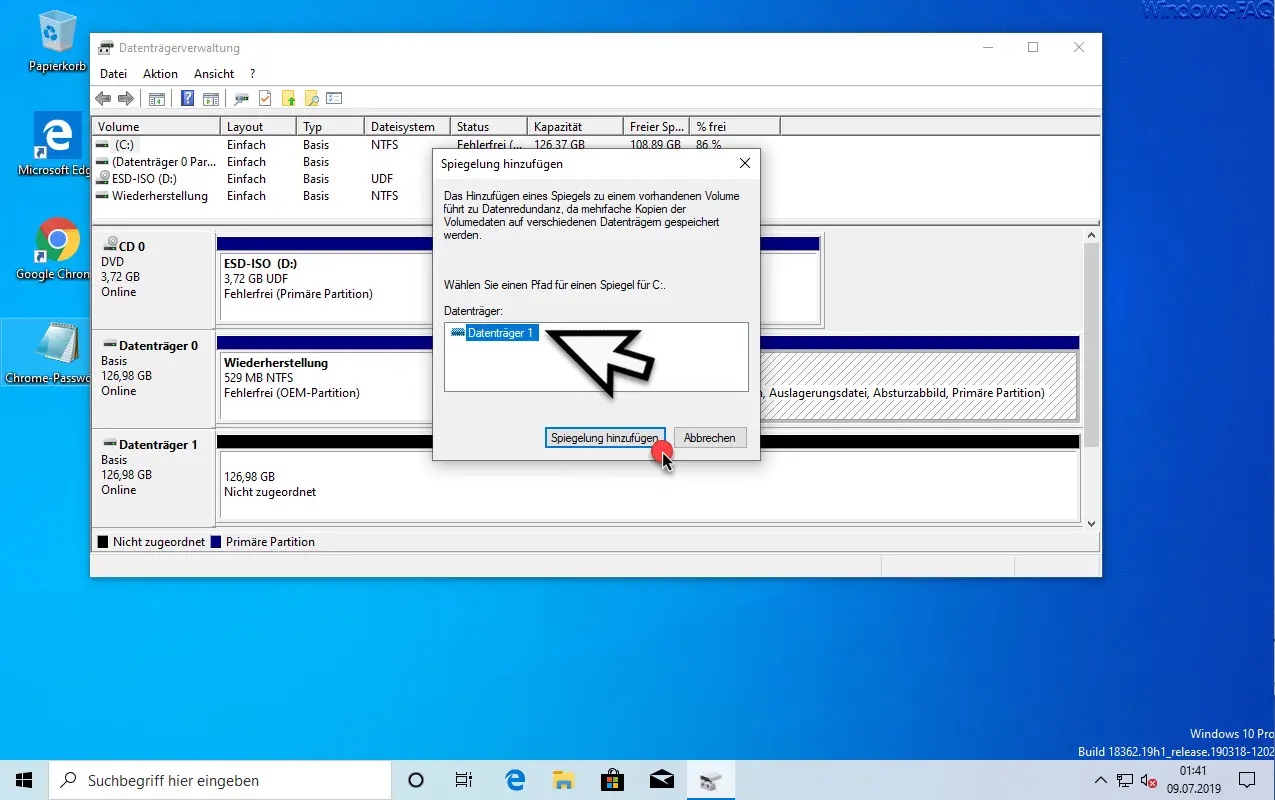
Since the PC currently only has an additional, empty hard disk, the selection of “Disk 1 ” remains here .
The following message is also displayed.
Adding a mirror to an existing volume leads to data redundancy, since multiple copies of the volume data are stored on different data carriers.
After confirming ” Add mirroring ” the following query appears.
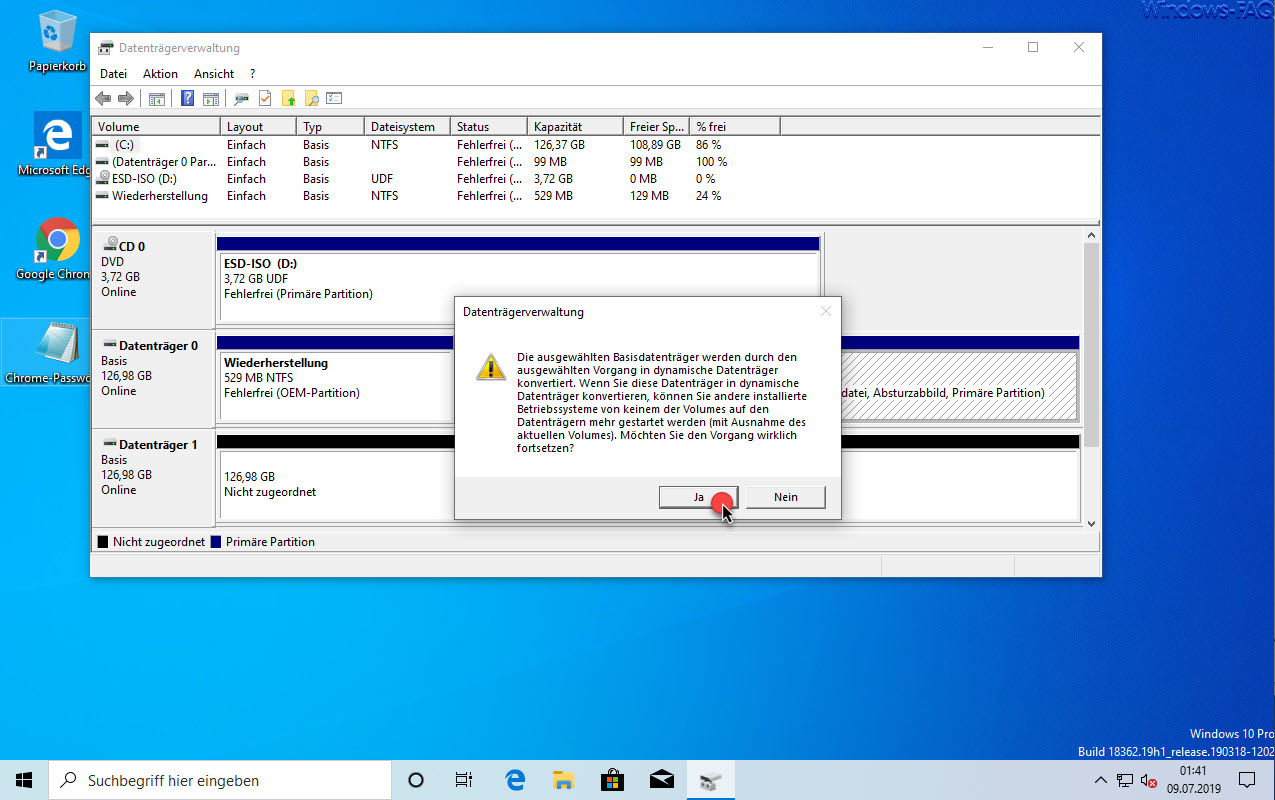
The exact message is:
The selected basic volumes are converted to dynamic volumes by the selected operation. If you convert these disks to dynamic disks, other installed operating systems can no longer be started from any of the volumes on the disks (with the exception of the current volume). Are you sure you want to continue?
This message should be observed and you should be aware of the consequences of the conversion . In any case, you should have one or more current backups before setting up a mirror .
After clicking on ” Yes “, the setup of the Raid 1 mirroring begins .
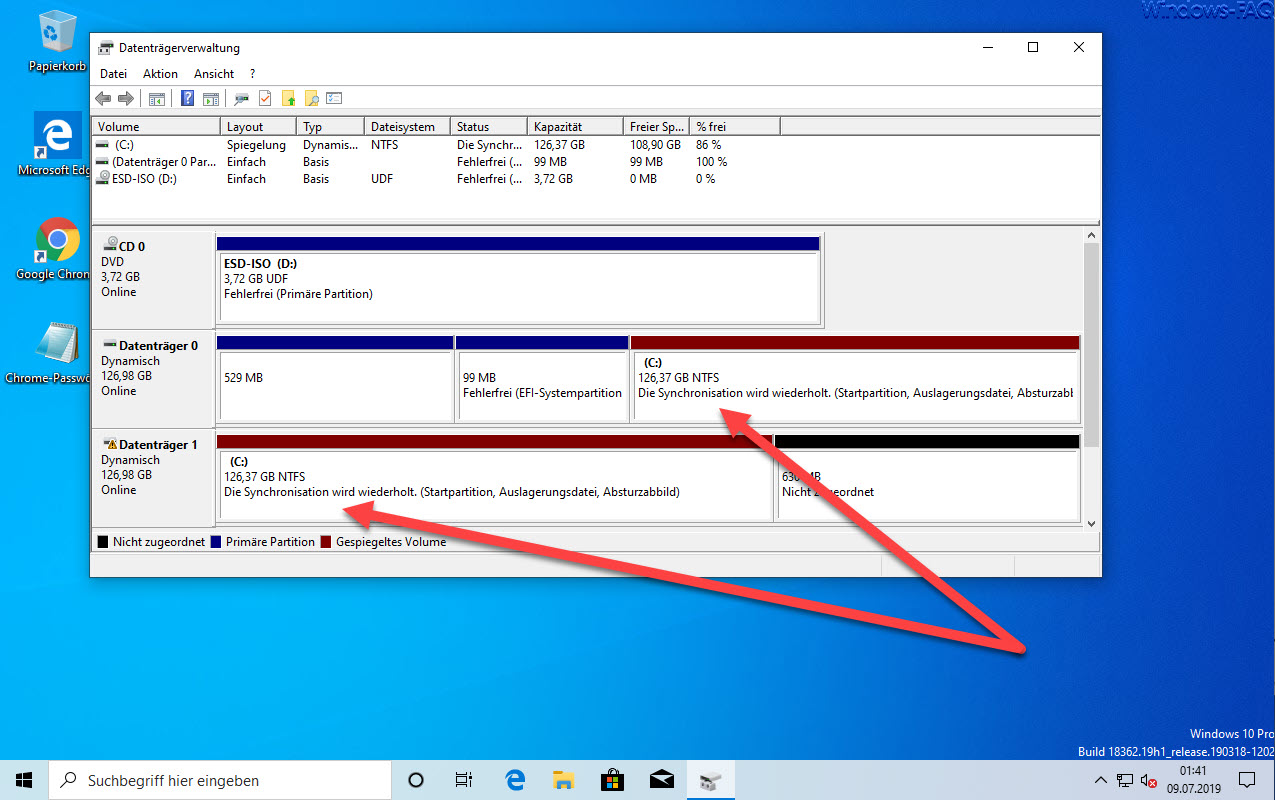
In this case, both partitions are now displayed ” RED “. In addition, both partitions show the message immediately after mirroring is set up
The synchronization is repeated
at. This does not have to unsettle you, because it takes some time until Windows 10 has mirrored all information from the 1st hard disk to the 2nd hard disk . Only after all data has been completely duplicated does the display change as follows.
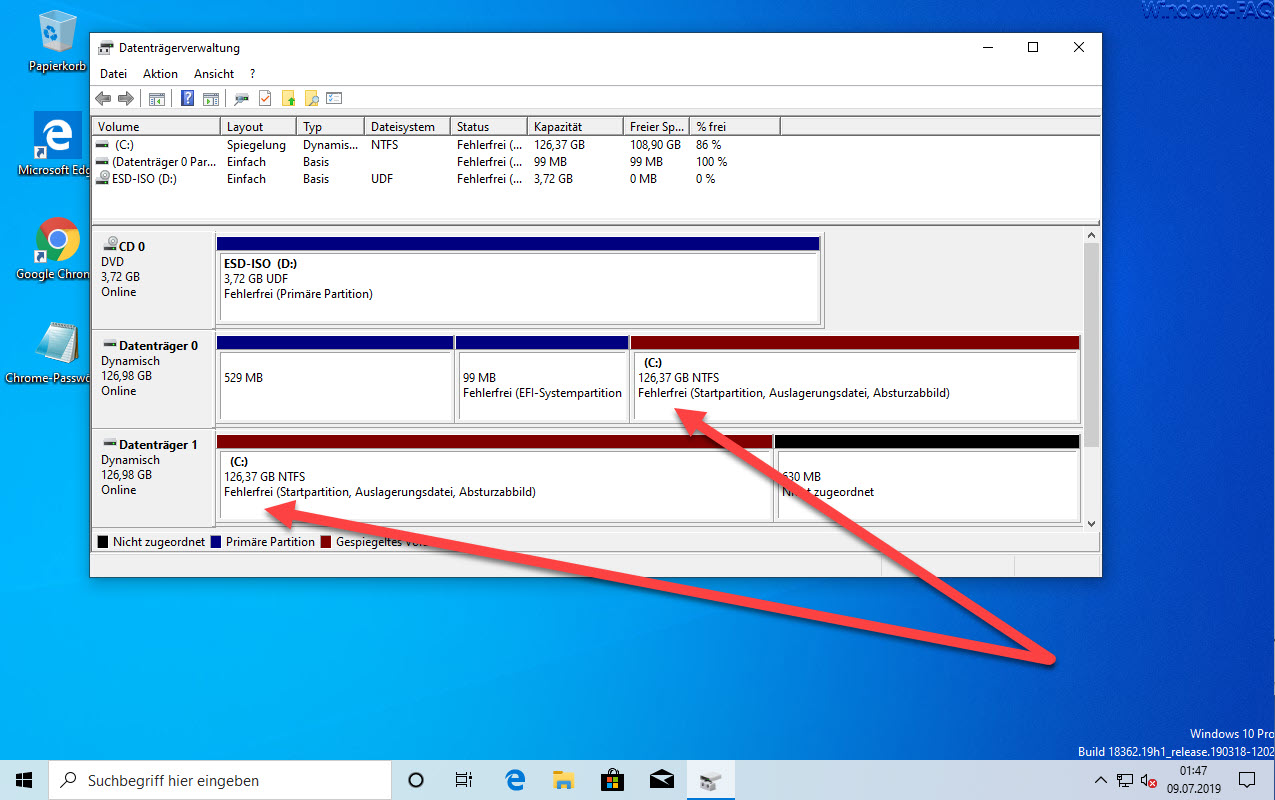
Now the status
Flawless
displayed. This is a sign that the Raid 1 mirroring was carried out properly.
With a subsequent restart you will now see the following start screen.
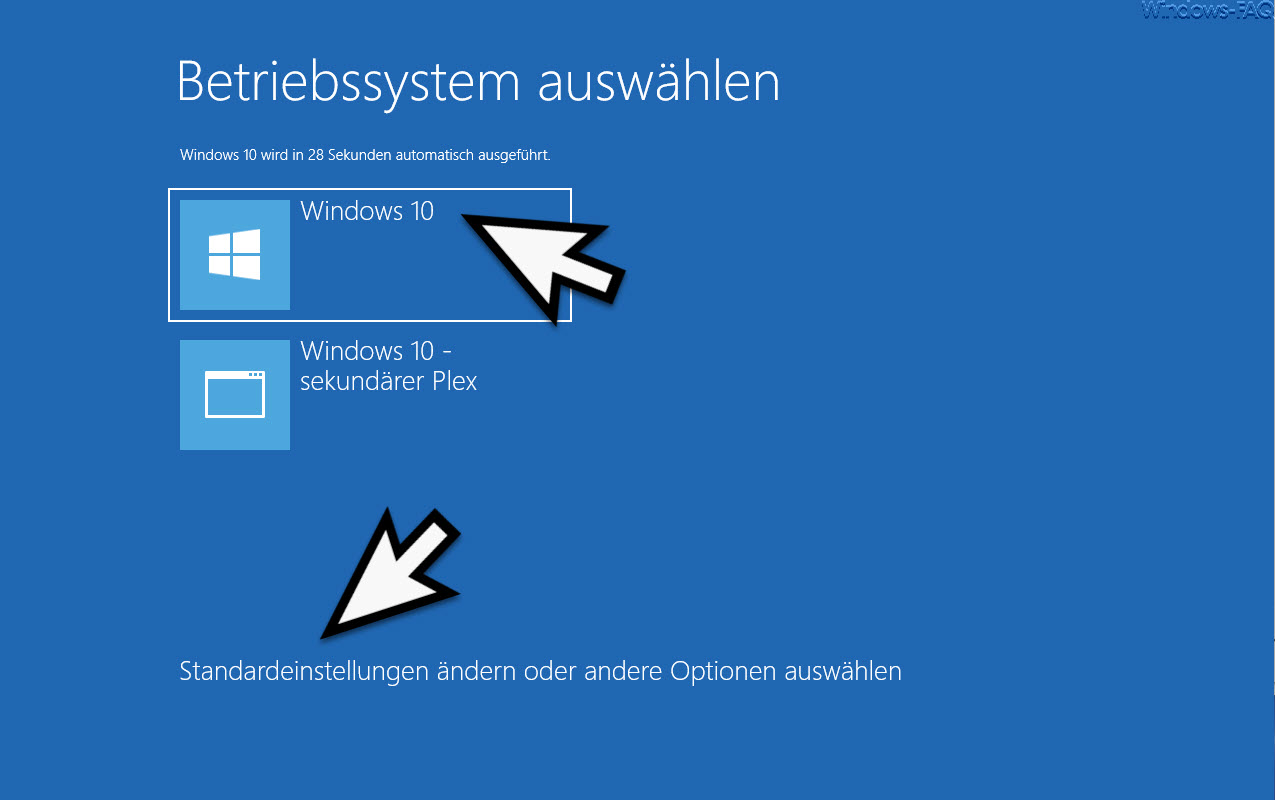
Here you have the option to select the desired start partition. As a rule, it will always be the first partition. About the option
Change default settings or select other options
then you have other setting options for software mirroring .
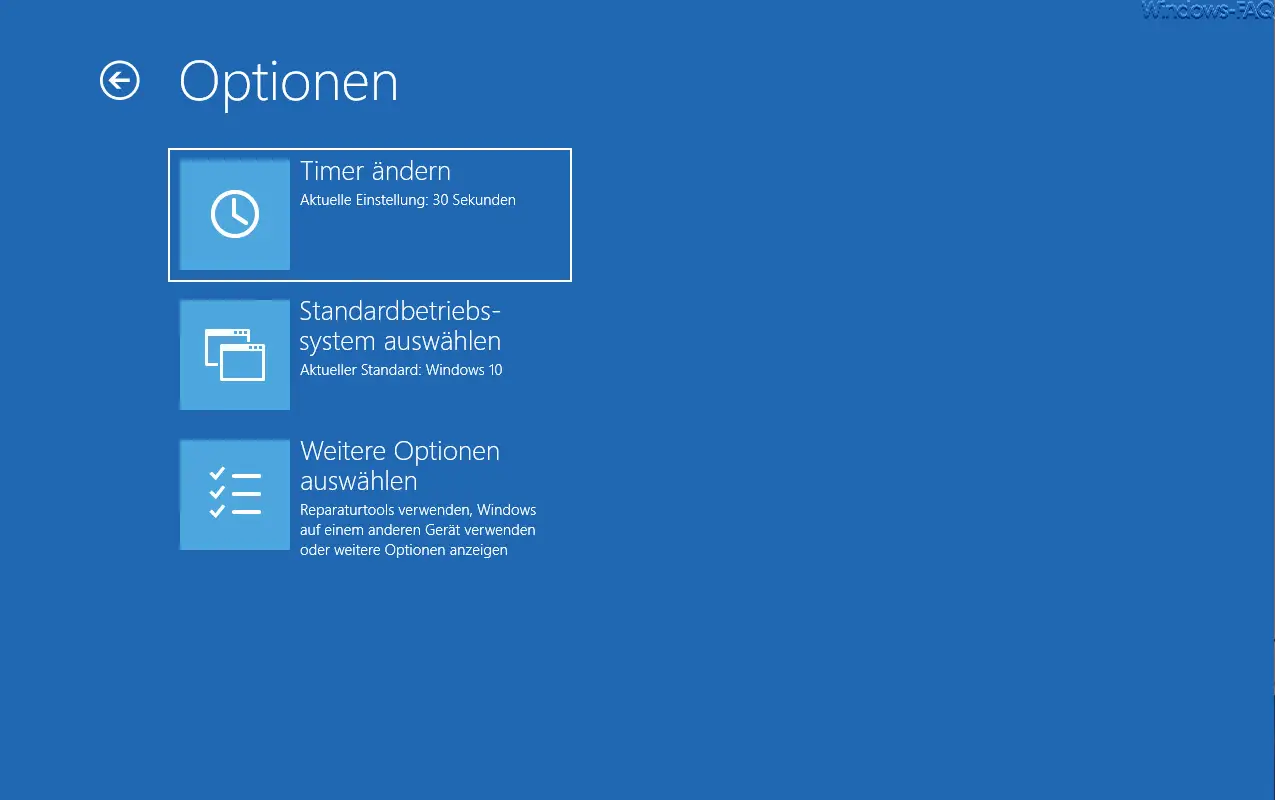
Here you can change the timer , for example . Using the timer, you select a period of time for how long the start screen with the 2 partitions is displayed.
Furthermore, you can select the standard operating system, which should be started automatically after the timer has expired.
Various repair tools or troubleshooting options are then available to you via the ” Other options “.
Overall, it is very easy to equip a PC with software Raid 1 mirroring and thus increase the security and stability of the PC.
Should you be interested in further information on the subject of ” hard disks & partitions “, we recommend the following articles.
– Change Windows Explorer hard disk icon
– Define Hyper-V default
folder for virtual computers and hard disks – Restore formatted hard disks with Wondershare Recoverit Pro
– Query free and used hard disk space locally or remotely using PowerShell
– Convert GPT hard disk to MBR
– Boot from external hard disk or make it bootable
– securely delete the hard disk or USB stick with DISKPART
– set the time period for switching off the hard disk under Windows 10 (energy options)
– convert hard disks from MBR to GPT in Windows 10 with MBR2GPT