With Windows 10 , Microsoft introduced the possibility that Windows users can log in with a PIN instead of a password . In this post, we would like to show you exactly how you can set up the PIN registration for Windows 10 and what things you should pay attention to.
Is the PIN registration secure?
This is a fundamental question, which we would answer with “ YES ”. You only have to set a 4-digit PIN , but in the end it is just as secure as your pin number on your bank card or credit card . Of course, you should always make sure that you don’t write down your PIN number somewhere or that someone watches you when you type in the PIN .
Otherwise, Microsoft has also integrated some security features into the PIN login for Windows 10 . If someone tries to crack your PIN and enters the PIN incorrectly five times, a message appears that you have to enter a certain passphrase so that you can repeat the PIN entry again. Here is an example of the Windows 10 security question .
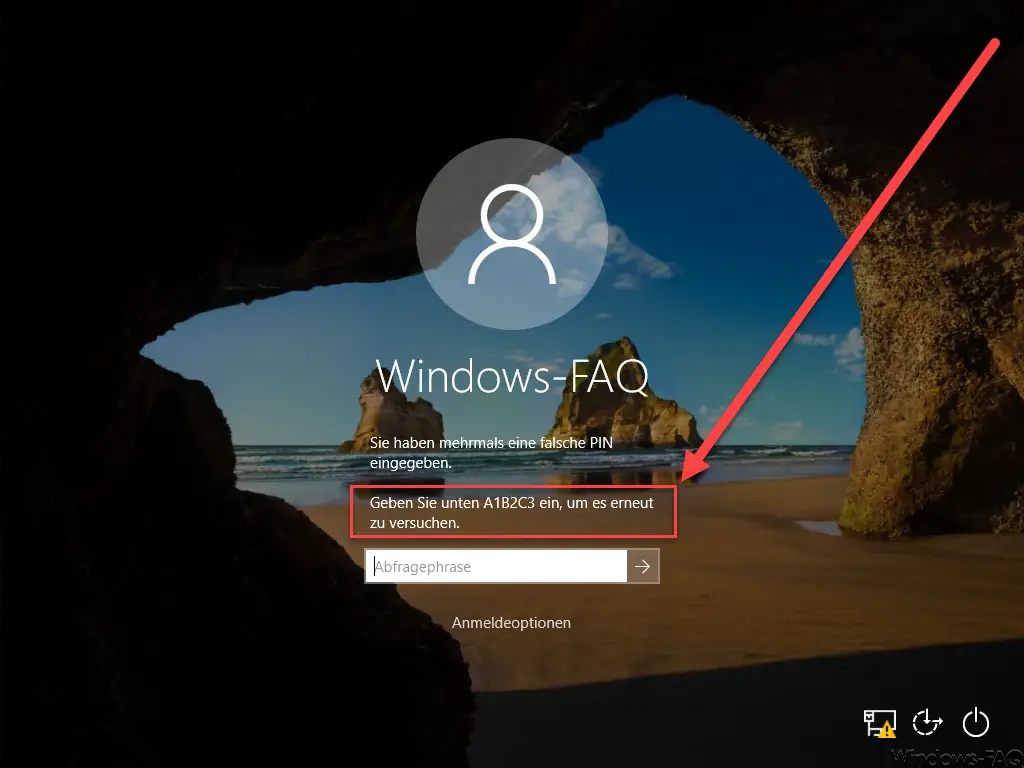
If you then enter the pin incorrectly five times , the Windows 10 PC must be restarted. Only then can you try again to enter the PIN . If 5 wrong attempts are made again, the attacker must first wait 30 seconds before entering the passphrase “A1B2C3” again . And so the game continues, because with further PIN attempts , the waiting time doubles more and more. First he has to wait 1 minute, then 2, 5, 10, 30, 60 minutes etc. before he can use the PIN again.
You also have the option of specifying a longer PIN than 4 characters . In the end, this is up to everyone, although of course a longer PIN offers more security than a short, 4-digit PIN. We will go into more detail later on when setting up the entire range of PIN assignments . Overall, however, it can be said that PIN registration is quite secure.
Set up PIN login
To activate the PIN entry in Windows 10, you must first open the Windows Settings app using the key combination Windows key + “I” . Then you enter the search term here
pin code
a. Now the option ” Set up login by PIN ” appears, which you then confirm.
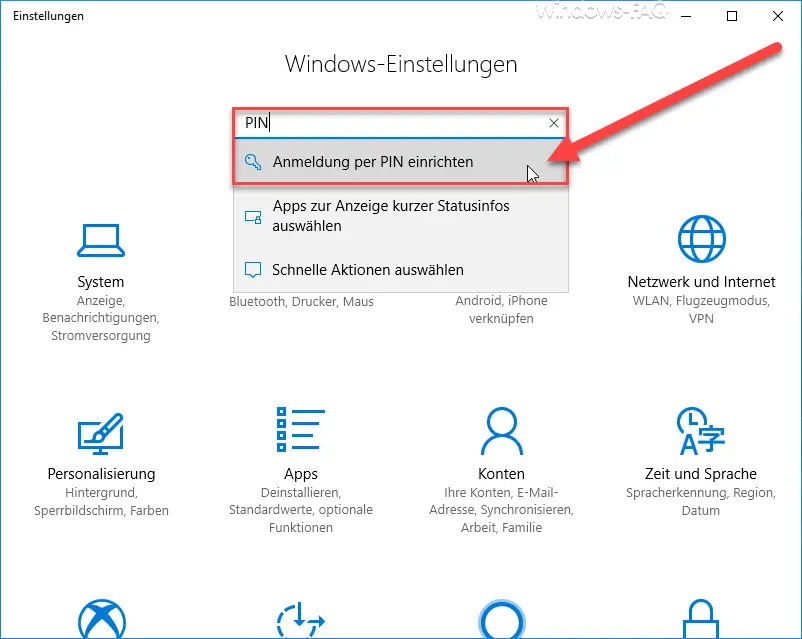
Then you come to the Windows login options, where you can make settings for ” Windows Hello “, for the normal ” Windows password ” and of course for the ” PIN “. Microsoft describes adding the PIN as follows.
Create a PIN that will be used instead of passwords. You will be asked to enter this PIN when you log in to Windows, your apps and services.
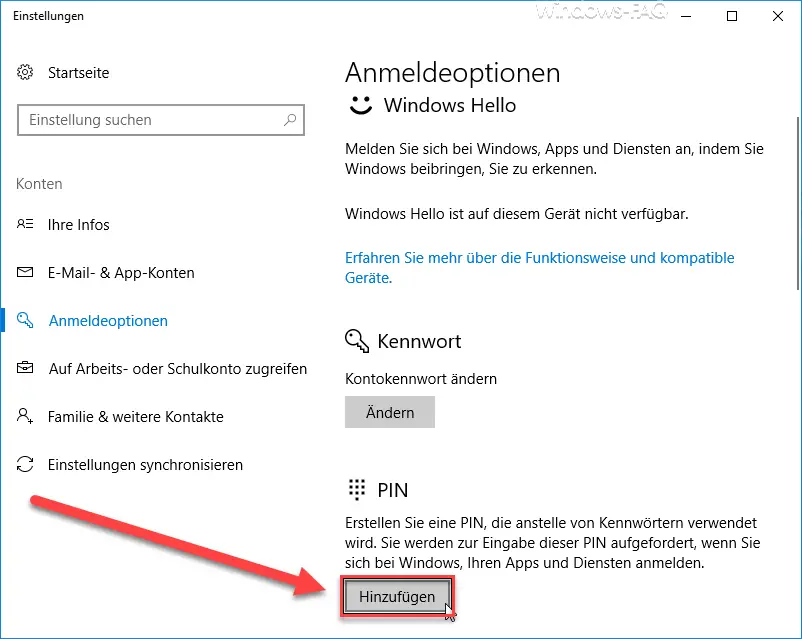
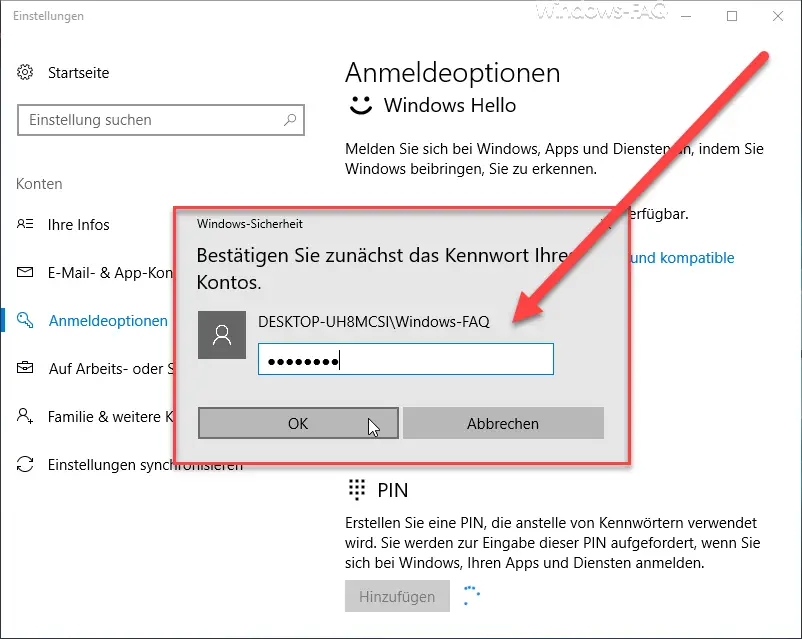
Now that you have clicked on ” Add “, you will be asked to enter your ” normal ” Windows password. This is queried by Microsoft for security so that no other user who may be working on your PC for a short time can store a PIN for you . You can only continue the PIN processing if you have entered your password correctly.
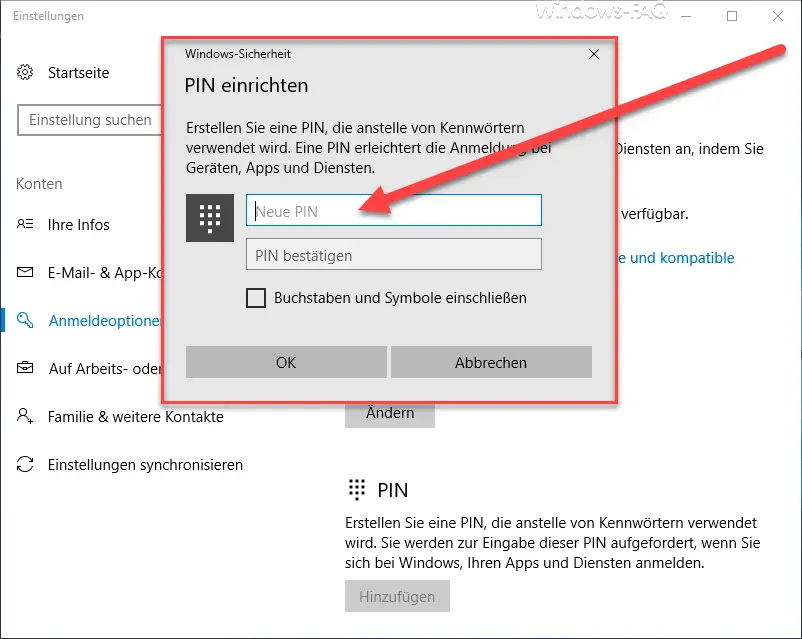
Then the ” Set up PIN ” mask appears , as you can see below. Now the actual PIN assignment begins, you have to enter a 4-digit number twice in the existing fields. Both entries must of course match, only then can you close the window with ” OK “.
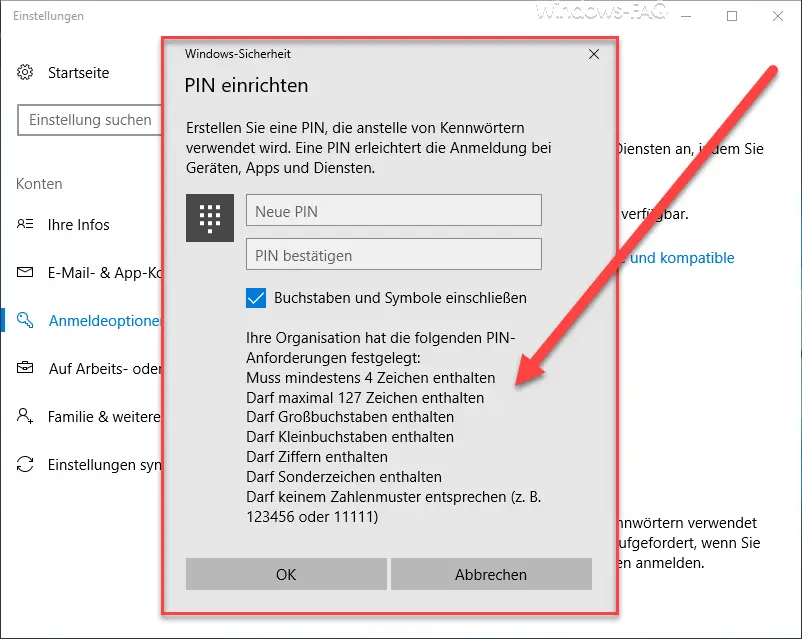
If you tick ” Include letters and symbols “, the following PIN information will be displayed.
Here you can see which PIN requirements your organization has set. In our example, nothing was specified, they are simply the standard PIN requirements from Microsoft or Windows 10. These are as follows:
- PIN must contain at least 4 characters
- The PIN can contain a maximum of 127 characters
- It can contain capital letters
- The PIN may also contain lowercase letters
- It can contain digits
- Even special characters are allowed.
- The PIN must not correspond to a number pattern (e.g. 123456 or 11111)
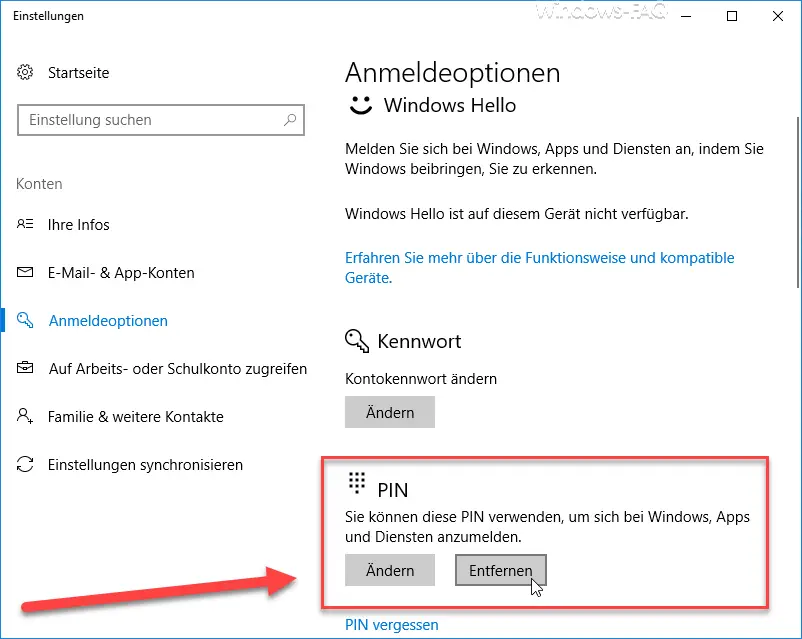
After you have set the PIN for the Windows 10 login , you will come back to the ” Login options ” of the Windows 10 settings app. Here the point ” Add ” has disappeared after the PIN , but you can now change the Windows 10 PIN here or even ” Remove “.
The entire PIN setup in Windows 10 is now complete. If you now restart the PC or log off once, the following login screen from Windows 10 appears. By default you only need to enter the PIN number . If you have chosen a 4-digit PIN number, you do not even need to press ” Enter ” at the end of the entry . Registration takes place automatically as soon as the 4 digits of the pin number match the stored PIN. If the PIN is extended or if you use special characters, lower or upper case letters, you still have to confirm your entry with Enter.
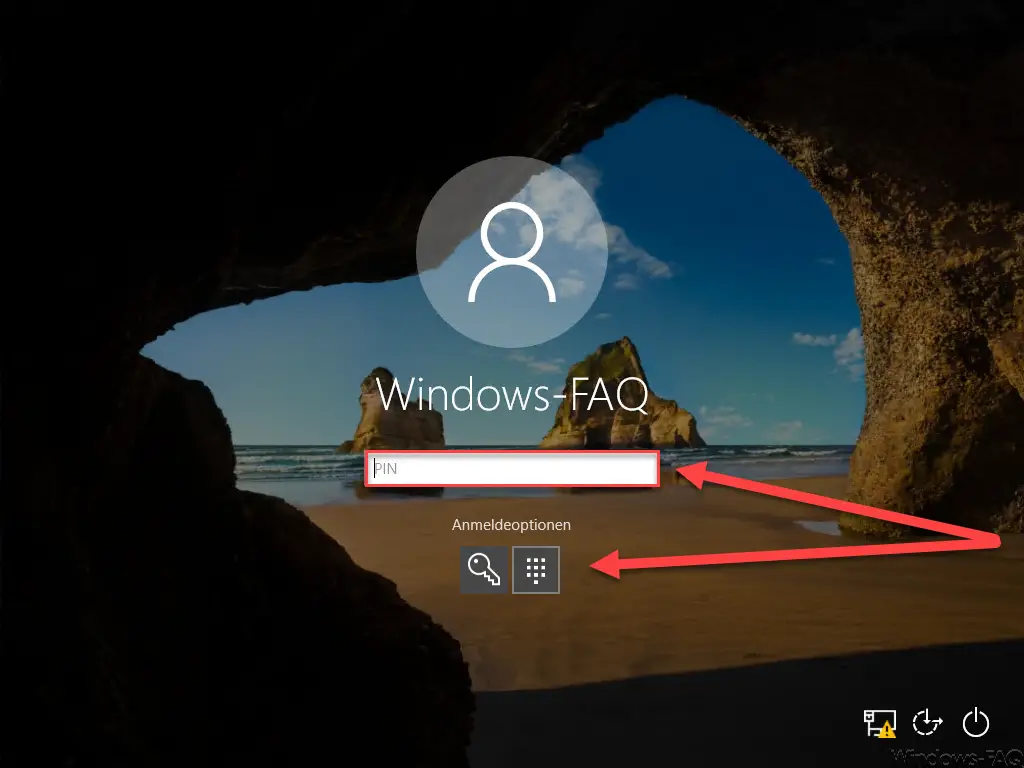
You can now use the ” Registration options ” to select or switch between the two registration options ” PIN ” or ” Password entry “. Overall, we find the possibility of PIN registration in Windows 10 quite successful and can only recommend it to you. Have fun setting up!
If you are looking for other useful tips & tricks on the topic of “Windows registration” , we recommend the following articles.
– Always wait for the network when restarting the computer and logging in
– Deactivate
animation when logging in for the first time in Windows 10 – Deactivate greeting animation in Windows 10 logon by changing the registry
– Automatic user logon after Windows has started
– Windows profile error message “The logon of the “User
Profile Service” failed. ” – Windows Update with automatic user login after installation
– Server Manager does not start automatically after Windows login