It is relatively easy to delete the OneDrive entry from Windows 10 Explorer . We already described in detail yesterday how you can easily delete or uninstall OneDrive completely and today we want to explain briefly how you can remove the OneDrive shortcut from Windows Explorer.
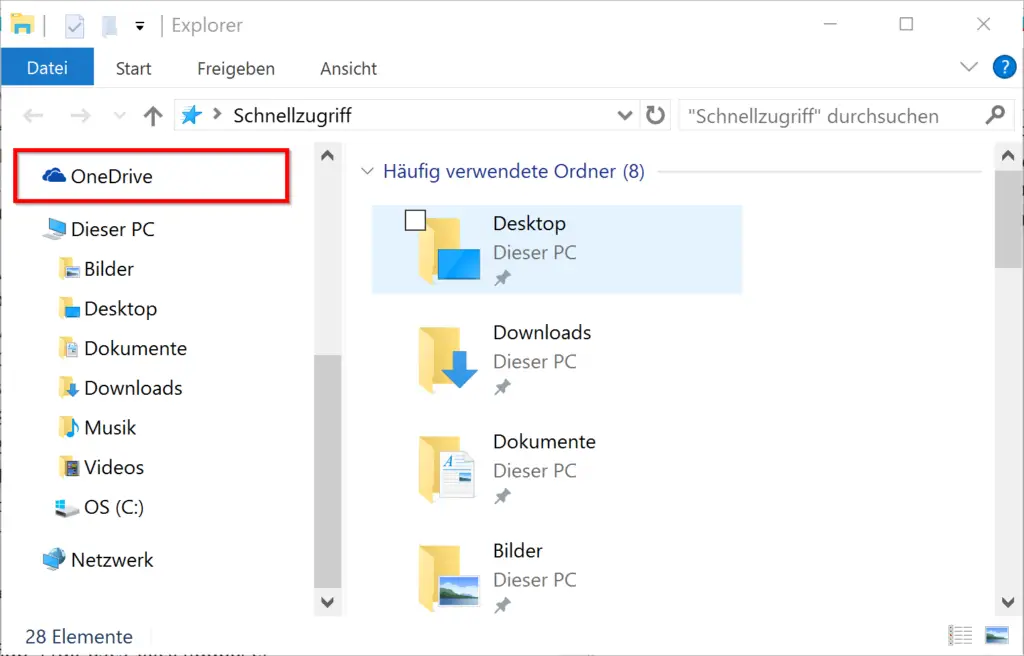
By default, Windows 10 Explorer looks like this, OneDrive is clearly visible on the left side of Windows Explorer.

After you have completely uninstalled OneDrive from the Windows system, you can delete the icon as follows.
Disable OneDrive in registry
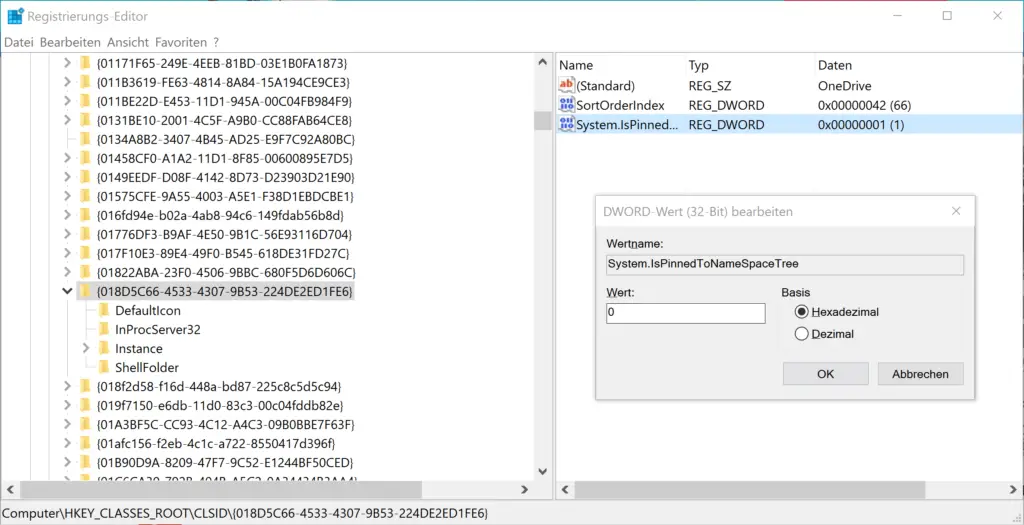
You have to open the Windows Registry Editor (regedit.exe) and switch to the following key.
HKEY_CLASSES_ROOT CLSID {018D5C66-4533-4307-9B53-224DE2ED1FE6}
There you will find the following value, as can be seen in the following image
System.IsPinnedToNameSpaceTree
By default, this value is ” 1 “. If you set this value to ” 0 “, the OneDrive entry is immediately removed from Windows Explorer .

You don’t even have to restart the PC to do this, the changes in the Windows registry immediately affect Windows Explorer and the entry is deleted.
You have now completely removed OneDrive from your system .
Below we have listed other interesting articles related to Windows Explorer , which are also available here on Windows FAQ . Maybe there is one or two interesting things for you.
– Useful key combinations from Windows 10 Explorer
– Registry value for hidden files in Windows Explorer
– Change the default path in Windows 7
– Quickly create a new directory in Explorer
– Show hidden files, system files and file extensions in Explorer by default