BitLocker is Microsoft’s name for the operating system encryption of hard disks under Windows. Microsoft has already introduced Bitlocker encryption technology with Windows Vista and is constantly developing it further. Today we would like to show you how you can activate Bitlocker in Windows 10 and thus encrypt your hard drives securely.
First, the BitLocker Drive Encryption utility is needed. The fastest way to find this is to search in the Windows 10 Start menu
Manage Bitlocker
enter. We have shown you this once below.
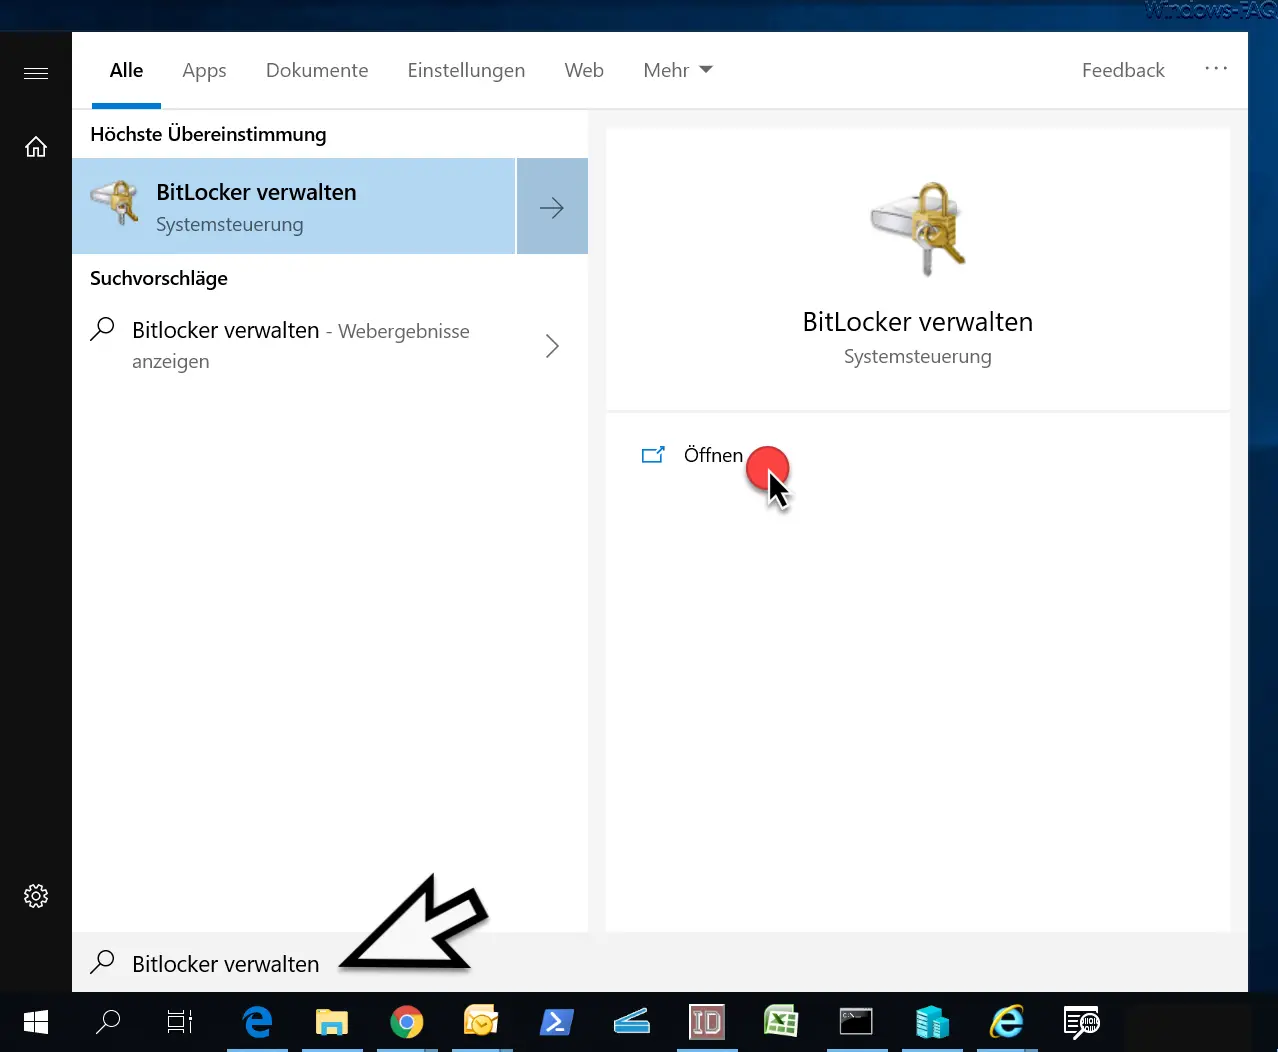
After the call the administration tool for the BitLocker drive encryption is shown. Here you now have the option to activate “ BitLocker ”, as you can see in the figure below.
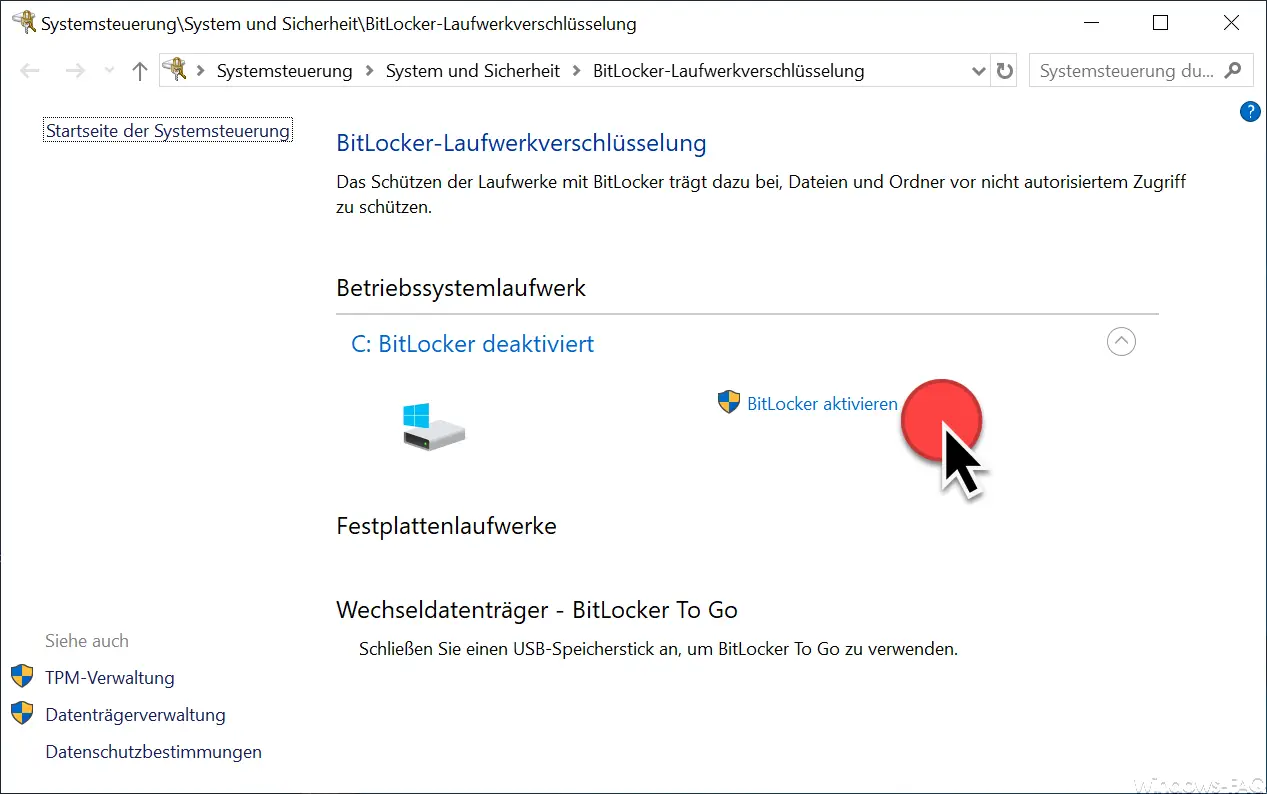
Now BitLocker encryption is started and the system examines whether it meets all the requirements for BitLocker encryption. If, for example, the following display appears, further preparatory work is necessary.
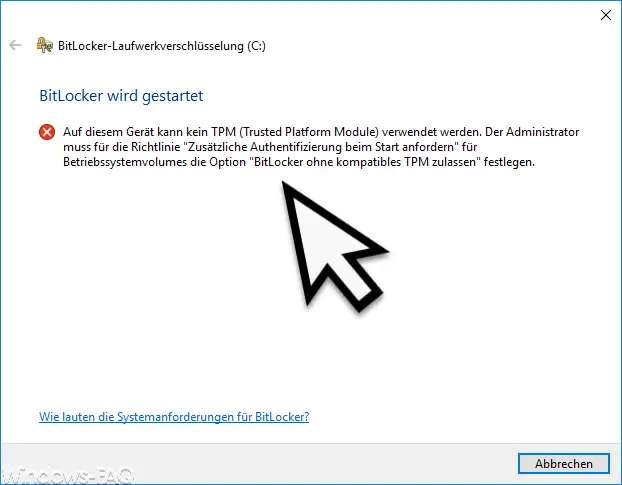
The following message is displayed, for example, if you have not activated the BitLocker function in the BIOS . The message is:
TPM (Trusted Platform Module) cannot be used on this device. The administrator must set the Allow BitLocker Without Compatible TPM option for the operating system volumes for the Request Additional Authentication On Startup policy.
This message is not entirely correct, because newer hardware in particular has a corresponding option in the BIOS where you can activate the “TPM” function , as you can see here.
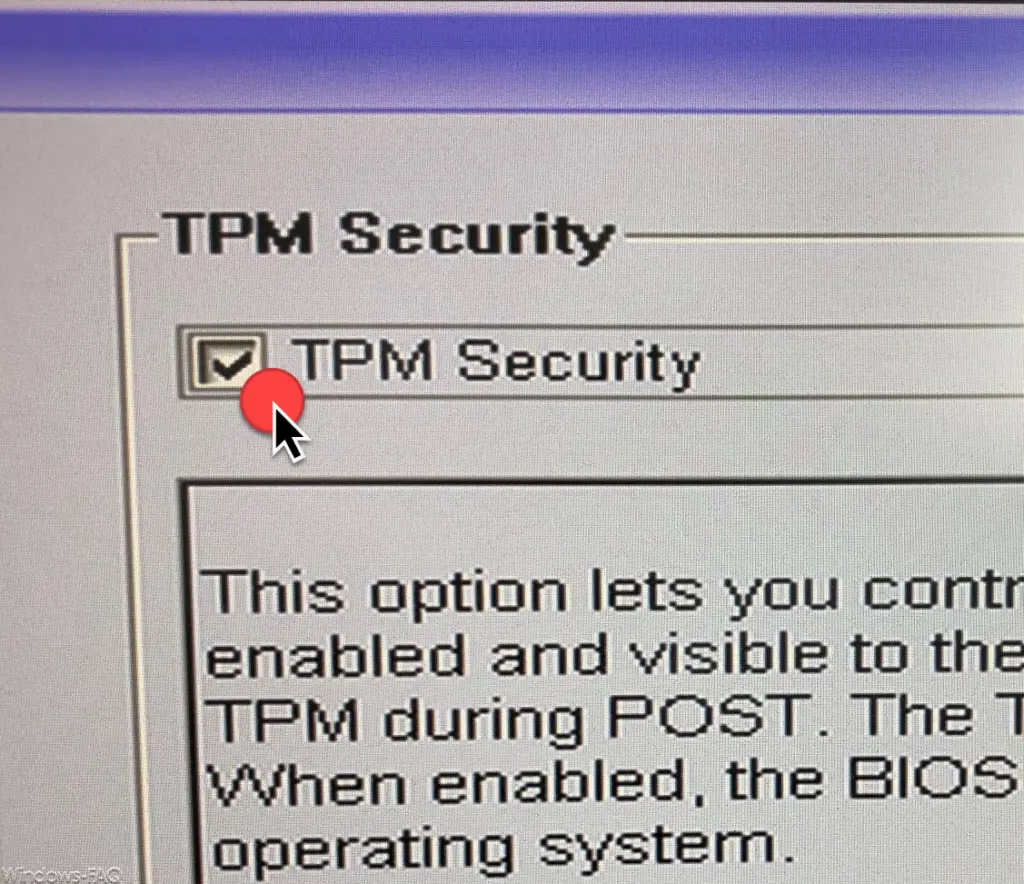
If you activate this option ” TPM Security “, the above BitLocker message does not appear. The option can of course be different for each manufacturer. Then simply start the entire BitLocker process again from the beginning .
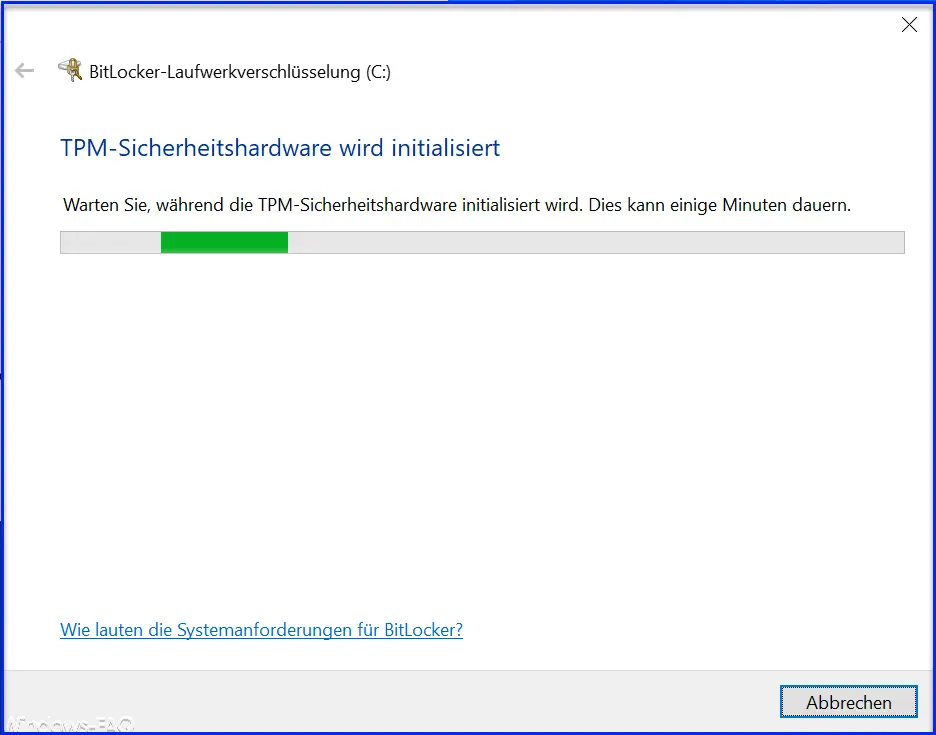
Now the ” TPM security hardware” is initialized. This process can take a few minutes. If the BitLocker initialization process can now be started without any problems, a few more queries regarding the BitLocker settings appear .
First, you will be asked how you want to manage the BitLocker recovery key. There is also the option to save the BitLocker recovery key to a file or to print out the recovery key.
Microsoft has released the following information:
A BitLocker recovery key can be used to access files and folders if you can’t unlock your PC. It is recommended to keep several recovery keys separate from the PC.
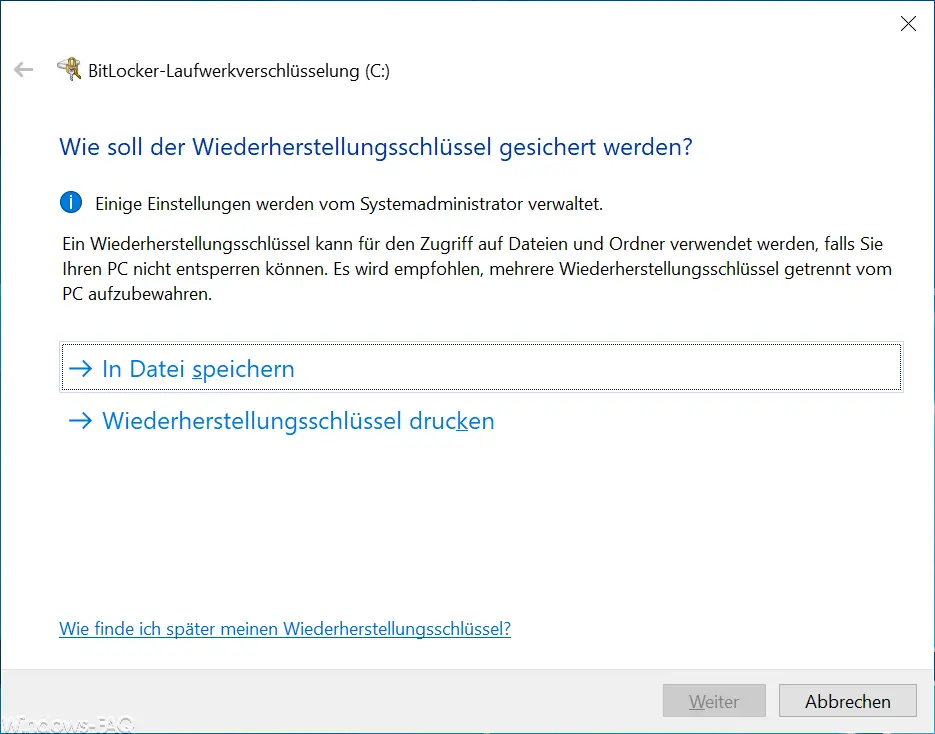
The following error message may appear when saving the BitLocker key .
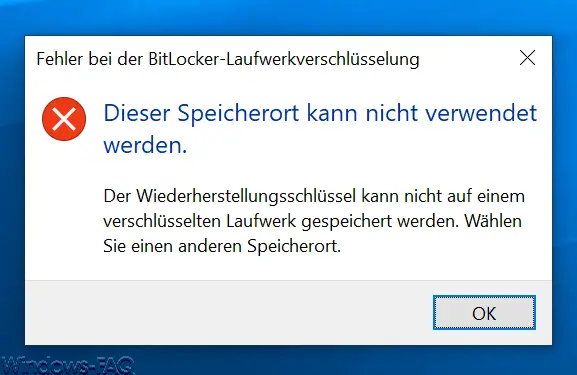
The message is:
BitLocker Drive Encryption Error
This location cannot be used.
The recovery key cannot be saved on an encrypted drive. Choose a different location.
If you get this message, you have probably tried to put the BitLocker recovery key on the same drive that you want to encrypt with BitLocker . This is not permitted, for this reason you should store the BitLockerkey on a network drive or a USB stick and keep it well.
In the following window you have to choose how much storage space of the drive should be encrypted. The following options are available:
-
- Encrypt only used storage space (faster, optimal for new computers and drives)
- Encrypt entire drive (slower, but optimal for PCs and drives that are already in use)
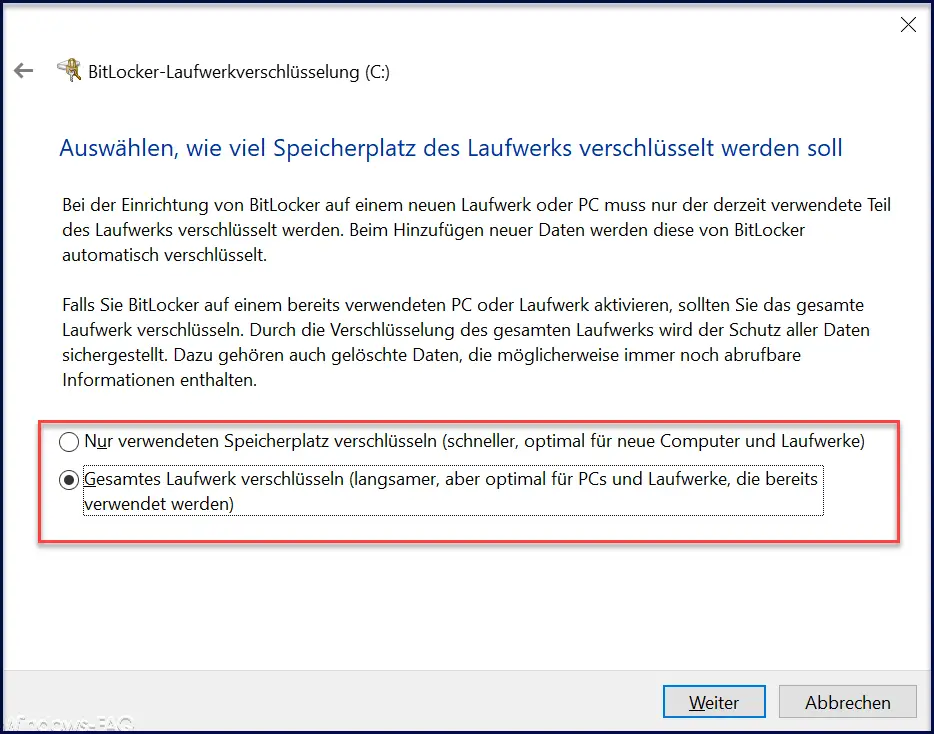
Microsoft has released the following BitLocker information.
When setting up BitLocker on a new drive or PC, only the part of the drive currently in use needs to be encrypted. When new data is added, BitLocker automatically encrypts it.
If you activate BitLocker on an already used PC or drive, you should encrypt the entire drive . The encryption of the entire drive ensures that all data is protected. This includes deleted data, which may still contain retrievable information.
Then select the BitLocker encryption mode, as you can see below.
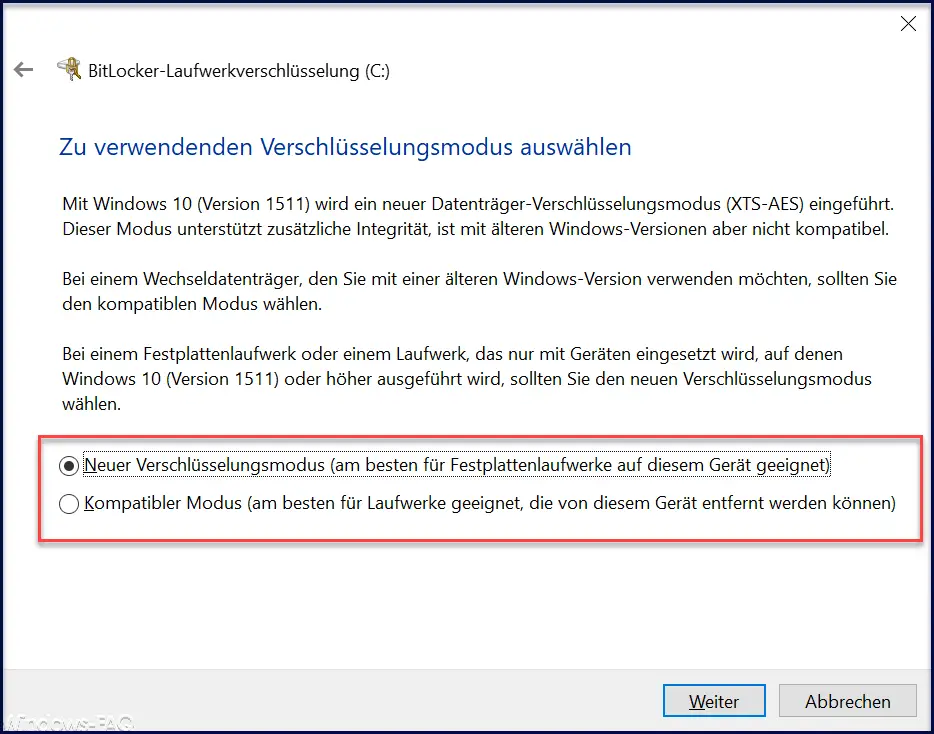
There are currently 2 BitLocker encryption modes:
- New encryption mode (best suited for hard drives on this device.
- Compatible mode (best for drives that can be removed from this device.
Microsoft introduced the new BitLocker disk encryption mode “XTS-AES” with Windows 10 version 1511 . This mod supports additional integrity, which is not compatible with older versions of Windows. Therefore, you should choose the compatible BitLocker encryption mode on a removable disk that you also use with an older version of Windows .
For hard drives that are only used with devices that use at least Windows 10 version 1511 or higher, you should use the new BitLocker encryption mode XTS-AES .
Then you will be asked whether the drive should now be encrypted.
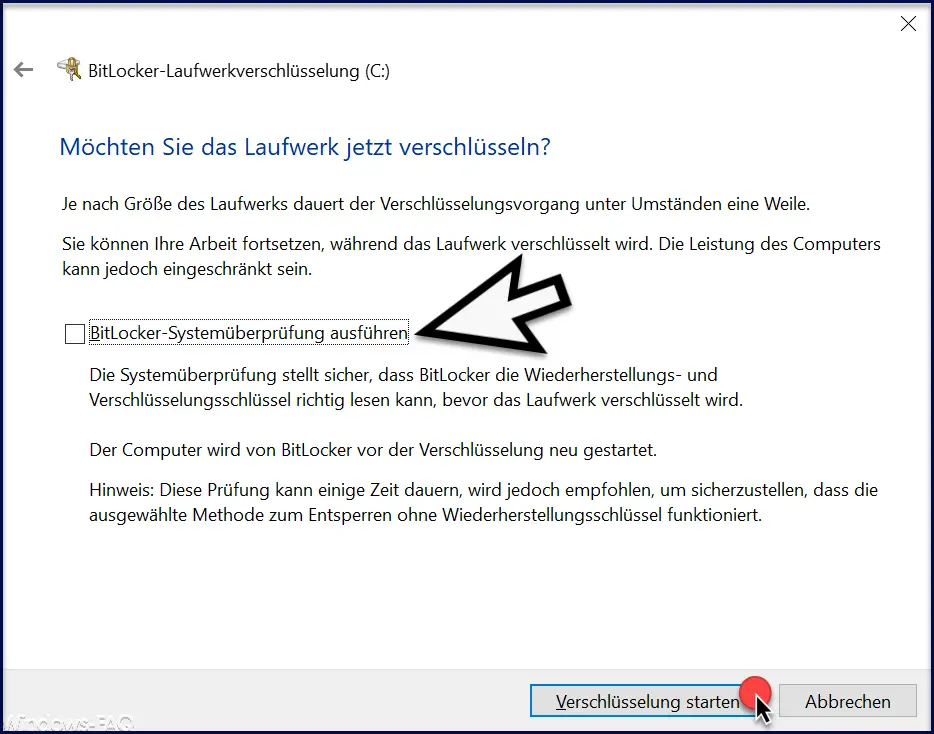
Now you can start the encryption process for the selected drive using the ” Start encryption ” button . Depending on the size of the drive, the BitLocker encryption process may take a while.
It is important to know that the actual encryption process is carried out in the background and you can continue to work with your PC without any problems. Of course, there may be a drop in performance due to encryption in the background , but this is usually kept within limits.
Optionally, you can also run a BitLocker system check before the actual encryption process .
This system check ensures that BitLocker can correctly read the recovery and encryption keys before the drive is finally encrypted. In addition, the computer is automatically restarted before encryption. However, this check of the BitLocker data takes some time. For security reasons, Microsoft recommends that you run the Bitlocker system check in any case.
When you start BitLocker encryption, the following message appears shortly afterwards on the bottom right of the Windows 10 desktop.
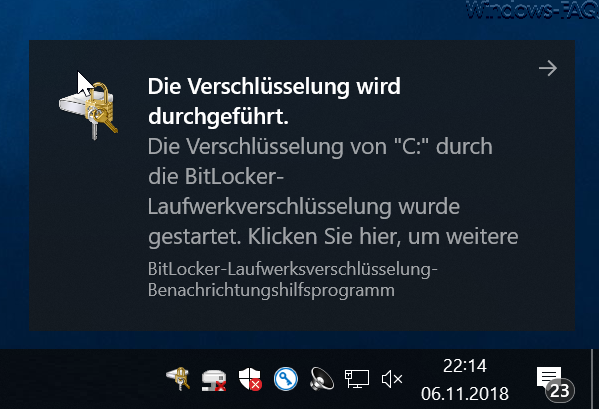
The exact message is:
BitLocker Drive
Encryption Notification Utility Encryption is in progress.
The encryption of “DRIVE” by the BitLocker drive encryption has started.
BitLocker encryption now runs in the background . How long the encryption process runs depends on the speed of the PC, the size of the HDD or SSD or the size of the stored files. As already mentioned, you can continue to work without any problems while encryption is active and your drive is now encrypted and protected.
IMPORTANT: We would like to point out again that you absolutely have to put the BitLocker recovery key in a safe place so that you have access to it in the event of a problem.
You can find more Windows tips and tricks in these articles:
– Activate Dark Theme in Explorer for Windows 10 version 1809
–
Show or move taskbar icons (system icons) of the taskbar on the second monitor only – Edit bookmarks in the Edge Browser and activate the quiet character bar
– Unpack the MSI file
– Set up the DLNA server under Windows 10