The hosts file under Windows is an important Windows system file that is responsible for resolving IP addresses into host names . The IP address that is entered in the local HOSTS file is processed before another DNS query . This hosts file is therefore very useful for performing local tests for name resolution . But there are also many more scenarios where editing the hosts file becomes necessary.
The file is always in the directory
% Systemroot% System32 drivers etc
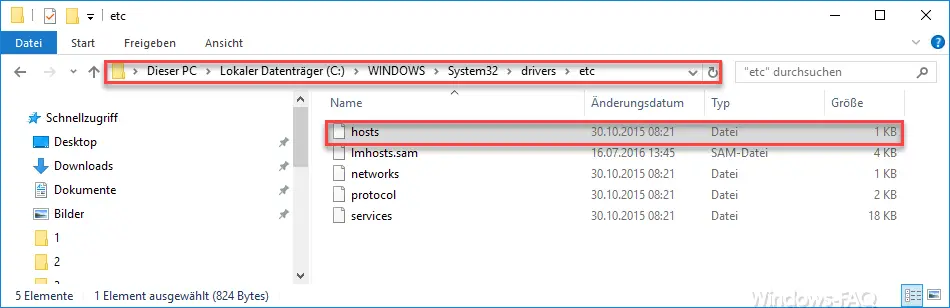
saved and it is a pure text file that has no file extension. Since it unfortunately does not have the ending “.txt” , it cannot be loaded into the notepad with a double click . After double-clicking on this file , you get a selection window under Windows 10 in which you have to decide on an editing program for the host file .
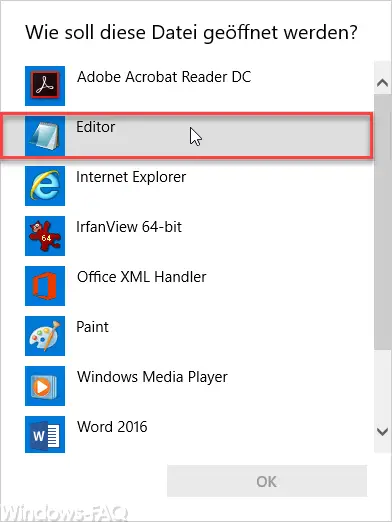
In this case we would recommend that you always select the “Editor” (notepad.exe) . This Windows editor is best suited for editing such Windows system files. After calling the host file you will see a similar picture.
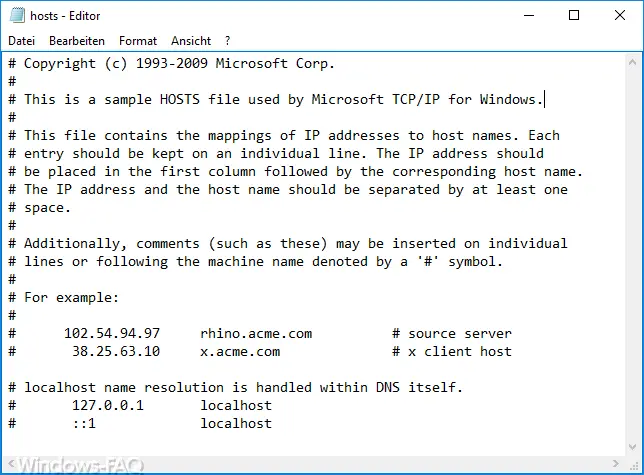
Microsoft describes the function of the hosts file as follows:
This is a sample HOSTS file used by Microsoft TCP / IP for Windows.
This file contains the mappings of IP addresses to host names. Each entry should be kept on an individual line. The IP address should be placed in the first column followed by the corresponding host name.
The IP address and the host name should be separated by at least one space.
Additionally, comments (such as these) may be inserted on individual lines or following the machine name denoted by a ‘#’ symbol.
You can now add, edit or remove further entries in the hosts file. If you want to add another entry, it looks like this, for example.
192.168.0.1 WINDOWSFAQ
After you have made all changes, you must now save the changes in the hosts file . This is not that easy, because you cannot simply overwrite the file. So the easiest thing is to first save the file to your desktop using ” Save As “.
But make sure that you don’t attach a file extension like .TXT to the file by saving it . If this has been done, please rename the file back to HOSTS without an extension . Then you copy them via Windows Explorer into the original location specified above in the Windows directory. Again, you get a warning that the file must be overwritten.
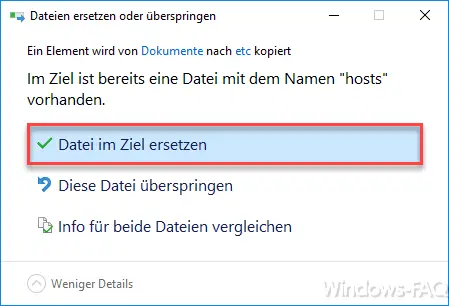
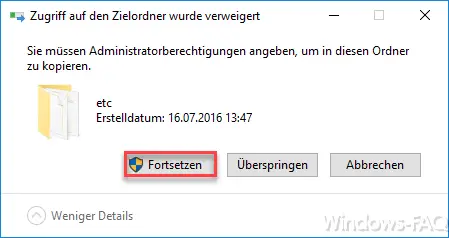
After you have confirmed the ” Replace file in target ” item , another query appears because access to the target folder has been denied. This question can also be answered with ” Continue “.
Now your hosts changes are active and you can check this by testing the name resolution with the following commands .
ping -a 192.168.0.1
This command must return the new assigned name “WINDOWSFAQ”.
ping WINDOWSFAQ
This command must return the assigned IP address 192.168.0.1.