Windows 10 automatically performs certain tasks at recurring times, including defragmenting the built-in hard drives or SSDs.
We have already described in detail how you can deactivate the automatic defragmentation in Windows 10 . But there is another way, and that is via Windows task scheduling .
The fastest way to do Windows task planning is to press the key combination

call by starting the following program.
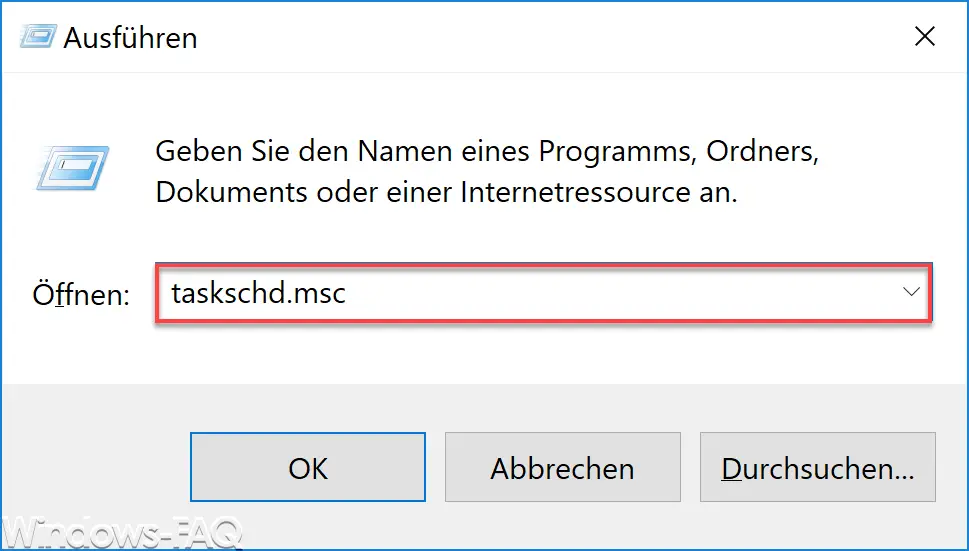
taskschd.msc
This looks like this in the Execute dialog.

Then the task planning is started and you then switch to area
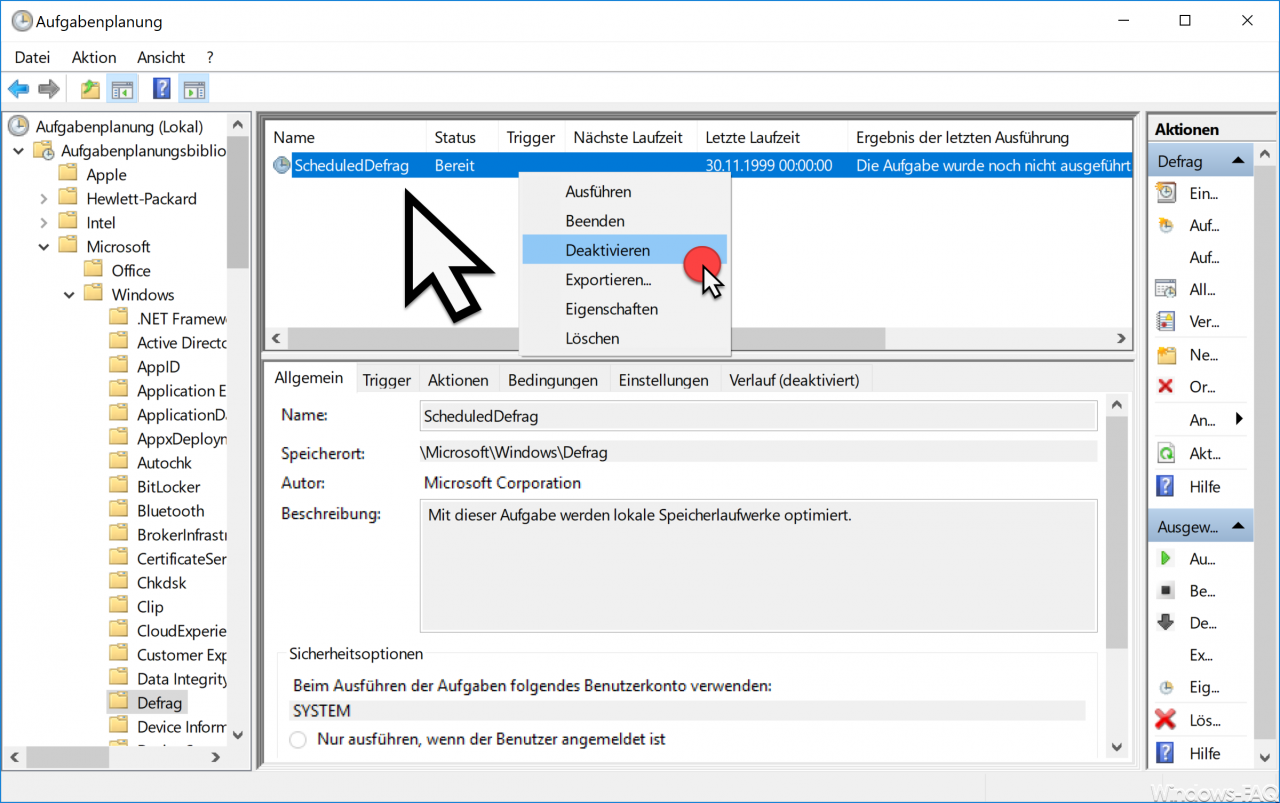
Task Scheduler / Task Scheduler Library / Microsoft / Windows / Defrag
There you will find the automatic defragmentation job that is created when Windows is installed. This then looks like this in the Task Scheduler.

Here you can see all the details related to the automatic defragmentation
ScheduledDefrag
belong.
Here you can call the ” Deactivate ” function by right-clicking on the task . Then the automatic defragmentation of your hard disk is deactivated, just as it is to be set directly with the defragmentation ” DFRGUI “.
Experienced Windows users can also make changes to the automatic defragmentation schedules and change them from daily to weekly or monthly, for example.
The changes made to the ” ScheduledDefrag ” task become active immediately, a separate Windows restart is not necessary here. There are therefore several options for quickly and easily deactivating the automated defragmentation of data media.
Further information on defragmentation can also be found in these articles here on our Windows blog.
– Defragmentation (defrag.exe) parameters
– CONTIG Tool – Defragmentation of individual files or folders
– Increase the lifespan of the SSD hard drive – Switch off automatic defragmentation
– Deactivate automatic defragmentation in Vista and Windows 7
– Call up defragmentation directly from Explorer
– Increase or decrease partition in Windows 10
– Detect PC performance problems with Fix it Tool from Microsoft
– Reduce partition and VHD of a VM