A few weeks ago we explained in detail how you can decrypt a partition encrypted with Bitlocker using PowerShell in our article ” Deactivating Bitlocker using PowerShell “.
By popular request, we will show you today in this Bitlocker tutorial how you can easily deactivate Bitlocker using the Windows 10 settings or the well-known Control Panel .
To do this, you first use the familiar Windows 10 key combination

the Windows 10 settings and enter the search term there
Bitlocker
a. The function then appears as the only search result
Manage Bitlocker
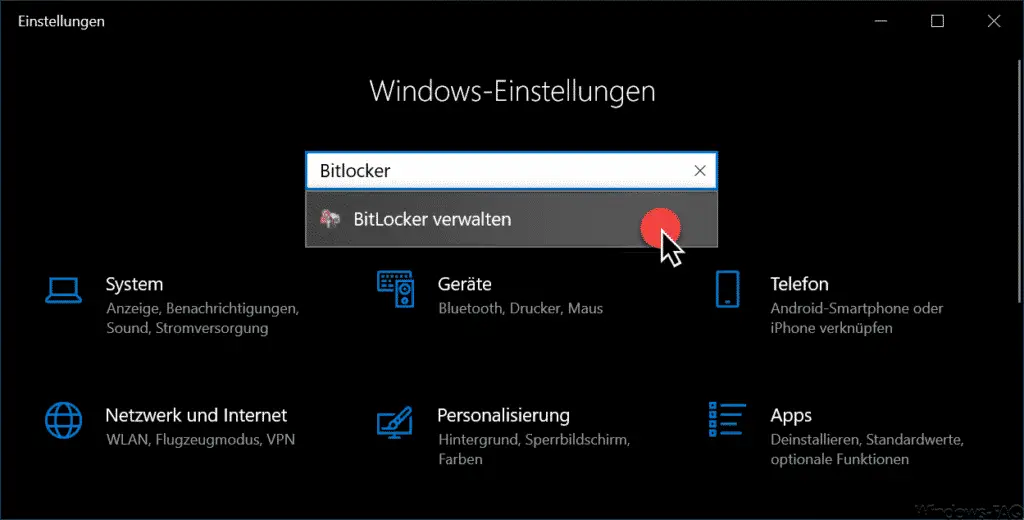
Since Microsoft’s Bitlocker administration has not yet been transferred to the Windows 10 settings app, Bitlocker deactivation is still carried out via the Control Panel.
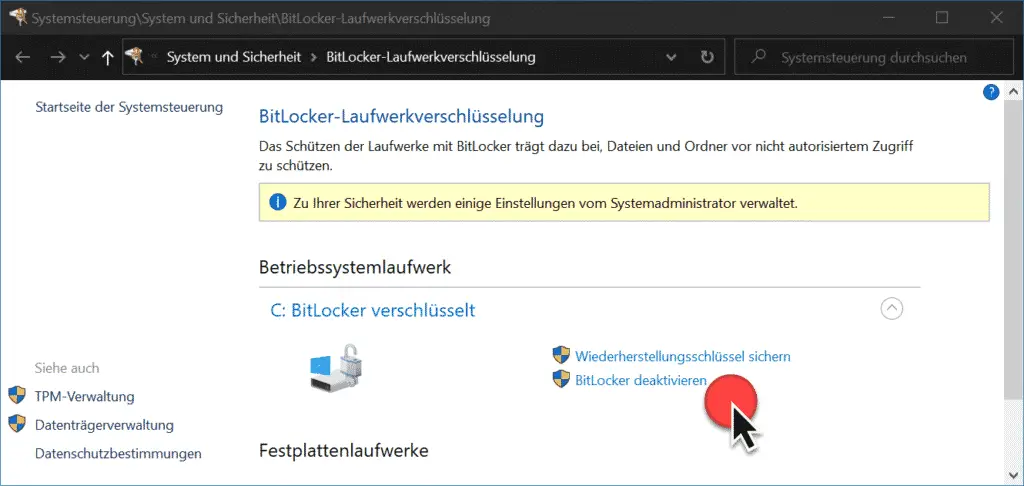
In our example you can see that the operating system drive C: is encrypted . Now you can just over
Deactivate Bitlocker
call the function to decrypt the drive . For security reasons, the following security question appears before deactivating Bitlocker .
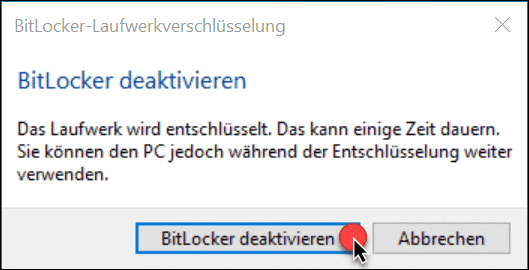
The exact message is:
Bitlocker drive
encryption Deactivate Bitlocker
The drive is decrypted. It can take some time. However, you can continue to use the PC during decryption.
After confirming ” Deactivate Bitlocker ” Windows starts decrypting the Bitlocker data.
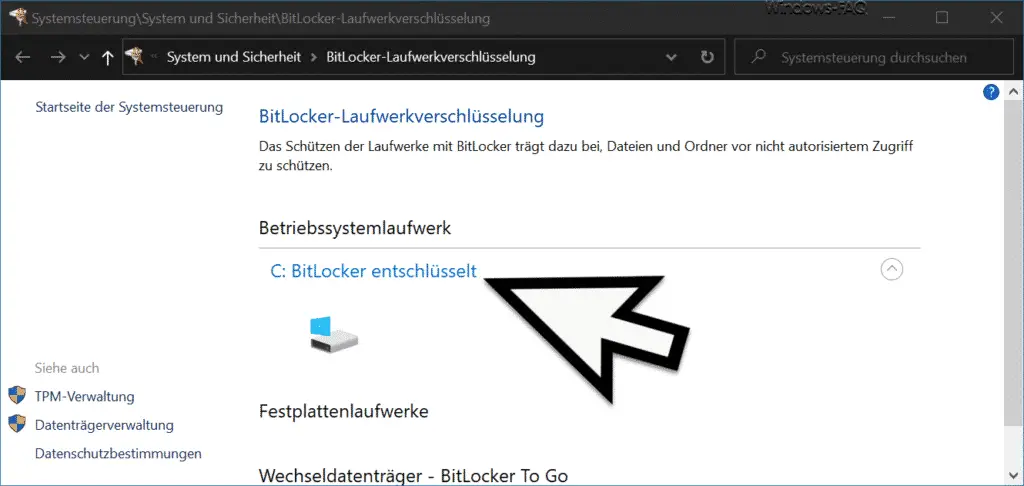
The active Bitlocker decryption is indicated by the status
Bitlocker decrypted
You can also use the Bitlocker tool “BDE status” to query the status of the decryption at any time.
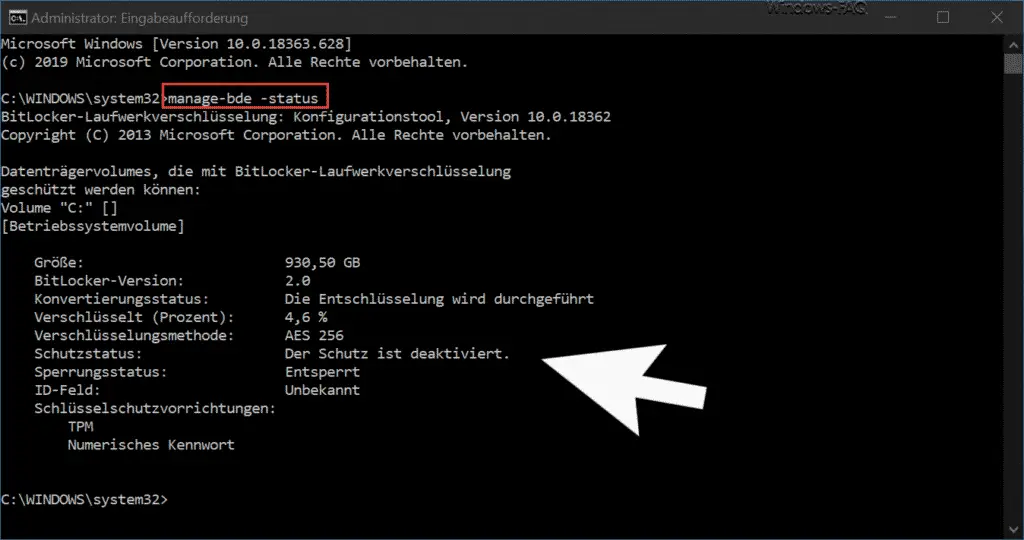
After some time, depending on the size of the Bitlocker encrypted data , the display of the Bitlocker system control changes from ” Bitlocker decrypted ”
Bitlocker deactivated
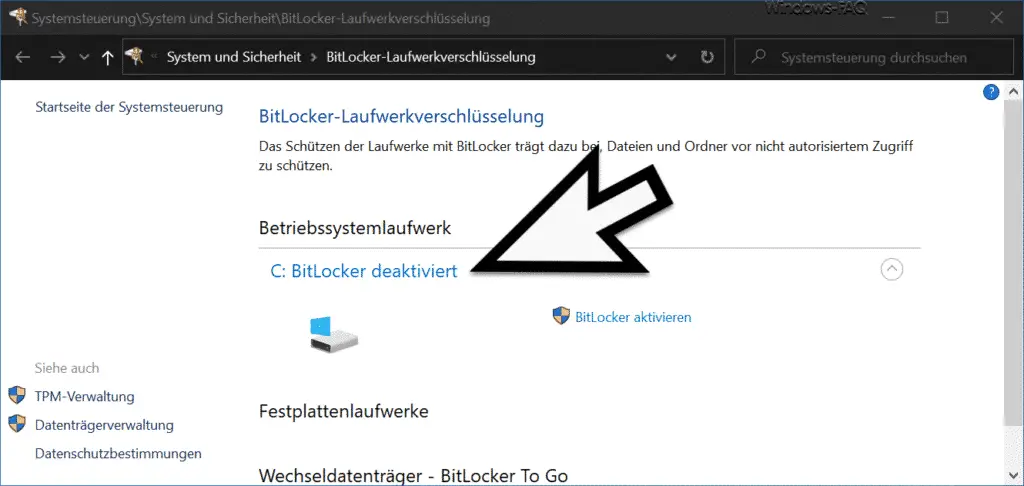
It is therefore relatively easy to deactivate Bitlocker encryption under Windows .
If you are interested in further information about Windows Bitlocker encryption , we recommend the following articles here on Windows-FAQ.de.
– Repair or decrypt Bitlocker with the Bitlocker repair tool “Repair-BDE”
– Display the Bitlocker encryption settings with “Manage-BDE”
– No TPM can be used on this device … Use BitLocker under Hyper-V