How you can create user accounts under Windows 10 and add accounts to the numerous Windows 10 security groups, we have already described in detail in our article ” Create Windows login account and add them to local Windows groups “. Today we would like to show you how you can deactivate user accounts very quickly and easily .
Deactivate user account via LUSRMGR.MSC
If you want to work with the Windows 10 GUI , the easiest way is to press the key combination Windows key + “R”

the following program.
LUSRMGR.MSC
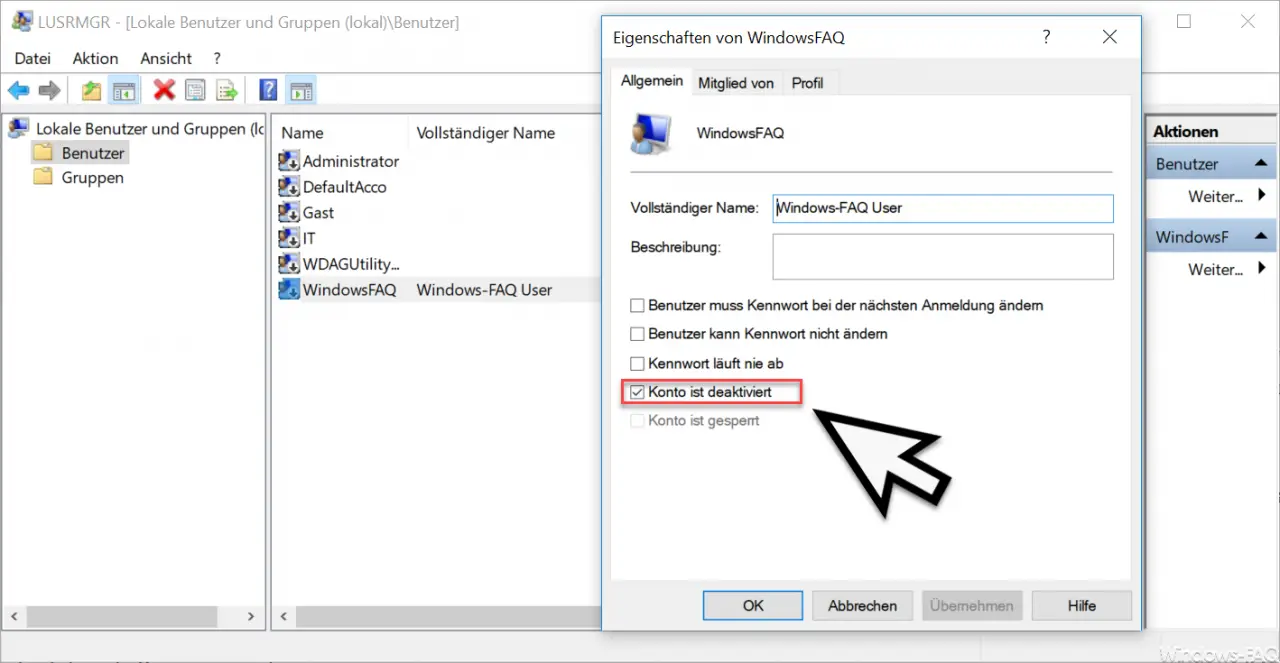
This will start the local user accounts and group management on your PC. In the ” user ” then you call simply by double clicking on the user, the user properties on. We have shown you this process here below.

All you have to do is tick the ” Account is deactivated ” radio button . After confirming OK, the user is deactivated and can no longer log on to Windows. Of course you can reactivate the user until you completely delete him from the user management.
Deactivate users with a command
A second option is to do this from the command line. This is certainly faster, but you need a little practice. Simply open a command prompt (CMD) as administrator and issue the following command.
net user “username” / active: no
This looks like this:

The successful deactivation of the user account is indicated with the output “ The command was successfully executed. “Acknowledged. The user account is then also deactivated and can no longer log in. With ” / active: yes ” you can deactivate the deactivation of the user account .
Below we have listed some other interesting articles on the subject of ” user accounts “.
– Switch quickly between user accounts in Windows 10 (Fast User Switching)
– Delete Windows user profiles in the registry
– Edit local users and groups with PowerShell
– Find outdated computers or users in Active Directory
– Find out which AD user has never logged in
–
Read out Windows User SID (security identifiers) from all users – Determine the LastLogon (last login) of a user in AD using Get-ADUser