Windows usually writes the information to the hard drive immediately to prevent data loss. In order to gain some performance , it is possible to equip data carriers with a write cache .
This write cache means that information that is usually written to the data medium immediately is kept in RAM (main memory) for performance reasons and is only written to the hard disk with a delay. This also has the advantage that when reading information that is still in RAM, the data carrier is not addressed at all, which also contributes to improving the speed.
However, the user should be aware that data loss can also occur if, for example, a power failure occurs before the write process . In this case, the information that was not yet written to the hard disk at the time of failure would be lost.
Activate write cache in Windows
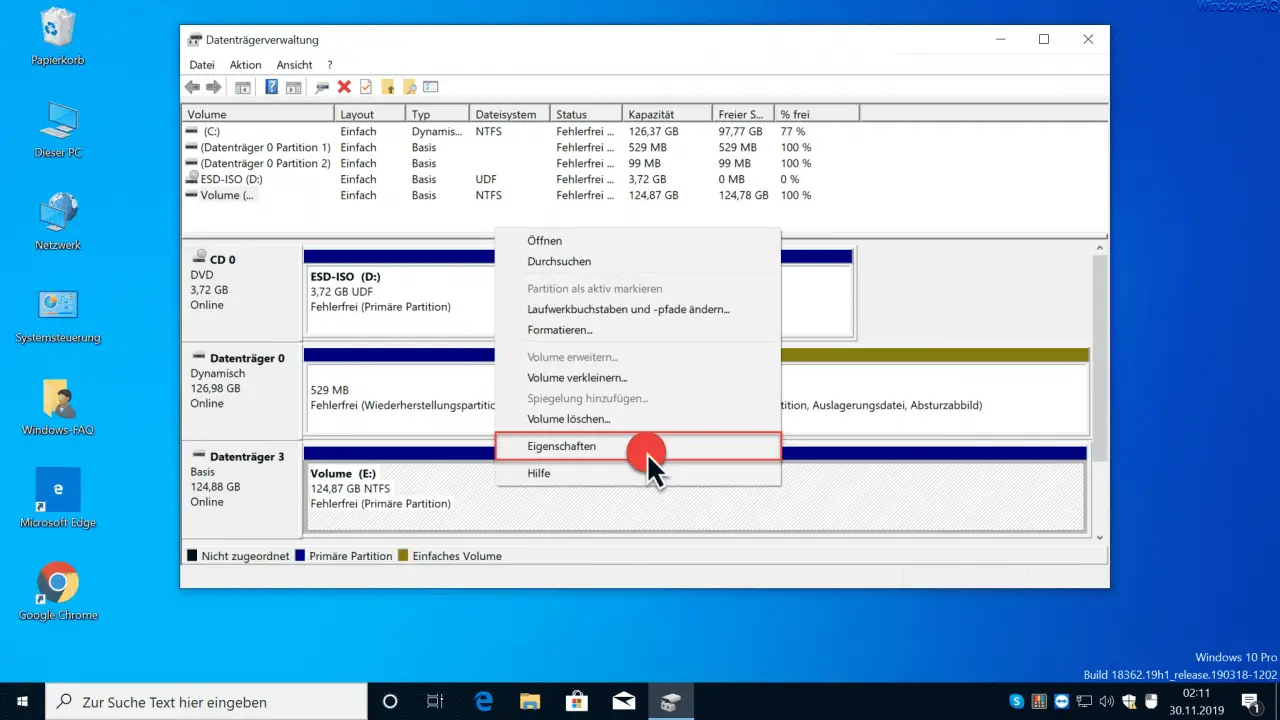
To activate the write cache, you first have to use the Windows disk management
DISKMGMT.MSC
open and right click on the disk on which you want to activate the write cache. Then you still have to
properties
call. This then looks like this.
In the subsequent properties window of the data carrier you have to click on the tab
hardware
switch and again
properties
call.

The desired option of the write cache is then visible in the ” Guidelines ” tab .
Activate write cache on the device
Microsoft has released the following information.
Improves system performance by enabling write cache on the device, but power failures or device errors can result in data loss or corruption.
Furthermore you can set the following option.
Disable device write cache flushed by Windows.
The following information is available here.
In order to prevent data loss, this check box should only be activated if the device has a separate power supply, which enables the device to empty the buffer in the event of a power failure.
We would recommend not activating the 2nd option.
Finally you will find further articles on the subject of ” data carriers ” under Windows.
– How can write protection be activated or deactivated on a data carrier
– Convert FAT32 data carrier to NTFS format without data loss
– Deactivate all access to removable data carriers via GPO
– Prevent installation of USB removable
devices via GPO in Windows 10 – Windows 10 shows USB storage media twice in Explorer on
– Fix Windows 10 USB problems
– Enable write protection on USB sticks
– Block access to USB sticks on Windows 10