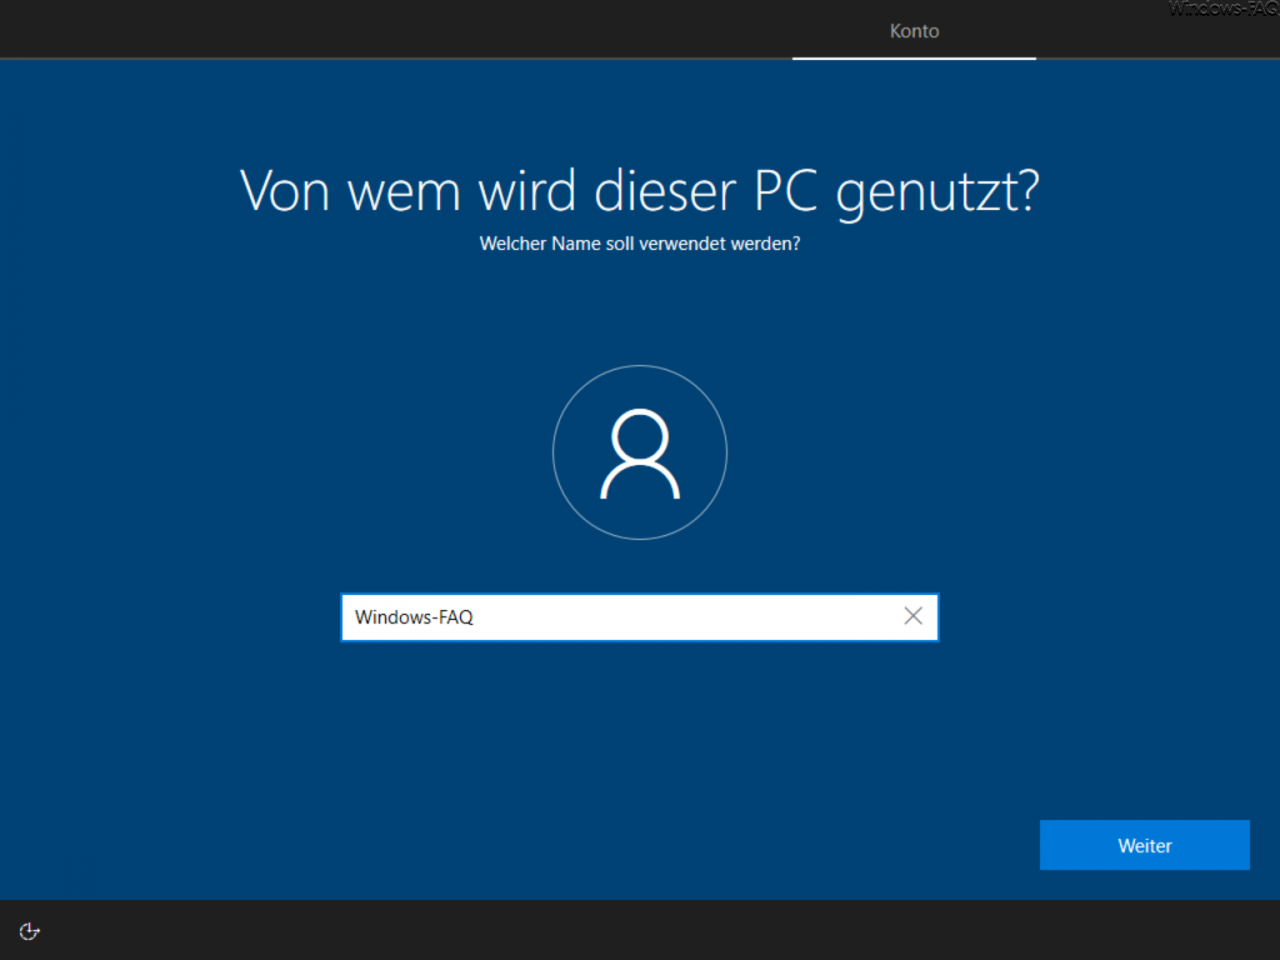
Microsoft has introduced with Windows 10 that the local administrator account is deactivated by default after a Windows 10 reinstallation . When installing Windows 10, you will be asked for an account that will work with the Windows PC by default and this will then have local administrator rights after installation .

The easiest way to view these account permissions is to use the ” Local Users and Groups ” tool , which you can use the shortcut
lusrmgr.msc
can be called up as quickly as possible (press Windows key + “R” at the same time, enter the above command and confirm “OK”).
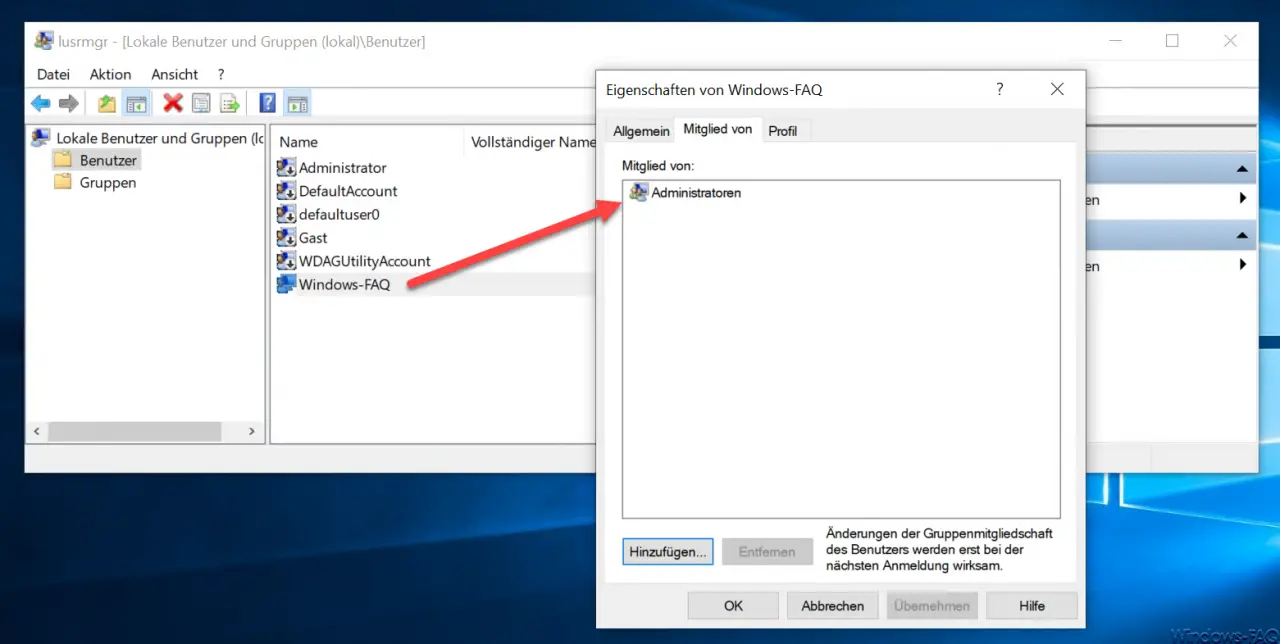
Here you can see that the newly created account ” Windows FAQ ” is automatically included in the group of local ” administrators ” and is therefore the only account with admin rights.

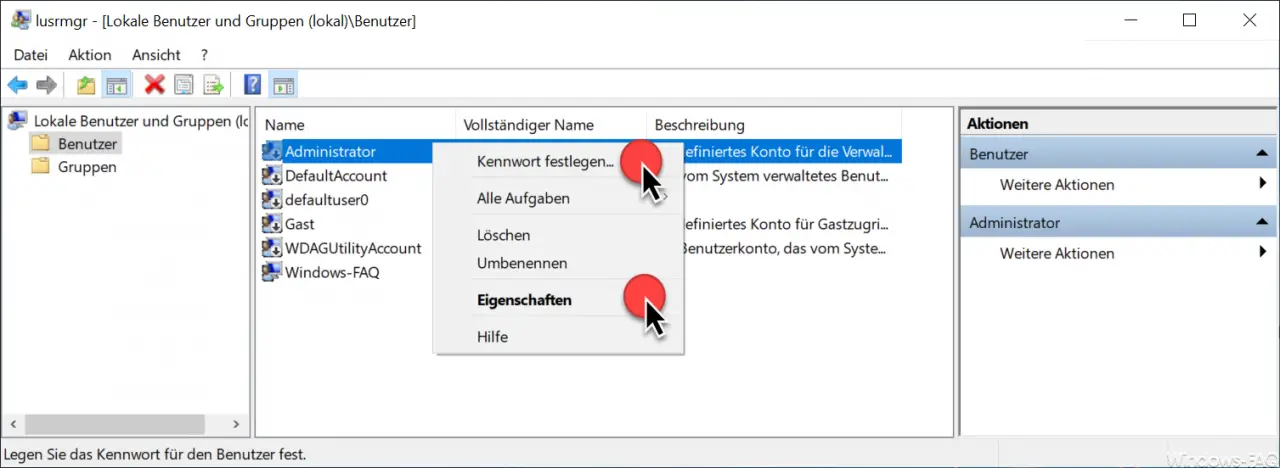
With the ” Administrator ” account you can also see that the symbol of the Administrator account has an ” arrow down “. This symbol indicates that the administrator account is deactivated.
With a right click on the administrator account you get to the properties of the account.
First you should set a new password for the currently deactivated administrator account .

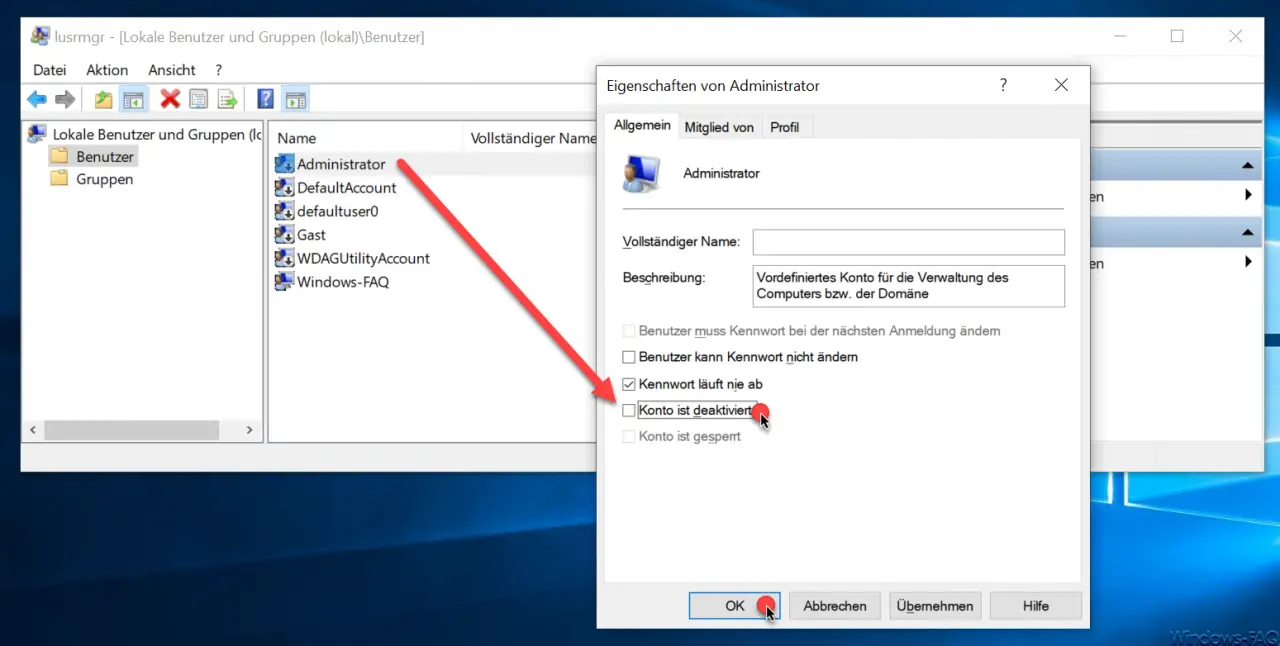
After you have set up a new password, you switch to the properties of the admin account . Here you can see that the administrator account is deactivated .

Here is the catch
Account is deactivated
to remove and close the properties window with ” OK “. Via the ” Member of” tab you can check again whether the administrator account is really included in the ” Administrators ” group .
Now the local Windows 10 administrator password is reactivated and can be used again.
Finally, you will find further articles about Windows user accounts .
– Deactivate user
account under Windows 10 – Create Windows login account and add it to local Windows groups
– Activate Windows 10 guest account