Anyone working with PowerPoint and packing a lot of graphics into a PowerPoint presentation knows the problem that the file size of the PowerPoint files grows quickly and can easily grow to over 50 or 100 MB.
But what very few PowerPoint users know is an integrated function for shrinking PowerPoint files . In this tutorial we will show you how you can shrink PowerPoint files yourself and without additional tools .
Shrink PowerPoint files
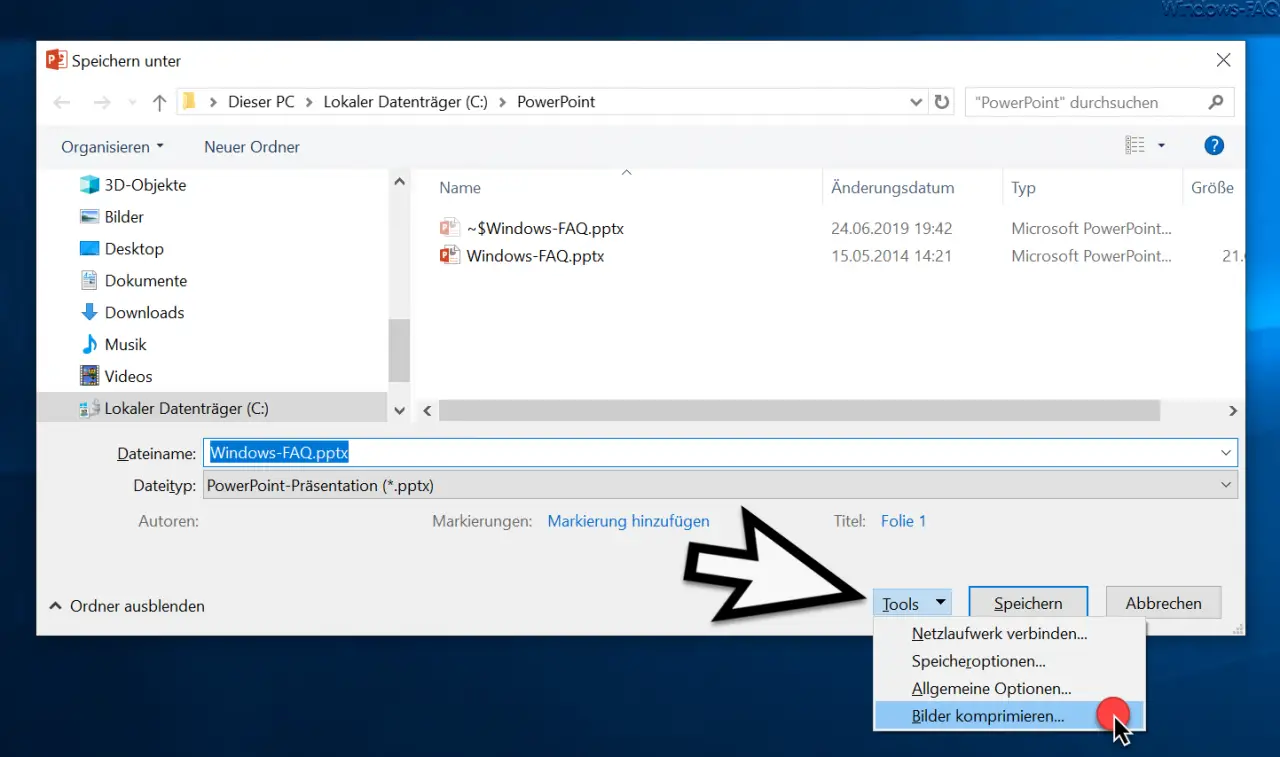
To do this, simply open the PP file to be reduced in PowerPoint and then call the dot
Save as
on. We have shown you this as an example.

The current PowerPoint file ” Windows-FAQ.pptx ” has a size of over 21 megabytes. To make it smaller, all you have to do is click the button
Tools
click. In the PowerPoint context menu that then appears there is the item
Compress images.
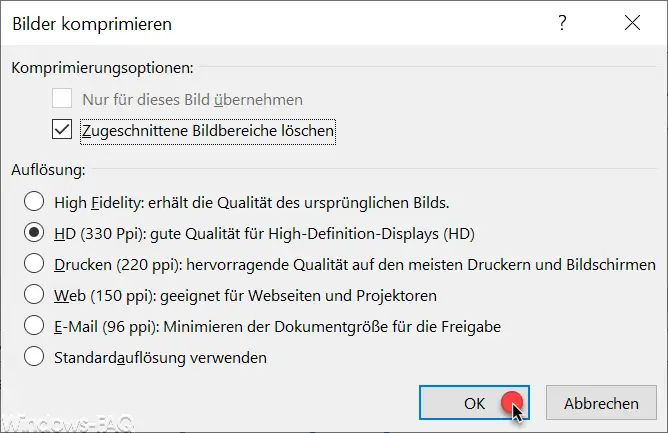
The following window then appears, in which you can specify the PowerPoint compression settings.

When it comes to the resolution of the integrated images, you can choose between the following options.
- High Fidelity : maintains the quality of the original image.
- HD (330 ppi) : good quality for high definition displays (HD)
- Printing (220 ppi) : excellent quality on most printers and screens
- Web (150 ppi) : suitable for websites and projectors
- Email (96 ppi) : Minimize the document size for sharing
- Use standard resolution
Depending on what you want to do with the reduced PowerPoint file after image compression, please choose the appropriate resolution here. Possibly. It is worth trying out the different options and to determine how much space the PowerPoint file has compressed itself.

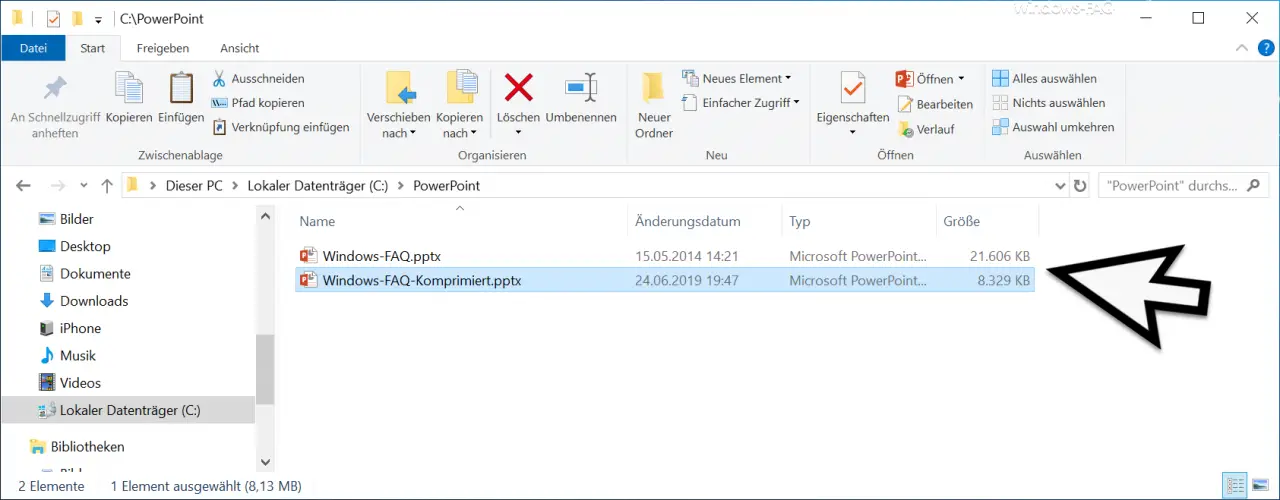
In our example, we were able to reduce the size of the PowerPoint file from just under 21MB to just over 8MB and could hardly find any losses in the quality of the images in the screen display .
If you are interested in a PowerPoint Viewer , you should have a look at our article ” Download Microsoft PowerPoint Viewer “.