The following information may be very interesting, especially for users who use their Windows notebook or Windows tablet in various WLAN networks .
You can relatively easily display the entire WiFi connection using a command line command . In another article about the management of WLAN networks , we have already shown you how you can do this via the Windows GUI. You can find the appropriate article under ” Shortcut to display the WLAN connections under Windows 10 “.
When using this DOS command , you will not only see the WLAN connections that are in the immediate vicinity of your Windows device, but also all WLAN networks to which you have ever established a wireless connection.
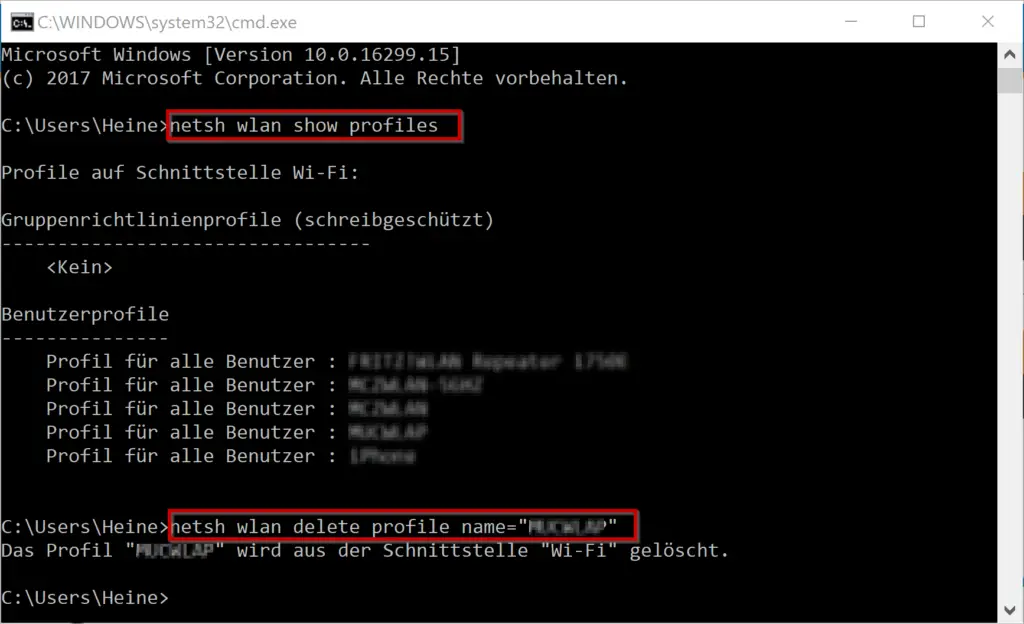
To do this, you must first simply call up an MS-DOS prompt, the easiest way using the short command ” CMD “. Then you can use the following command to display all WIFI networks .
netsh wlan show profiles
Here you can see that the existing WLAN user profiles are displayed after executing the command .

The following profiles based on the Wi-Fi interfaces are then displayed after executing the NetSH command:
- Group Policy Profiles (read-only)
- User profiles
Now you can sort of choose the WIFI networks you might want to remove from your WLAN list . To delete a WLAN profile , you have to use the following command.
netsh wlan delete profile name = “??????“
Then the message ” The profile” ???? “will be deleted from the” Wi-Fi “interface confirms that the WLAN connection has been deleted .
You can also find a lot of other useful information on the topic of “WLAN” in the following articles.
– Connect the ASCOM i62 WLAN cell phone to Aruba Wifi
– WLAN troubleshooting with the Windows WLAN report
– Switch Ethernet network connection and WLAN connection to Windows 10 on clocked (metered)
– Show WLAN password in plain text via DOS command
– Forgot WLAN password – No problem – Simply read out with a tool