The exporting and importing VMs usually works well with the Hyper-V Manager relatively simple and easy. Both the export of the VM and the VM import are relatively simple and self-explanatory.
However, the export and import of virtual machines works very quickly and easily via Windows PowerShell and as we would like to show you here in this short Hyper-V PowerShell tutorial .
All that is important is the name of the VM , which is used to control the export of the VM. The easiest way to display a list of existing virtual machines is by using the command
Get-VM
calls. We have shown you the process here below.
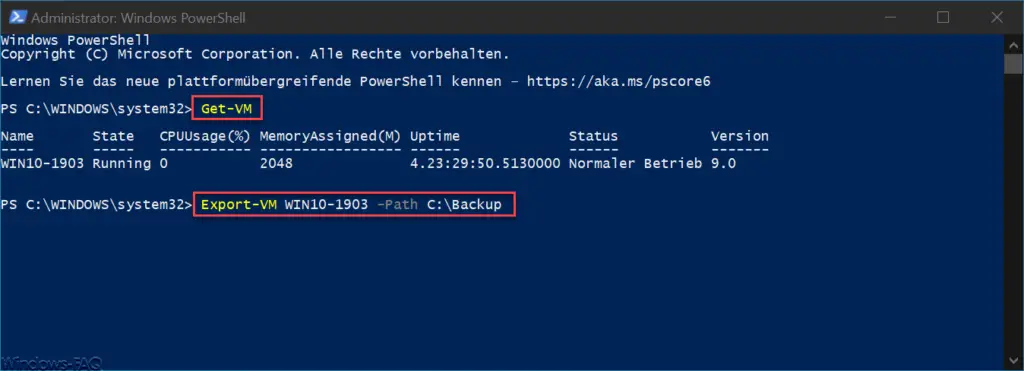
After calling ” Get-VM ” you will see some important information about the existing VMs. In our example, we have only installed 1 Hyper-V and this is called “WIN10-1903”.
With the following command you can now start exporting the Hyper-V VM .
Export VM VMNAME -Path DRIVE: PATH
After starting the command, Windows immediately starts creating the VM export file . During the export process , this is shown graphically, as you can see in the figure below.
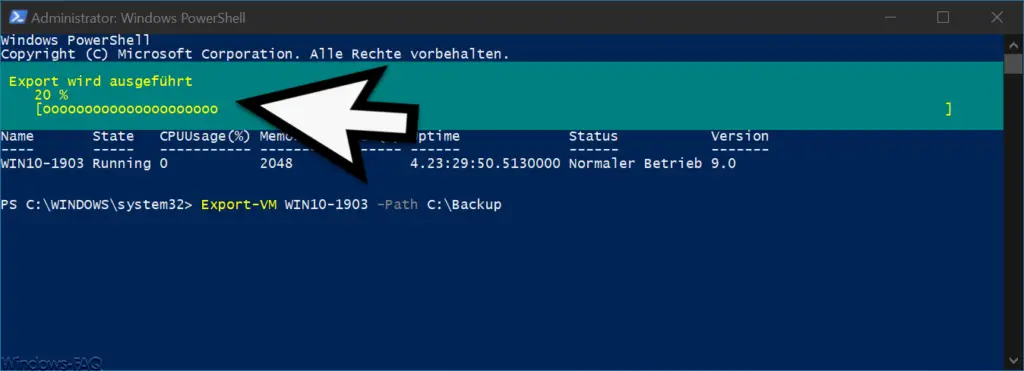
This is shown by the message ” Export is in progress “. By the way, you can also export the VMs when the virtual machine is started. It therefore does not necessarily have to be shut down before export .
Then you will find the well-known Hyper-V folder structure with the subfolders in the specified VM export folder
- Snapshots
- Virtual hard disks
- Virtual machines
The import of the Hyper-V VM also works very easily.
However, the path to the VMCX file must be specified here. The Import PowerShell command is then.
Import VM path, DRIVE PATH ????????? – ???? – ???? – ???? – ??????????????. vmcx
The export and import of the virtual machine takes a few minutes, depending on the size of the VM. After importing the VM, it is already registered in the Hyper-V Manager and can be used.
Finally, we have listed a few more interesting articles about Hyper-V and also about PowerShell .
– Take a snapshot of a Hyper-V VM using PowerShell and manage checkpoints
– Share Hyper-V VM – Easy way to clone virtual machines
– Rename VM in Hyper-V Manager or using PowerShell
– No TPM can be used on this device … BitLocker under Use
Hyper-V
– Upgrade Hyper-V configuration version – Hyper-V VMs react slowly with network traffic – Deactivate VMQ
– Automatic checkpoints with Hyper-V – Set
Hyper-V default folder for virtual computers and hard disks
– Get Hyper-V information about a VM via PowerShell
–
Query versions of Hyper-V integration services – Convert Hyper-V VM’s Generation 1 to Generation 2
– Problems with Hyper-V replication on iSCSI volume
– Microsoft Hyper-V version numbers (integration services) Overview
– Desktop links to Hyper-V create VMs
– Enable the extended session mode for Hyper-V VM’s
– Hyper-V with Windows 10 installed
Hyper-V application error when starting a copied VM
– Windows password a Hyper-V VM reset
– Hyper-V Manager VMMS Stop Service or Start