The grouping of the Windows system tray icons in Windows 10 is a nice feature for most users. Thus, the tasks of the same programs that have been started several times are simply summarized. This saves the user a lot of space in the Windows 10 taskbar and therefore also has the option of pinning more icons in the taskbar.
A Windows 10 taskbar with grouped program icons looks like this by default .

You can change them and this is how the same taskbar looks with ungrouped symbols .
![]()
You can change this by simply right-clicking in the Windows 10 taskbar and then the point
System tray settings
calls. Then the Windows 10 Settings app appears. You will find the setting you are looking for relatively far below:
Group buttons in the taskbar
We have shown you this below, but the selection field has already been fanned out and the possible display options are visible.
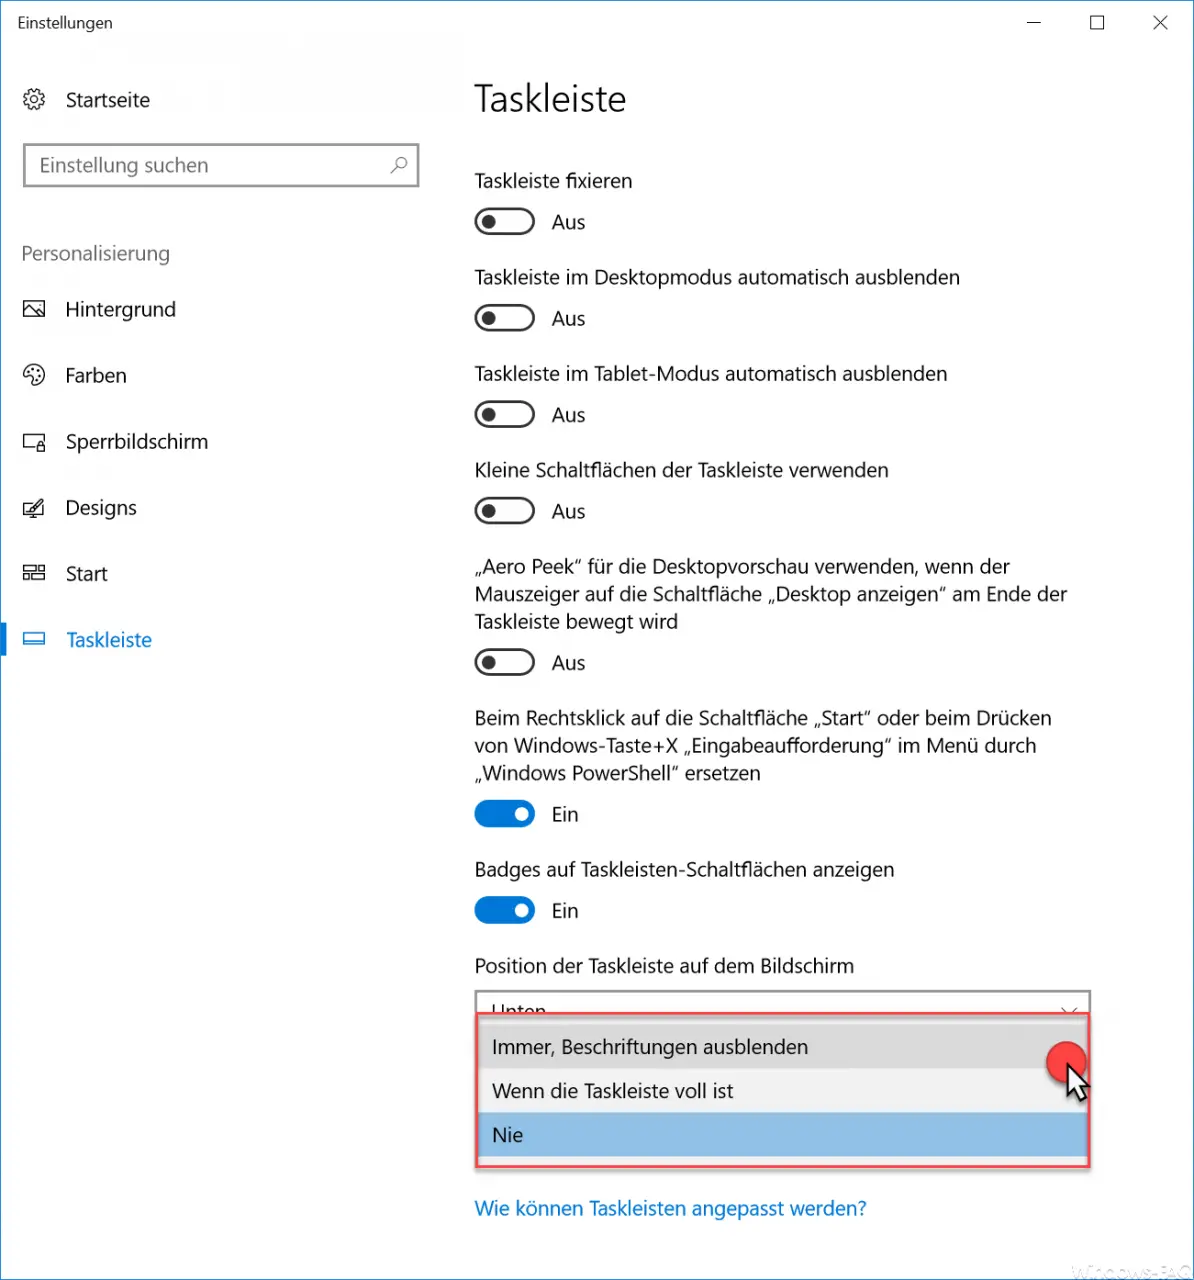
The following selection options are available to you in the grouping.
- Always, hide labels (this is the default)
- When the taskbar is full
- Never
Here you can also select the type of grouping you want. Incidentally, the changes become active immediately and the display of the taskbar is immediately adapted.
Taskbar grouping via registry
You can also make the same settings via the Windows registry. To do this, you have to call up the following path in the registry editor (regedit.exe).
HKEY_CURRENT_USER Software Microsoft Windows CurrentVersion Policies Explorer
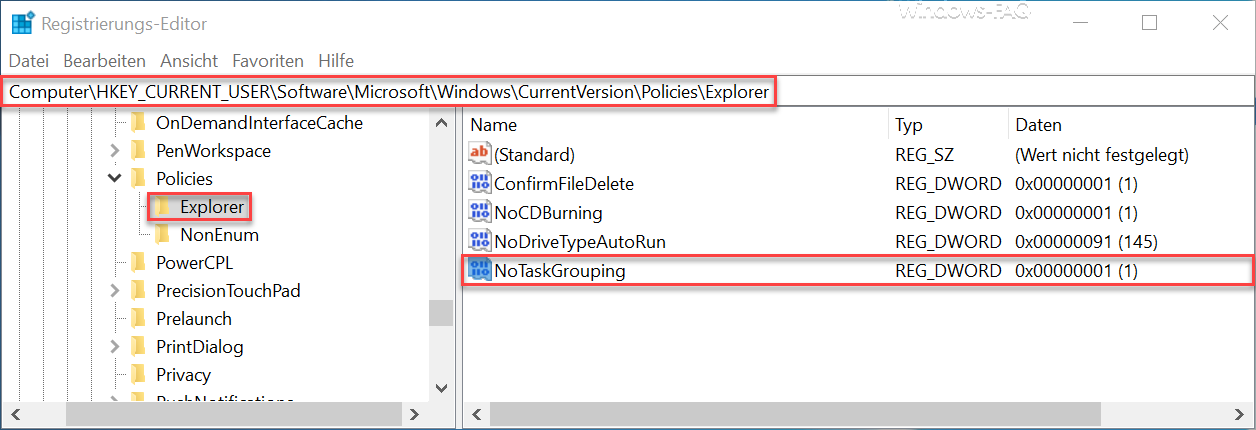
Here you have to create the following DWORD 32-bit value:
NoTaskGrouping
If you assign a ” 1 ” to this value , the Windows 10 taskbar icons are not grouped. With a ” 0 ” the grouping is activated.
Incidentally, these changes do not take effect immediately. You need to restart Windows or end the task ” Windows Explorer ” via the Task Manager .
Disable taskbar grouping via GPO
As a third option, you can also deactivate the taskbar grouping via a group policy. To do this, call the GPO editor (gpedit.msc) and switch to the following path.
Local Computer Guidelines / User Configuration / Administrative Templates / Start Menu and Taskbar
There is then the decisive GPO with the name:
Prevent grouping of taskbar elements
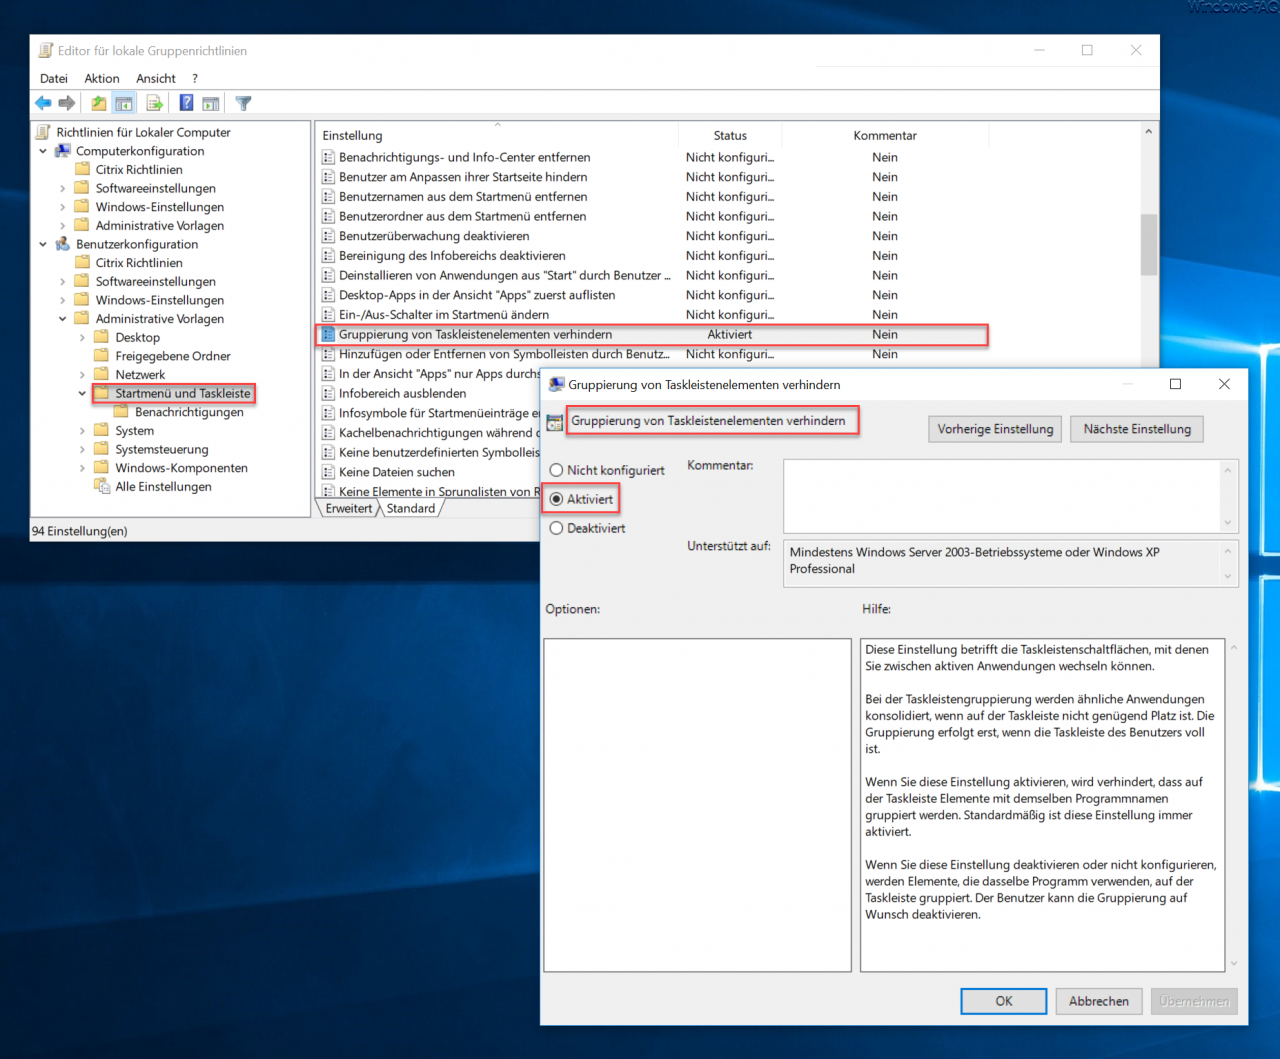
You have to activate this group policy . The taskbar grouping is then deactivated. Microsoft explains this GPO as follows:
This setting affects the taskbar buttons, which you can use to switch between active applications. Taskbar grouping consolidates similar applications when there is insufficient space on the taskbar. The grouping takes place only when the user’s taskbar is full. If you activate this setting, elements with the same program name are prevented from being grouped on the taskbar. By default, this setting is always activated. If you disable or do not configure this setting, items that use the same program will be grouped on the taskbar. The user can deactivate the grouping if desired.
However, this change only becomes active once you have logged on to the PC once.
You can also find other useful Windows tips and tricks here.
– Windows 10 programs and apps start automatically after restart
– Queries whether a 32- or 64-bit Windows is installed
– Activate the F8 key when booting Windows 10
– Hide or remove pages and options from the Windows 10 Settings app
– Windows Delete swap file by security policy on shutdown
– Activate Godmode under Windows 10 – Deactivate
Lock Workstation with the Windows key + “L”
– Deactivate autoplay in Windows 10 – Install
new fonts in Windows 10
– Point and print problems when installing Windows 10 printer drivers
– Windows 10 defer feature update installation via Group Policy