If you want to deactivate the network adapter or Ethernet connection of your Windows PC , this is possible, but unfortunately Microsoft has not integrated a function with which the shutdown can be carried out quickly and easily.
Overall, we would like to present 4 options for you to deactivate the network adapter. All examples refer to Windows 10.
Disable network adapters in the network connections
The first option is that you use the shortcut ” ncpa.cpl ” to call up the network connections. There you will see the possible network adapters , as you can see below.
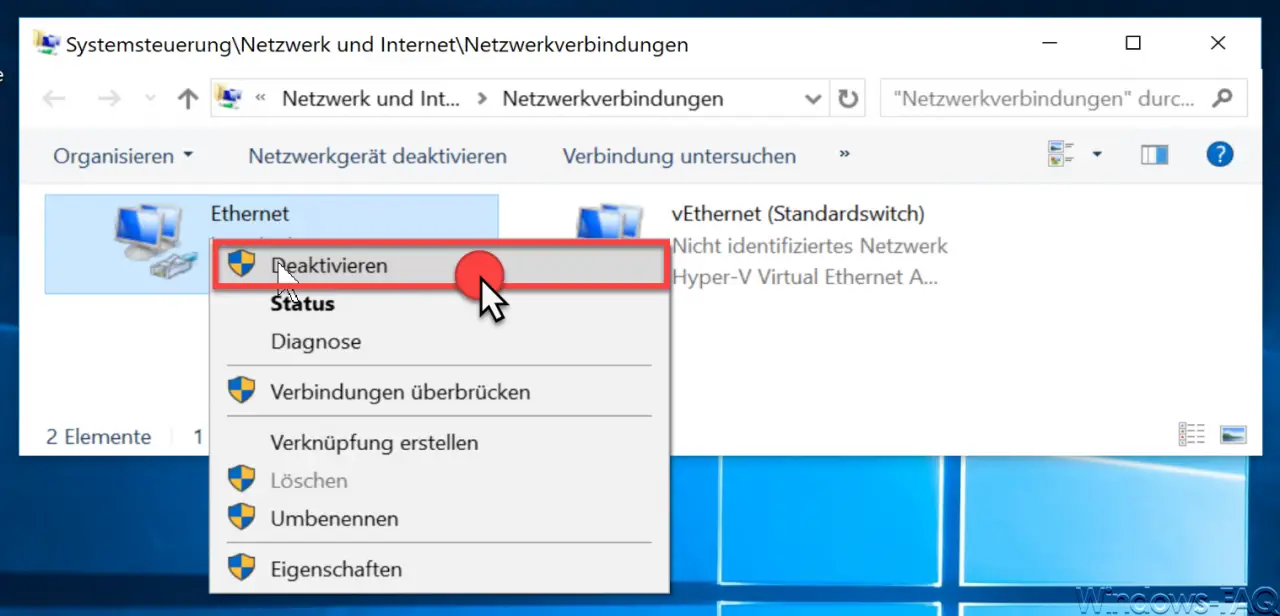
Simply right-click on the network connection to be deactivated and confirm ” Deactivate ” in the context menu that then appears .
Deactivate the network adapter in the device manager
The second option is to deactivate the integrated network adapter directly in the Windows device manager. To do this, open the Windows tool ” devmgmt.msc ” and right-click directly on the network adapter.
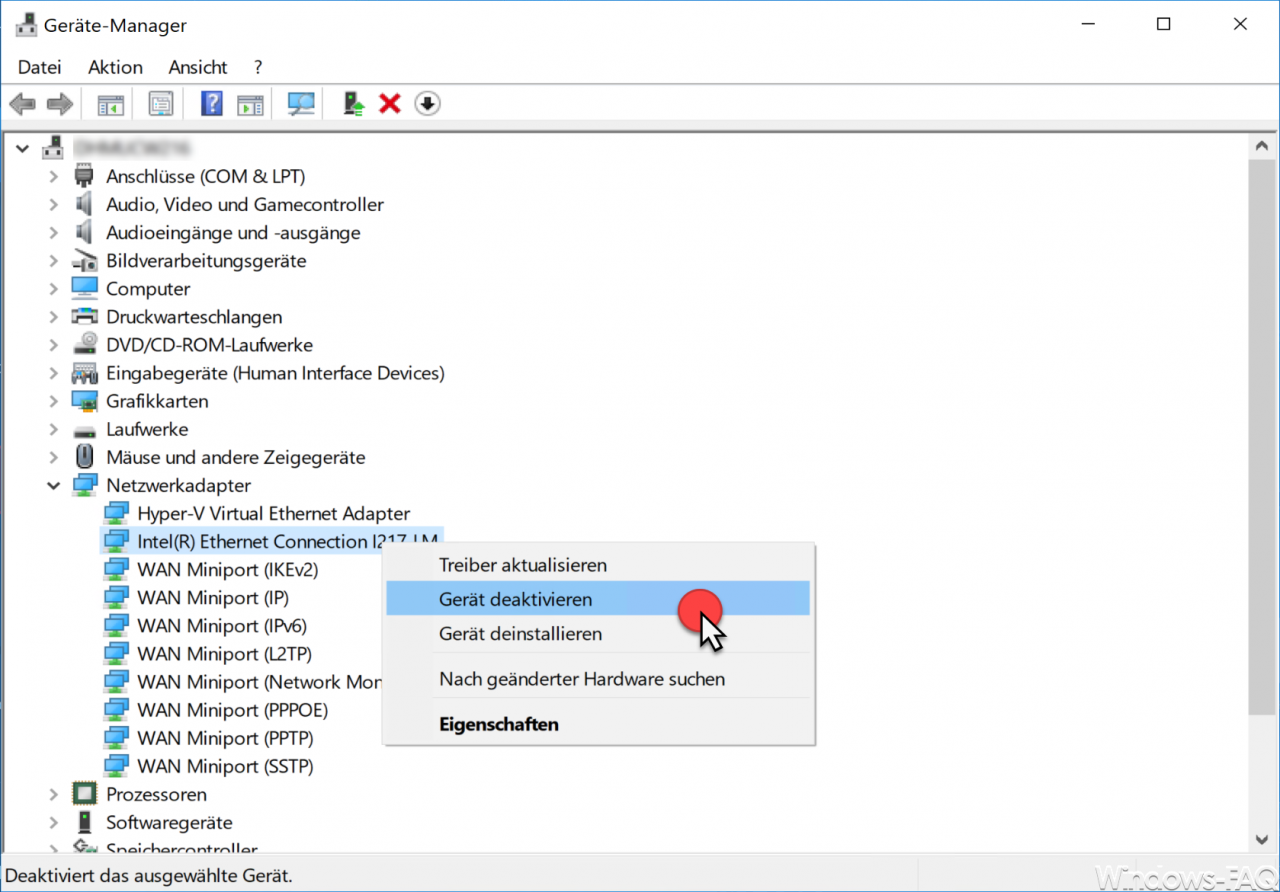
Here is the point in the context menu that appears
Deactivate device
to select.
Deactivate network adapter via NETSH
The third and certainly fastest way is to deactivate the network connection by command. Simply open a command prompt (cmd.exe) (with administrator rights) and issue the following command.
netsh interface show interface
Below you can see the process. The first command shows you the available interface names. In this case the network connection is called ” Ethernet “.
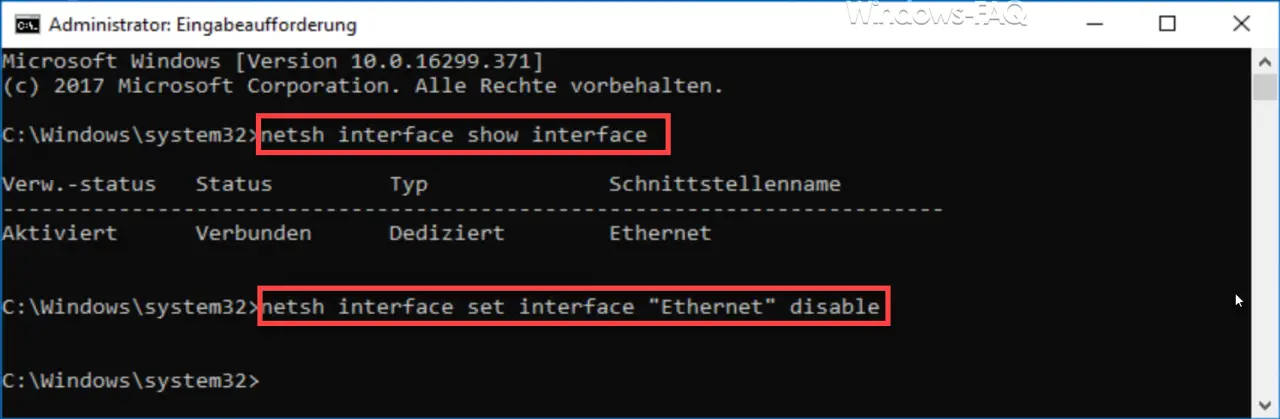
The actual command for deactivation must then still be issued. The corresponding ” interface name ” must be used.
netsh interface set interface “Ethernet” disable
The deactivation of the network adapter is no longer acknowledged, but the deactivation was carried out successfully.
Disable network adapter via PowerShell
The fourth and last option is to deactivate it using the PowerShell command. To do this, you have to open a PowerShell console with administrative rights and first query a list of the installed network adapters.
Get-NetAdapter | format-list
It looks like this:
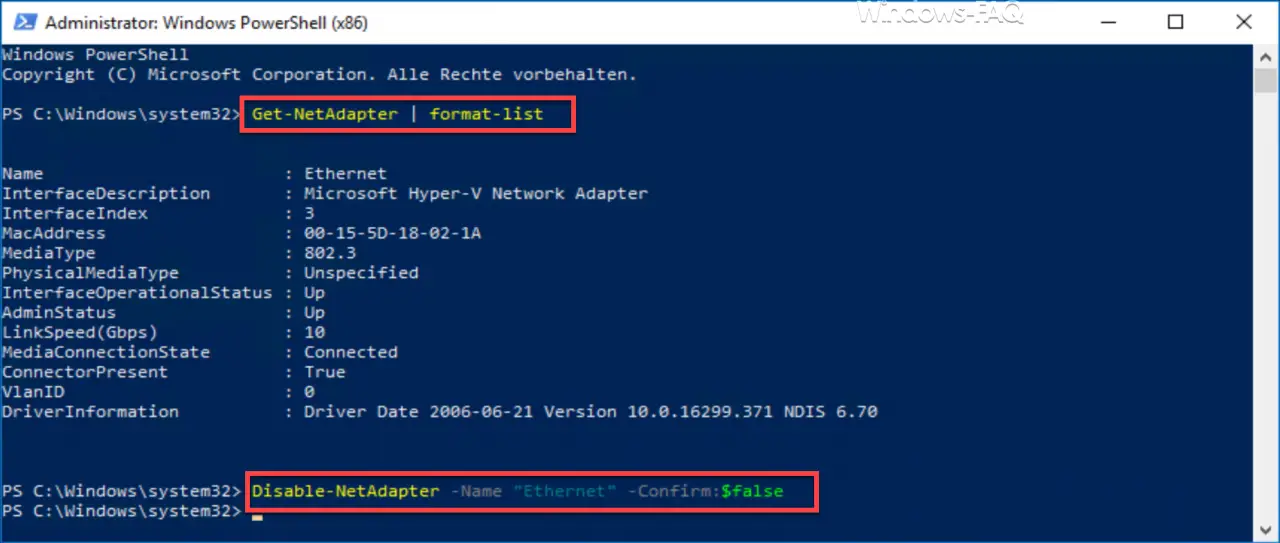
The name of the network adapter is then output under the ” Name ” field . This name must then be inserted in the following command.
Disable-NetAdapter -Name “Name of the network adapter – Confirm: $ false
Here too, successful deactivation of the network adapter is not acknowledged.
You can also find further articles on the topic of “Network” here:
– Connect the network printer in Windows 10
– Always wait for the network when restarting the computer and logging in
– Remove or show the network icon from the Windows 10 taskbar
– Change the Ethernet network connection and WLAN connection in Windows 10 to clocked (metered)
– Reset the network in Windows 10
– Windows system error 1231 – The network
address cannot be reached – Determine
network problems – Only log ping dropouts – Pingtest.bat – Network inventory
– Teaming of network adapters
–
Hide computers in the network – Network performance with 10GBit networks
– Use network printer without domain joining