One of the things that most concerns PC users is security, which is why we have made some articles in which we have shown you which are the best antivirus , antimalware or even how to protect a PDF file . However, we will always have items of a personal and sensitive nature on our computers and that is precisely the reason that has brought you here, because you need to put a password on a photo in Windows 10 and you don’t know how to do it. Well, you will be happy to know that it is a really simple process, you just have to follow the steps that we indicate below.
What do I need to Password Protect Photos?
There are many ways to password-protect items such as folders . However, some of these methods are very complicated to implement. But don’t worry, there are tools like WinRar that allow us to compress files with a password. And this is where the real usefulness of this post comes in, and that is that we can use it to shield images with a key in Windows 10 .
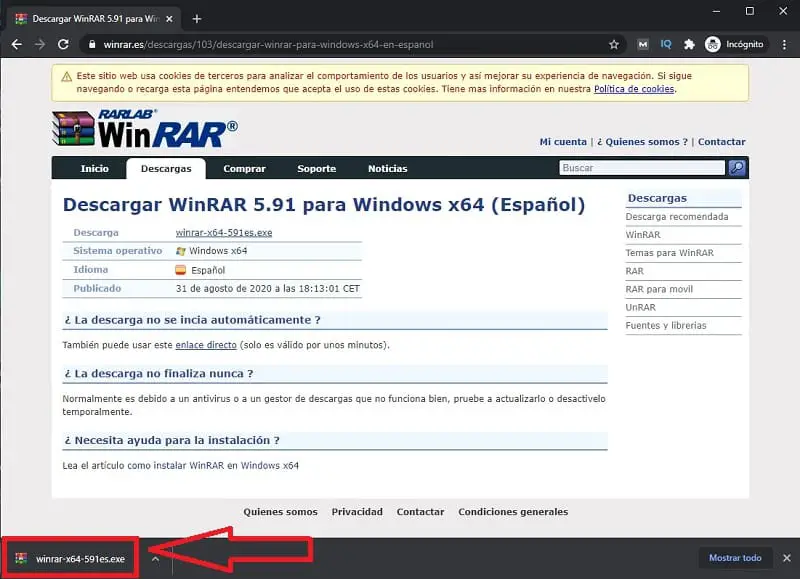
Download WinRar Free On Windows 10 2022
The first step will be to install WinRar for PC for free from its official page through the following link .
How to Protect a Photo With a Password in Windows 10 Step by Step 2022
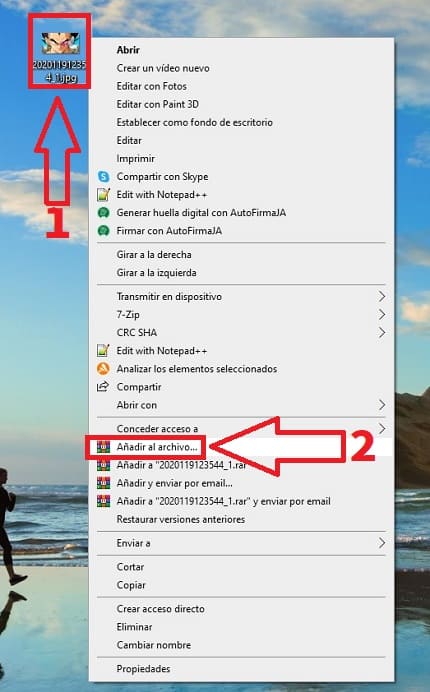
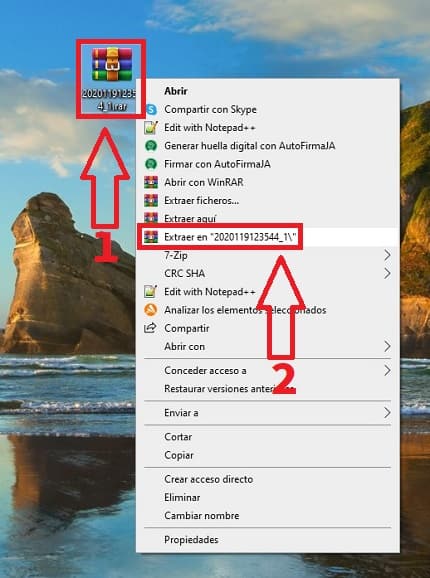
In the next step we will have to go to the image that we want to protect with a password and follow these instructions:
- We click with the right mouse button .
- In the context menu we select the section that says “Add to Archive” (in case Winrar does not appear in the menu 👈 follow this tutorial).
Protect A JPG With Password In Windows 10 Easy and Fast 2022
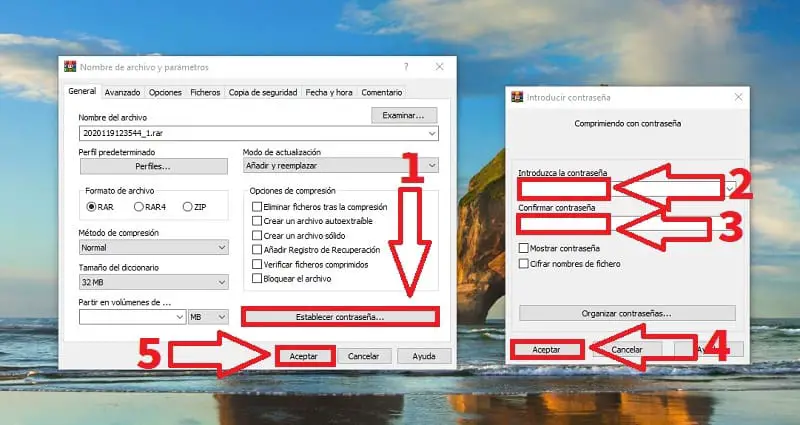
In the next step we will have to do what we indicate below:
- Select “Set Password” .
- We enter the password.
- We rewrite it.
- We give «Accept» .
- We return to “Accept” .
In this way we can protect our image with a key , it will also be compressed and having become a RAR file it will go unnoticed.
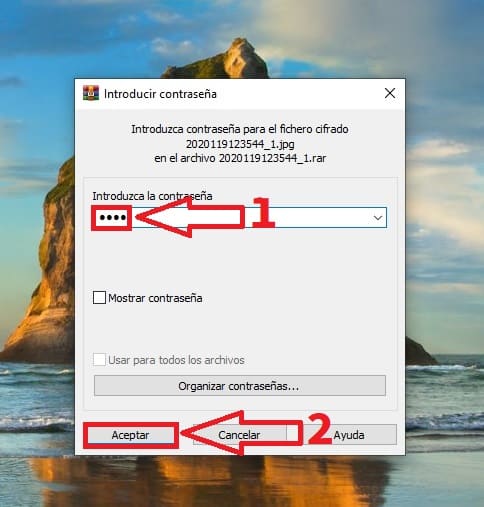
However, to enter the password again, simply follow these steps:
- We right click on the photo compressed with RAR .
- In the context menu we click on “Extract to…” .
On the next screen we will be asked for the following:
- The password to unzip the file .
- Finally, we click on “Accept” .
And it’s that simple we can protect a photo with a key thanks to Winrar . If you still have any questions, you can always leave me a comment and I will try to answer you when it happens. Don’t forget that you would help me a lot if you share this tutorial with all your friends through your social networks. Thank you for everything!